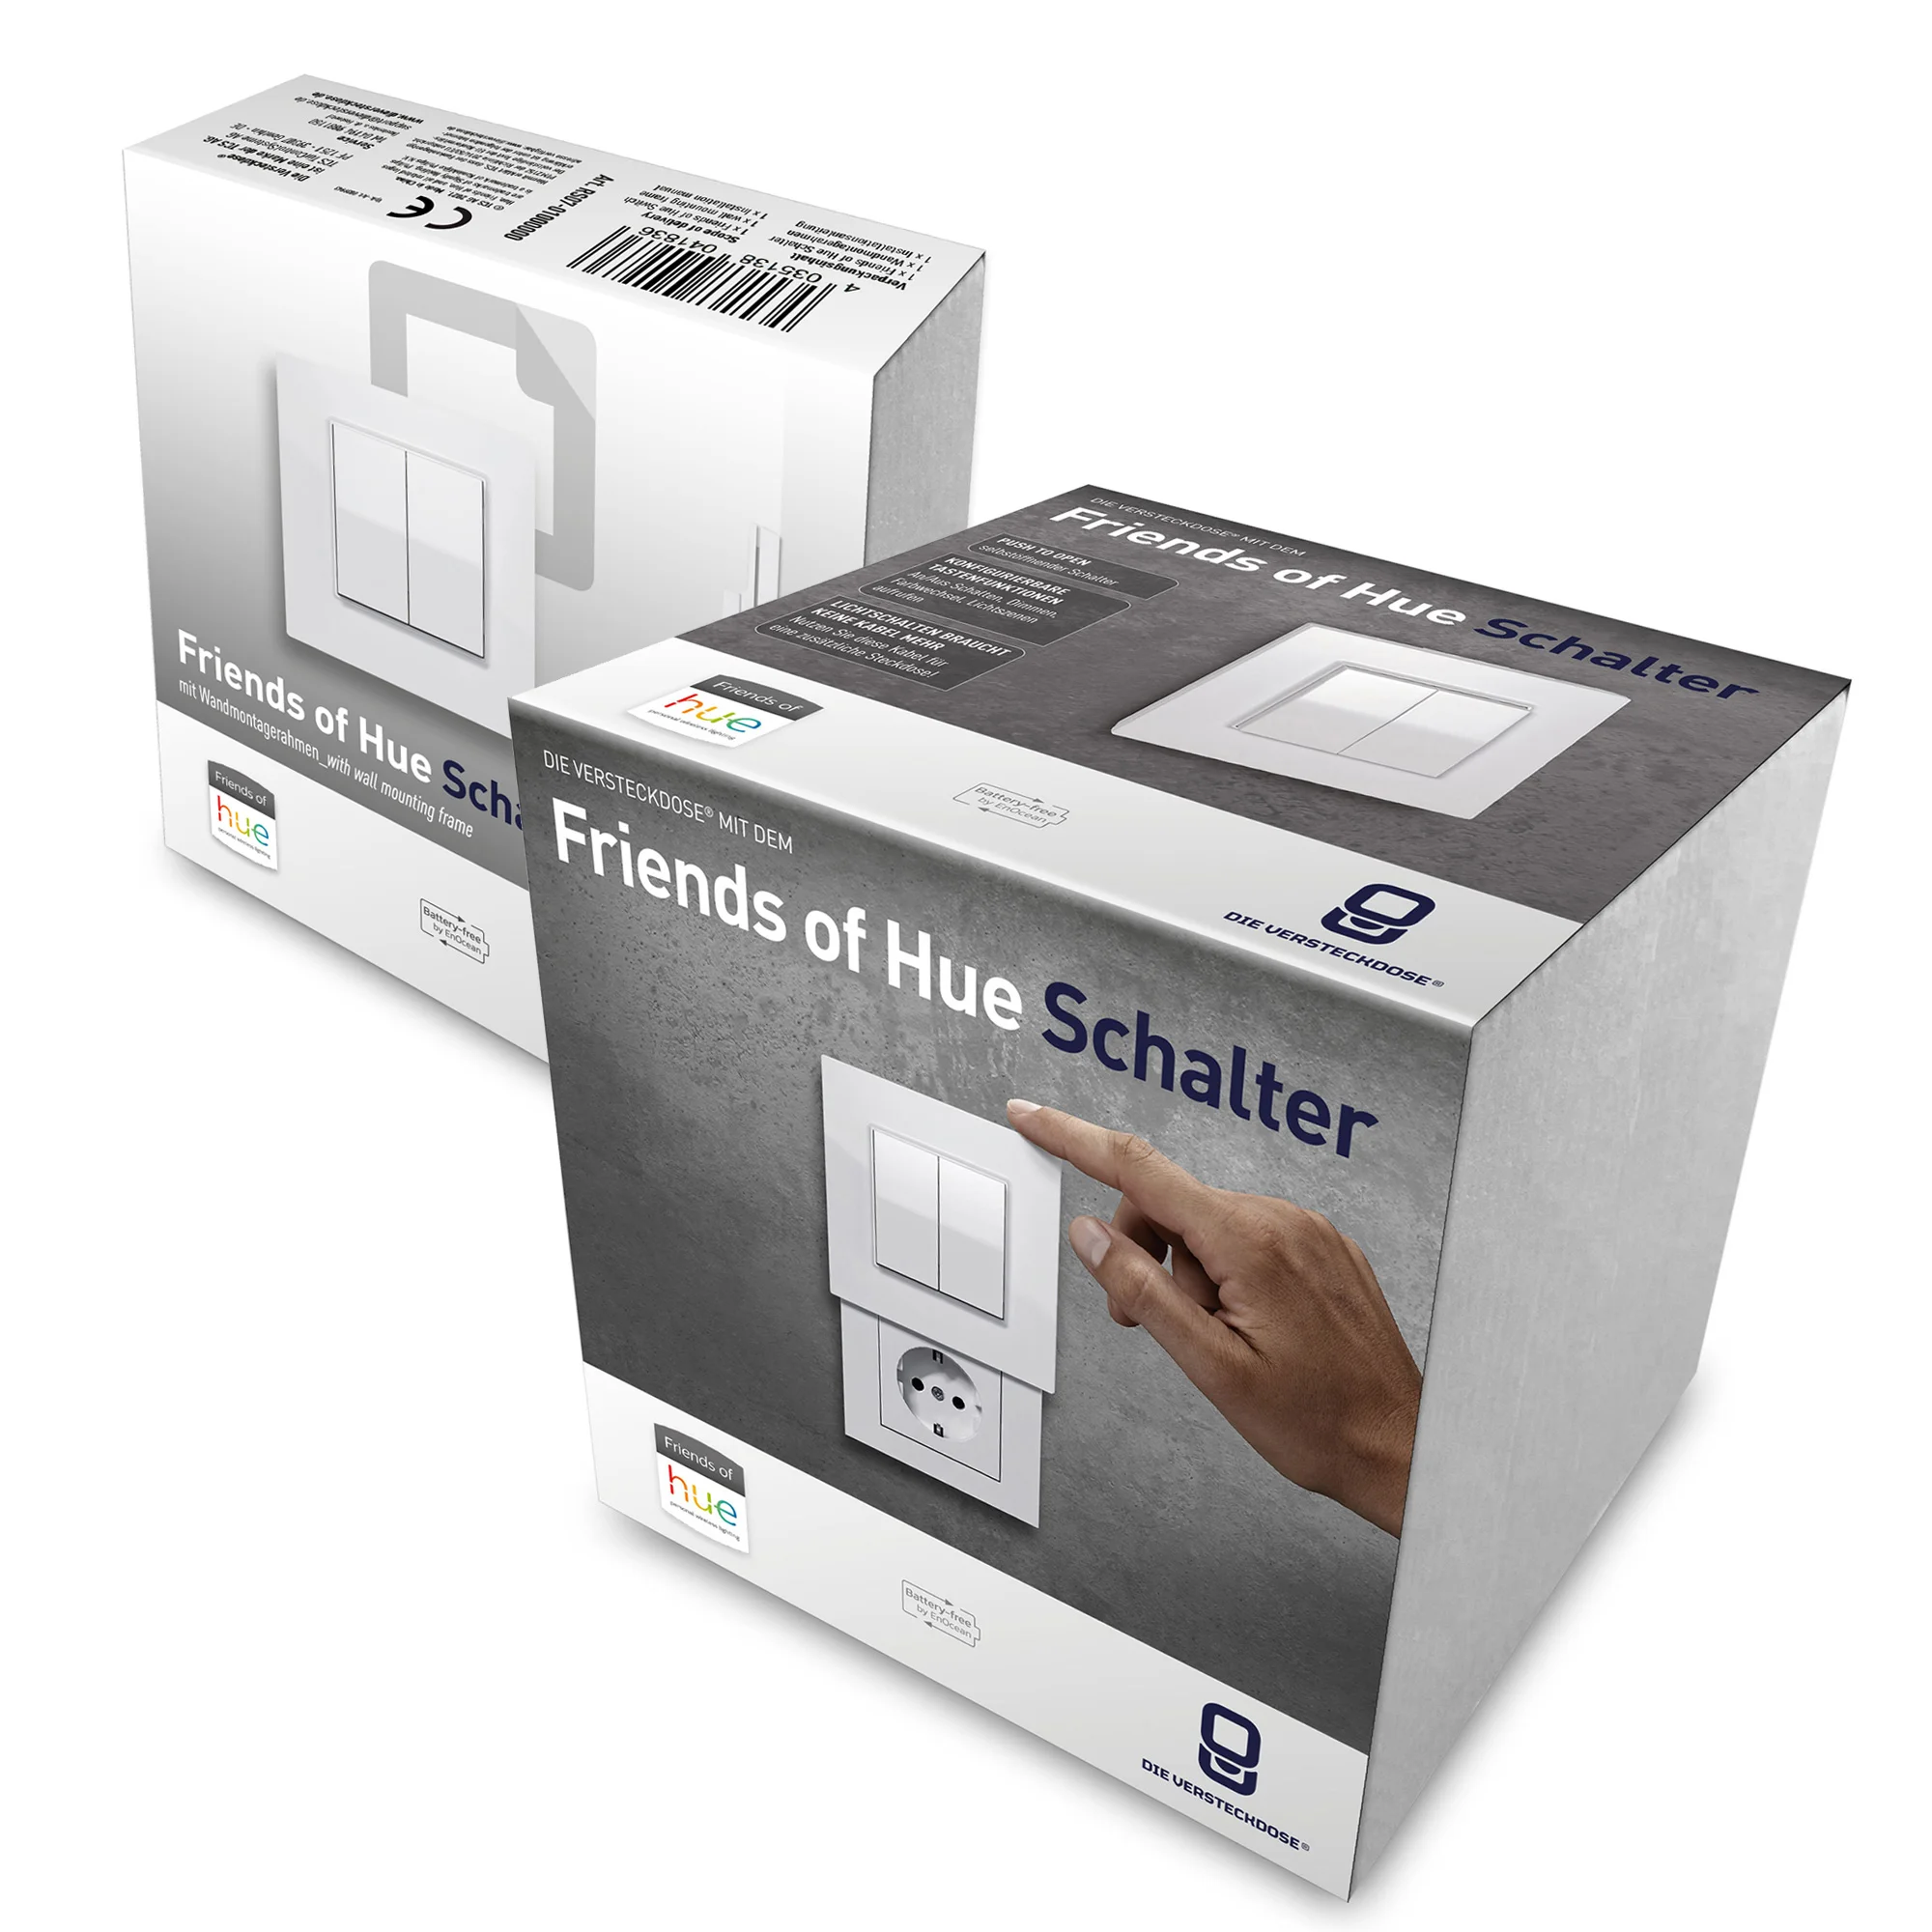
Overview of Friends of Hue Smart Switches
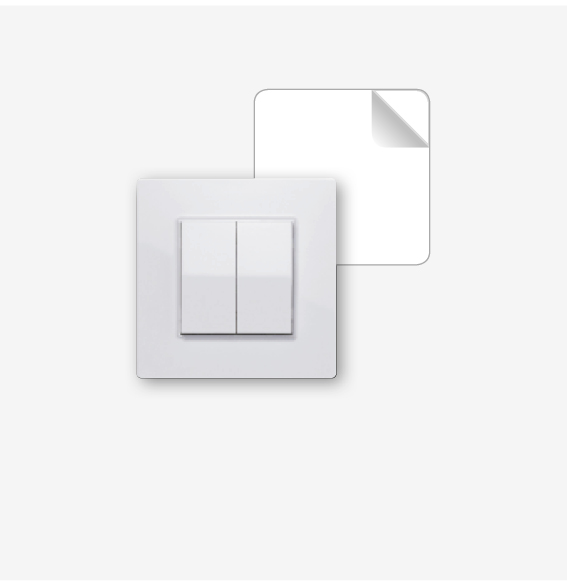
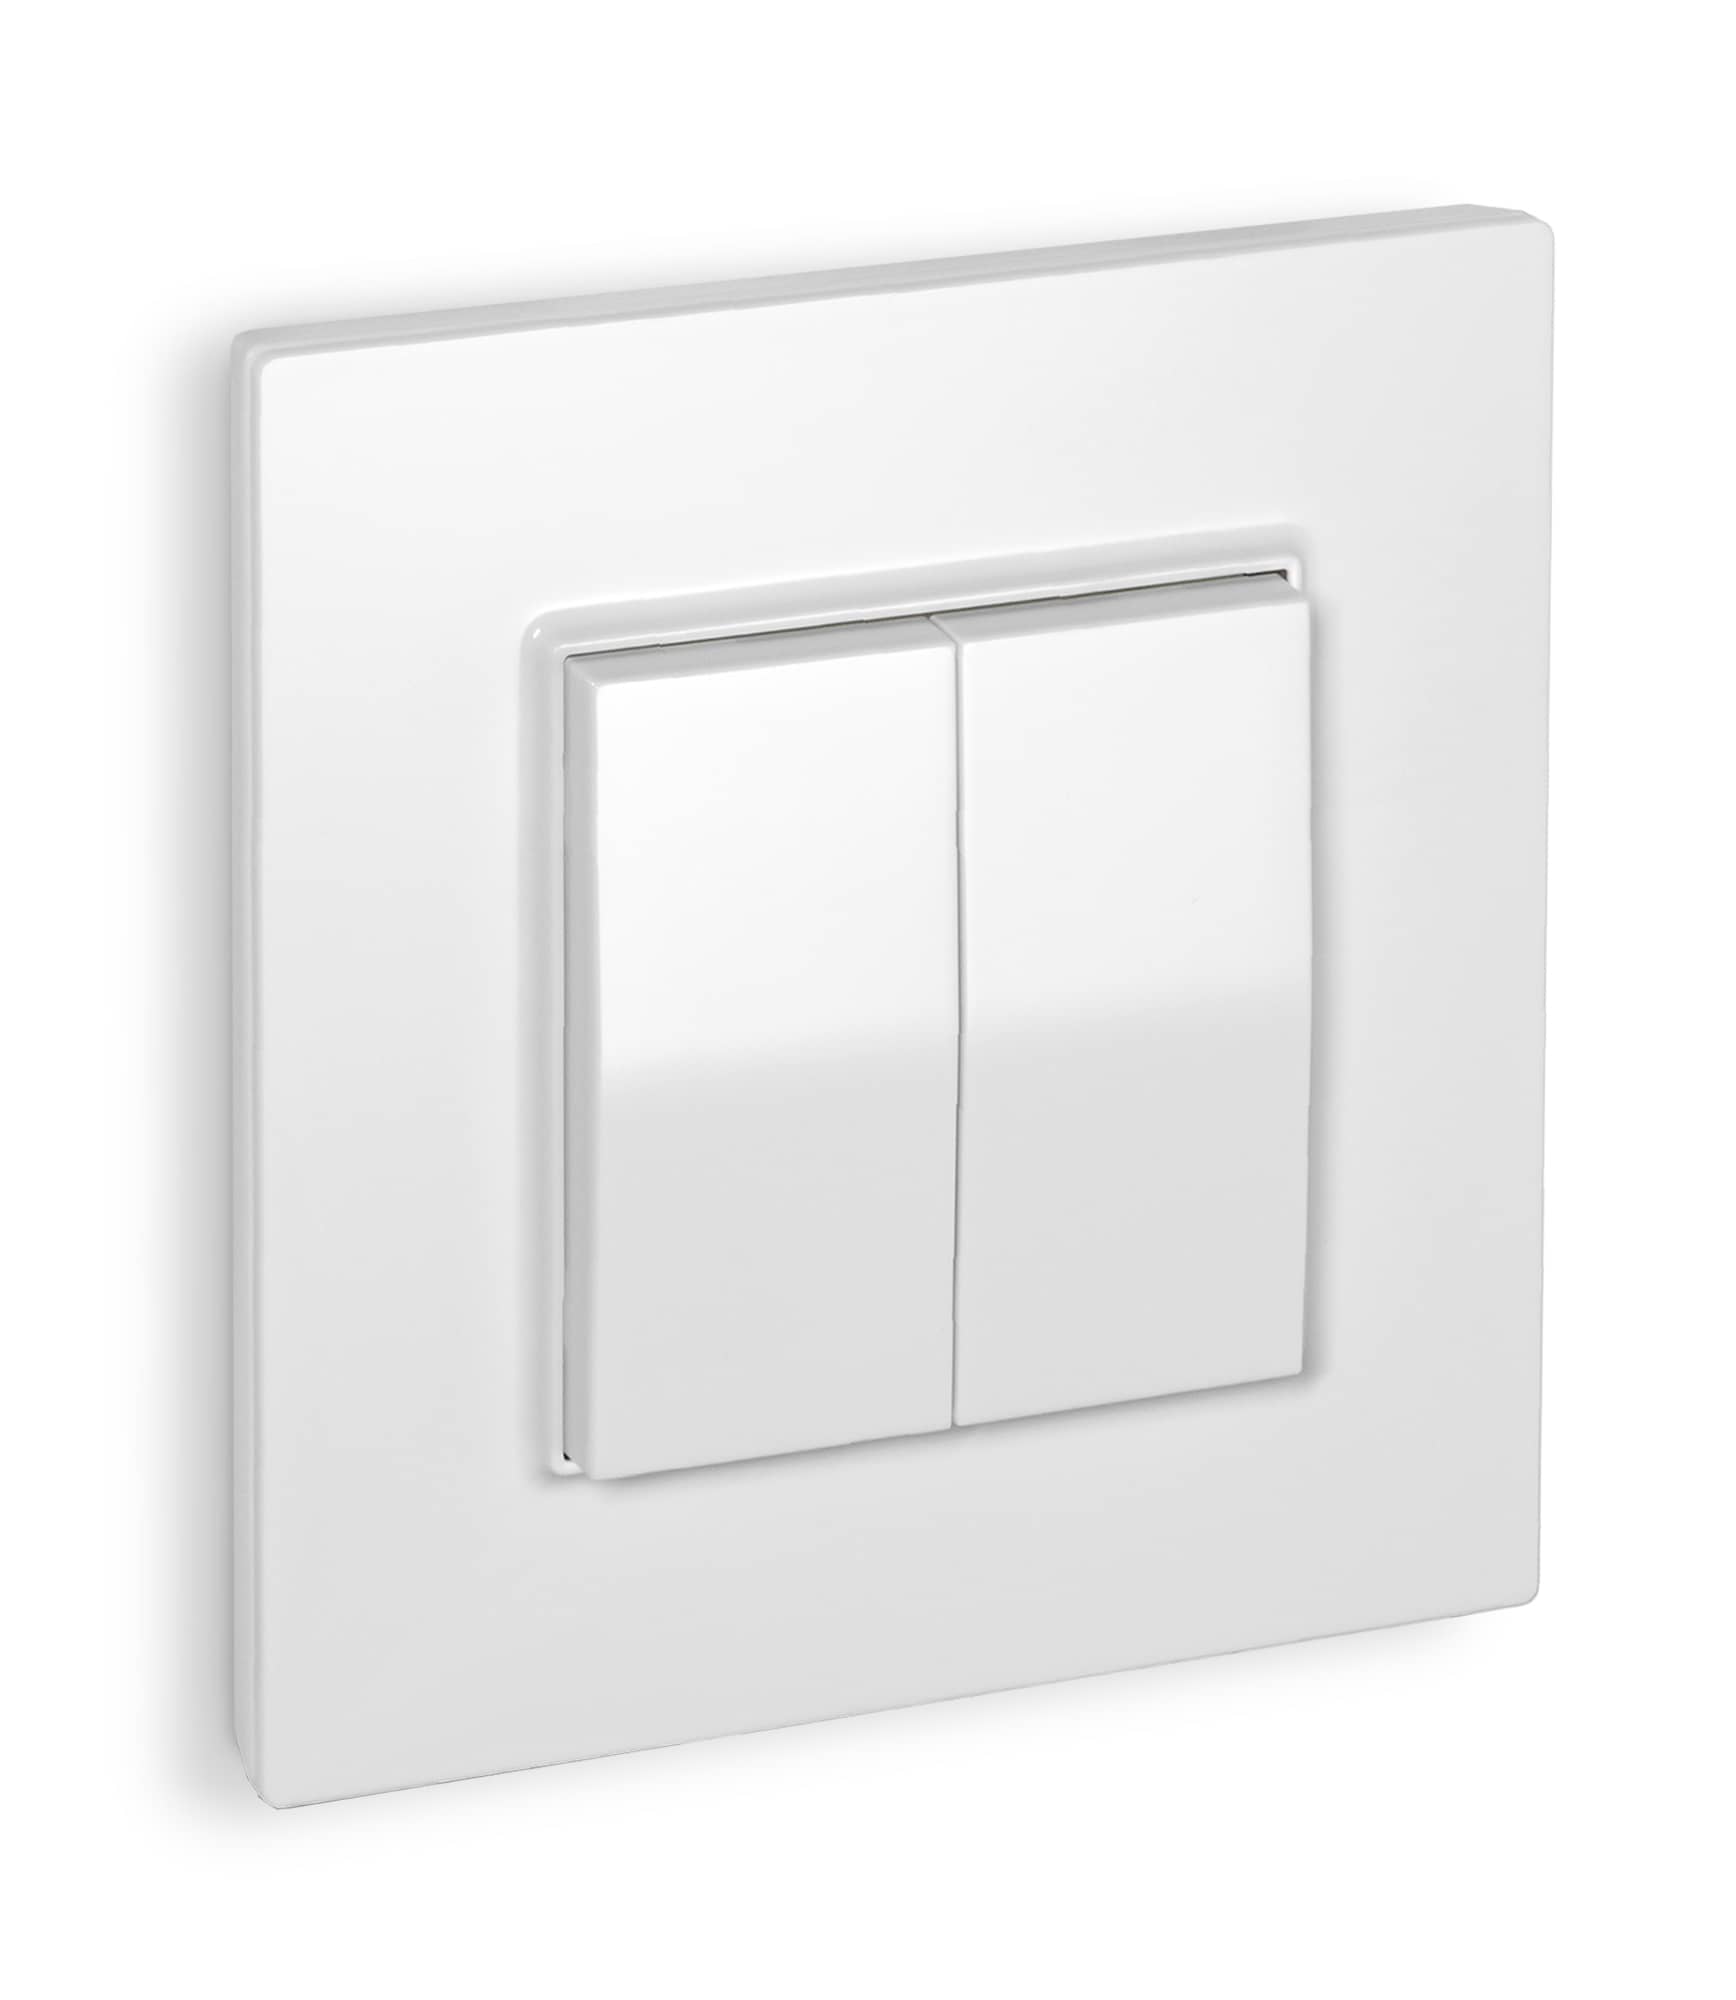
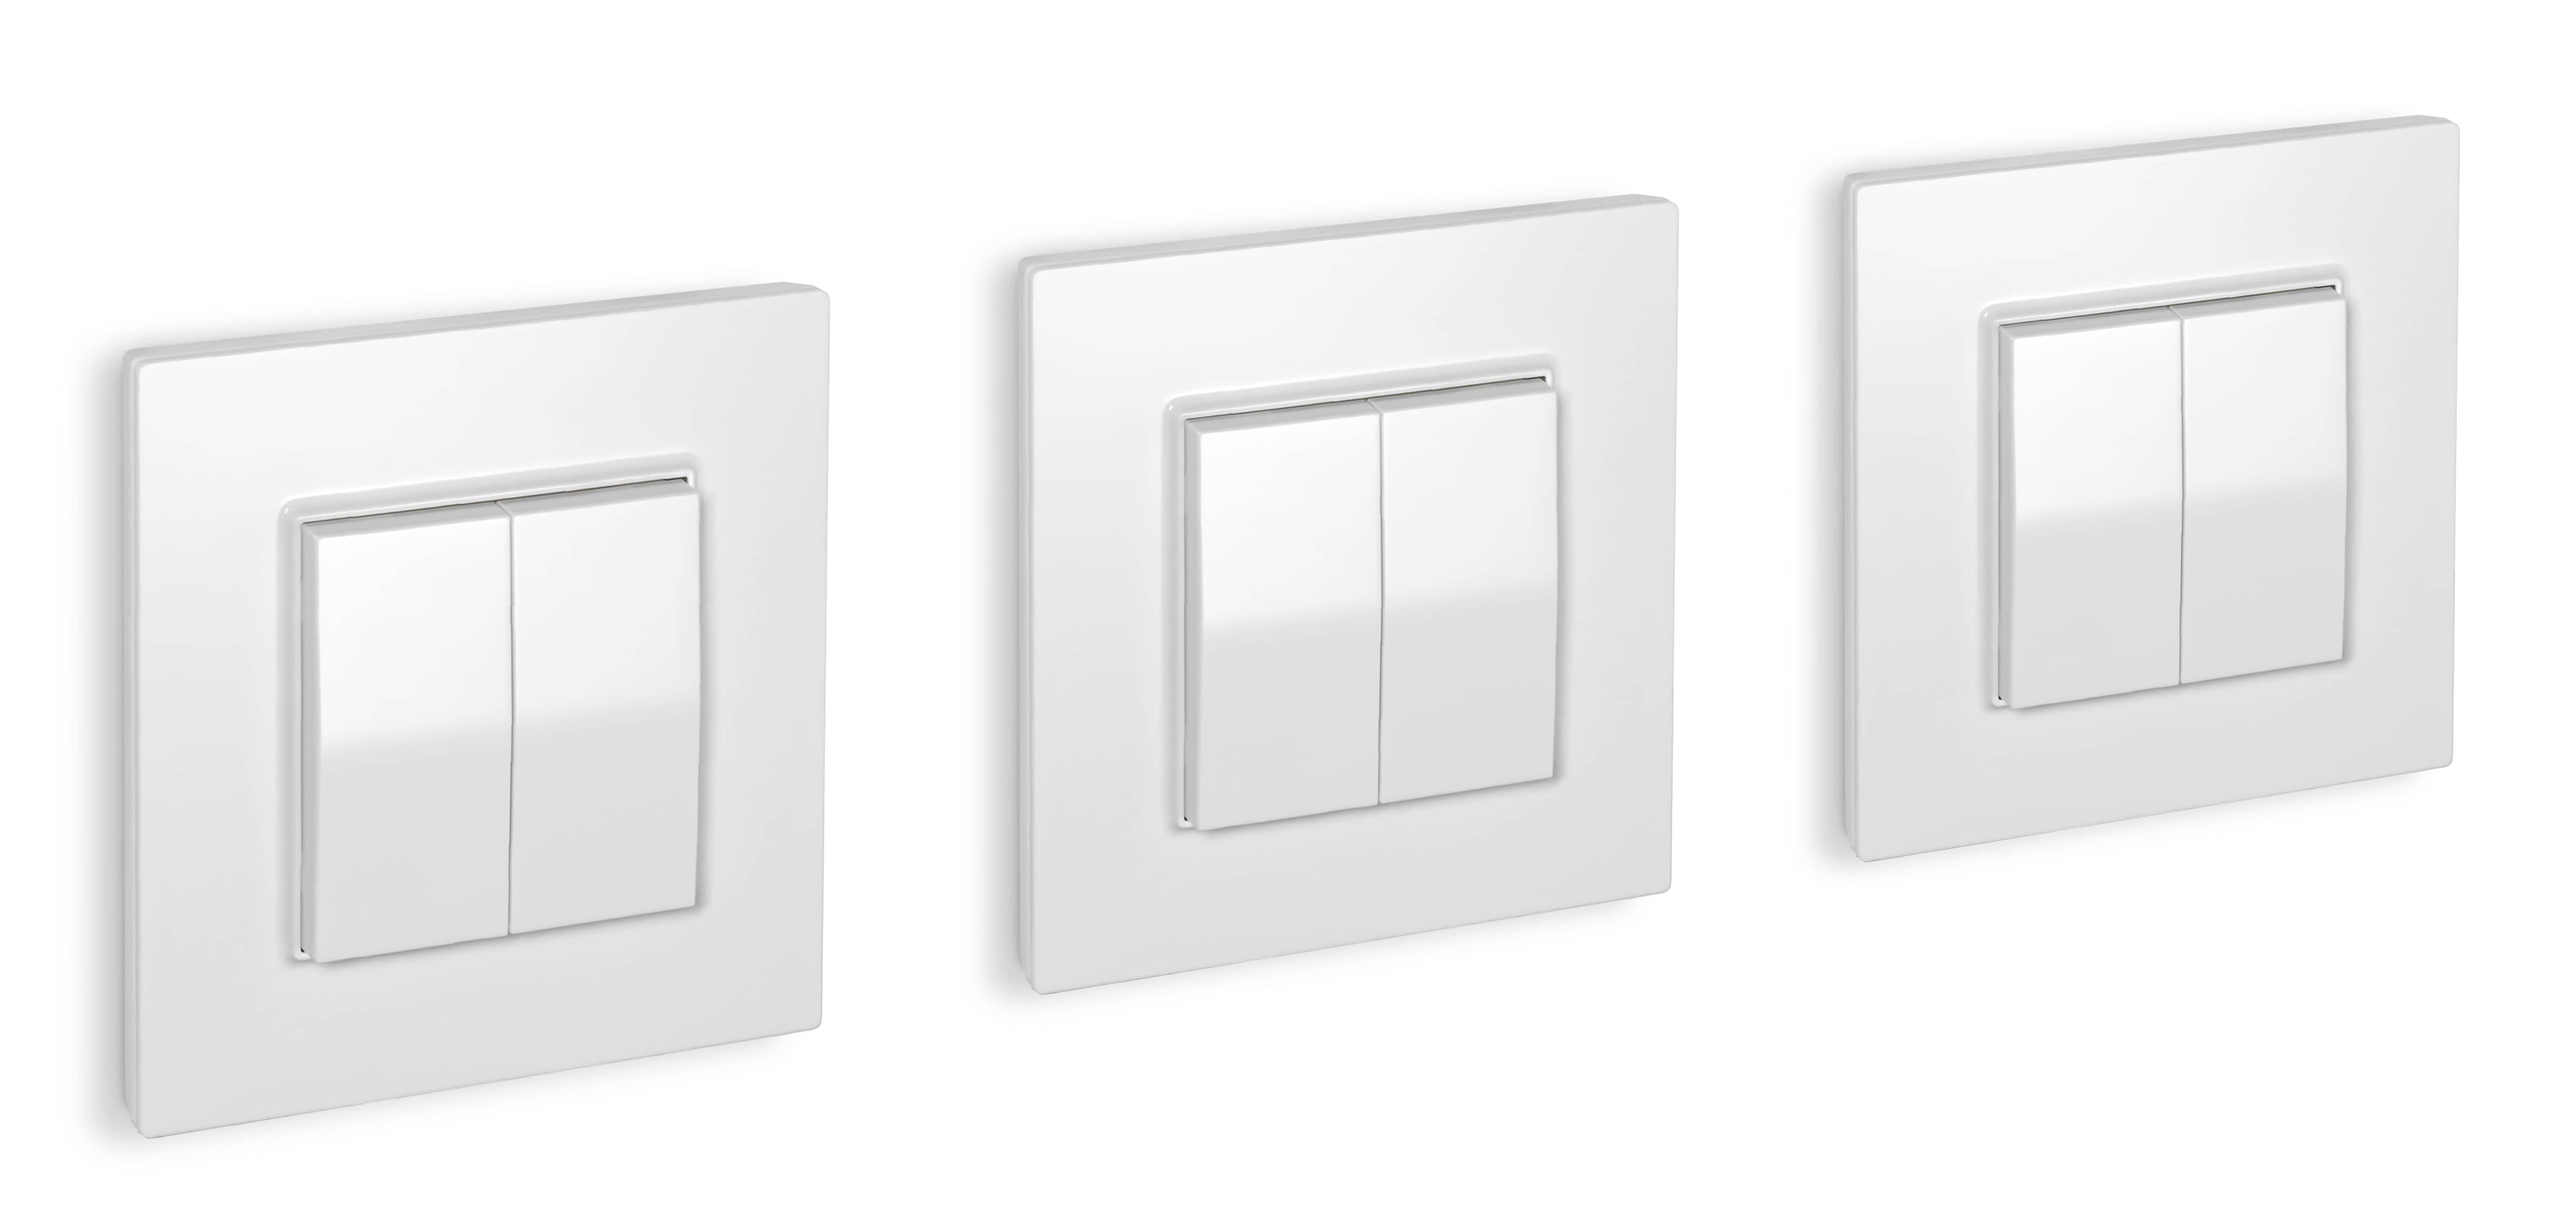
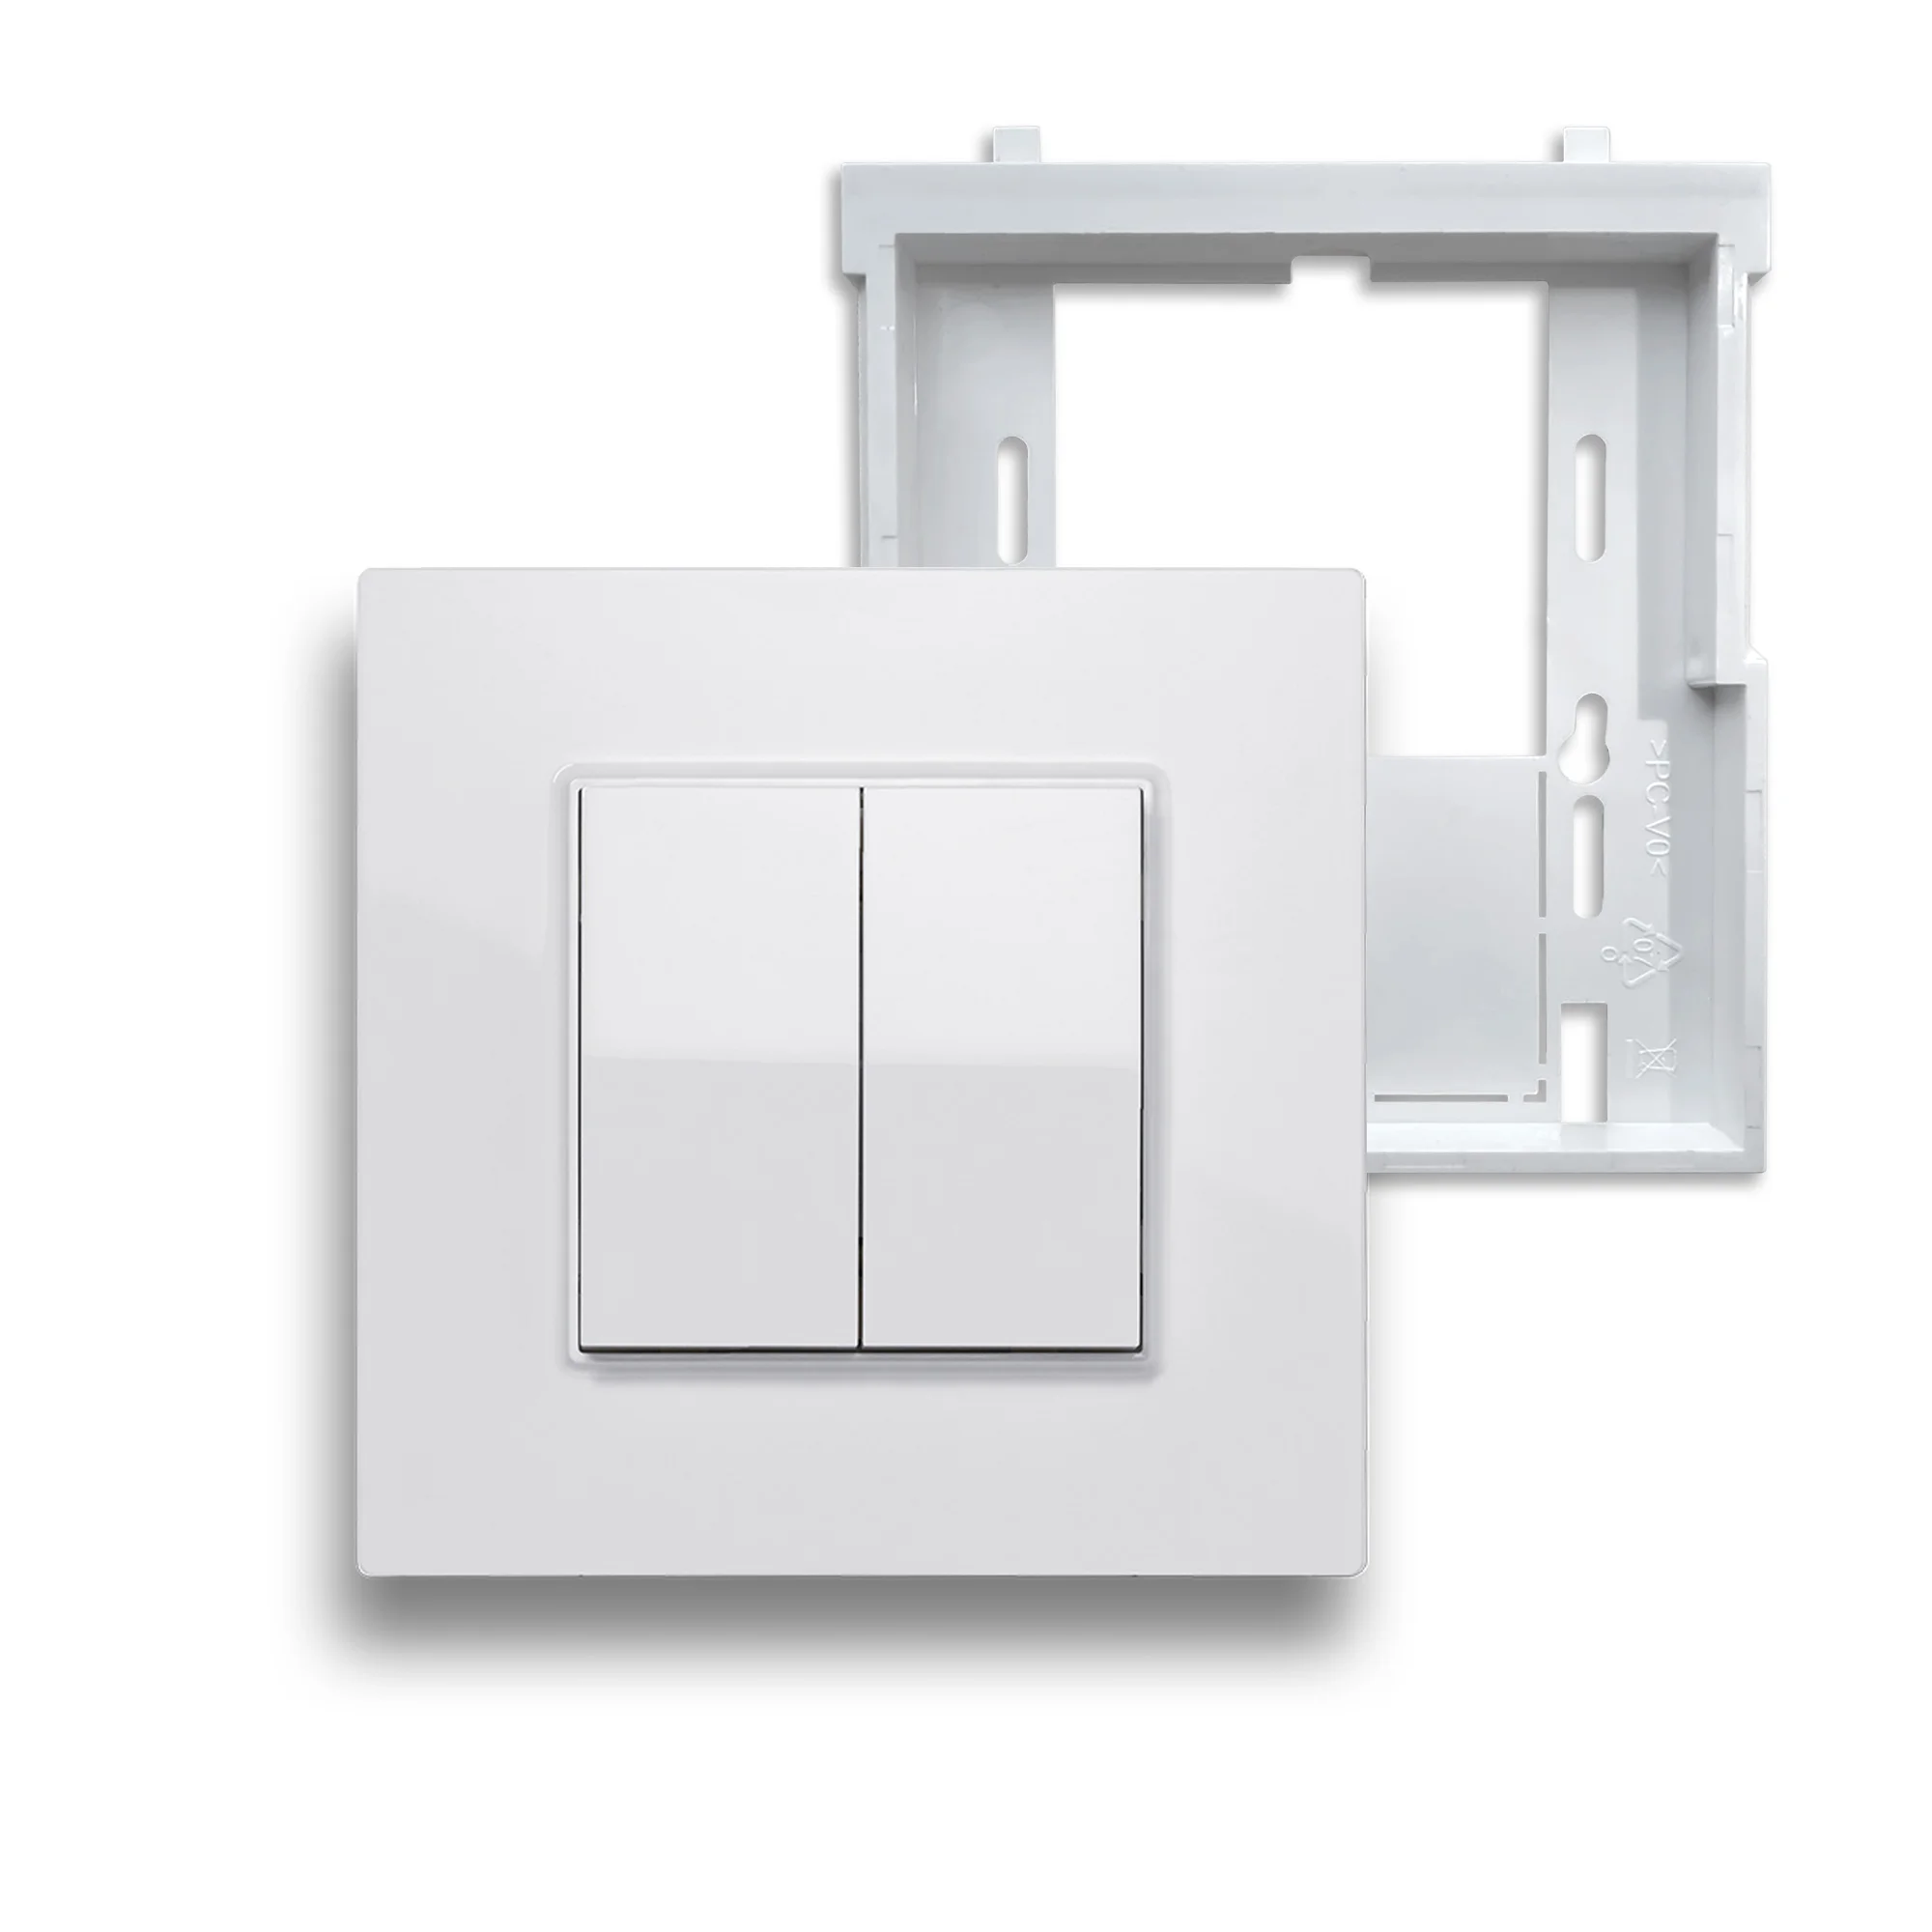
Friends of Hue switch with mounting frame (for sticking on)
Adhesive mounting allows you to place the wireless switch on a suitable flat surface as you wish. In this way, you can use it flexibly exactly where you need it. All you have to do is stick the switch to a firm, dust- and grease-free place with the enclosed adhesive pad. With additional wireless switches, the light can also be controlled from other switching locations.
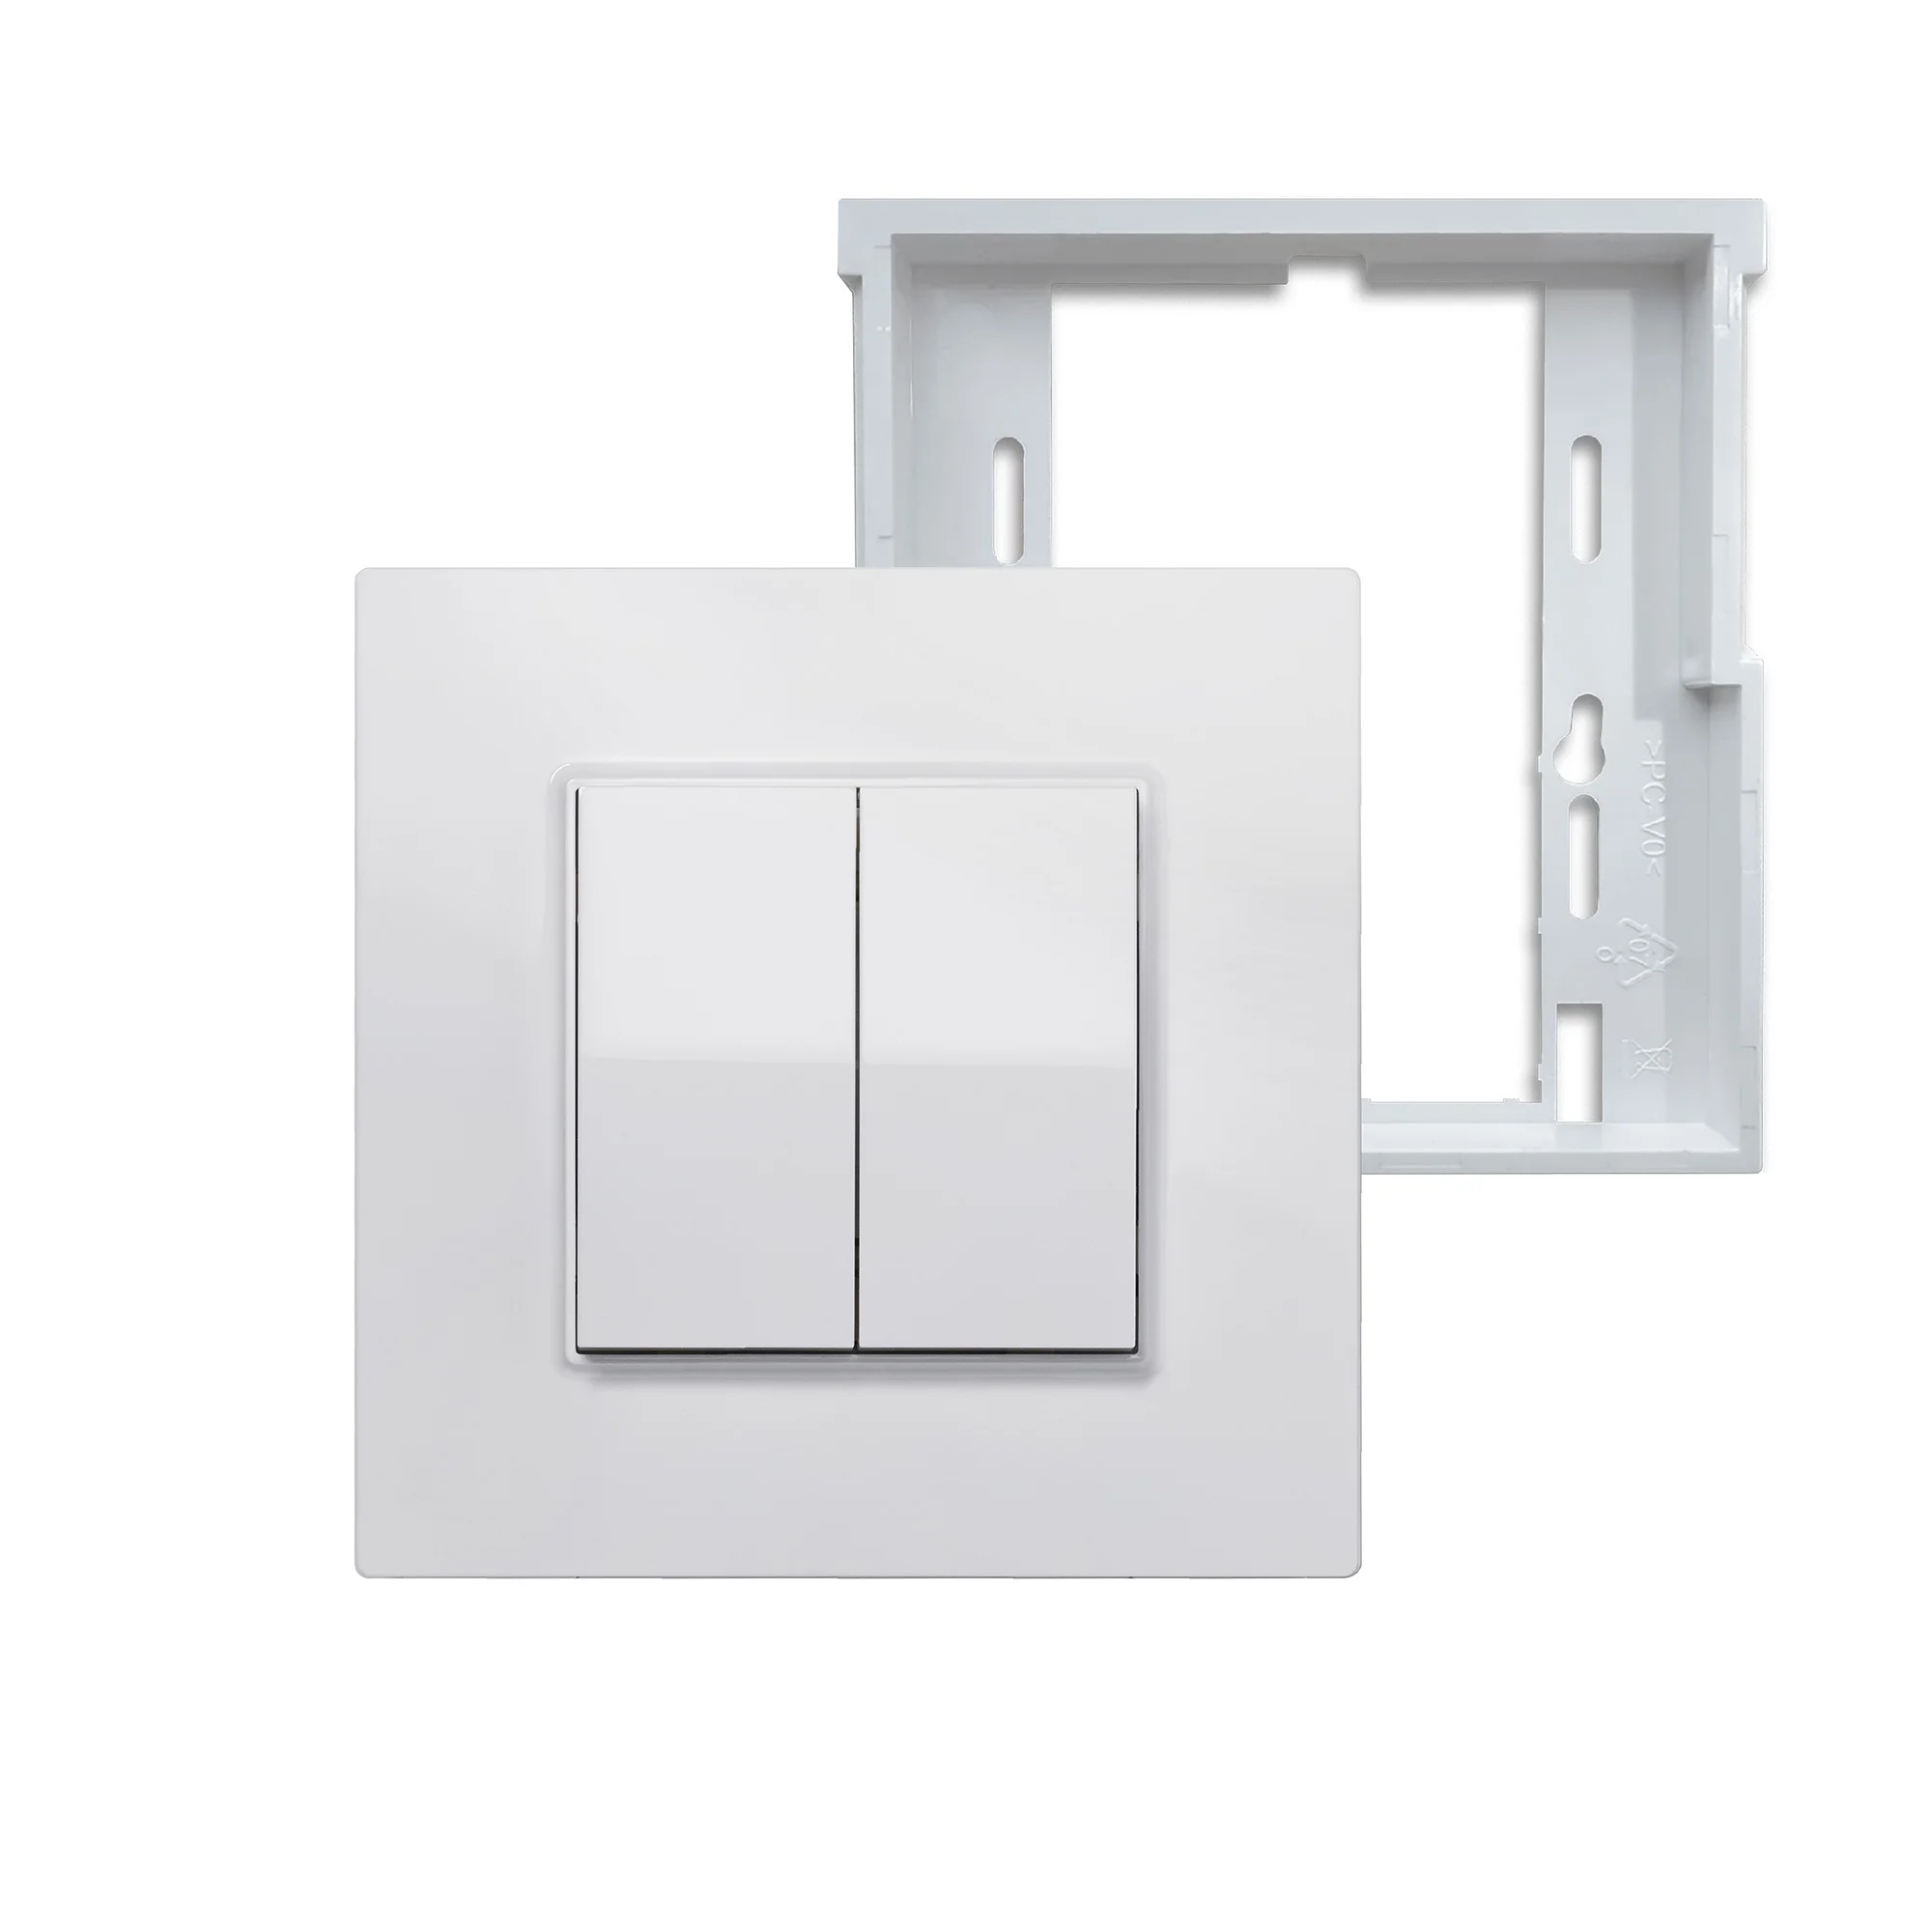
Alternatively, you can replace an existing light switch. For this purpose, the mounting frame can also be glued or screwed in place..
To replace a wired switch with the Friends of Hue wireless switch, you must remove it completely. Then clamp the cables so that the lamp is permanently supplied with power. Now you can screw the mounting frame onto the flush-mounted box and snap the wireless switch into place.
At this point we would like to point out that it is safest to have this work done by a qualified electrician.
You want to replace an existing switch?
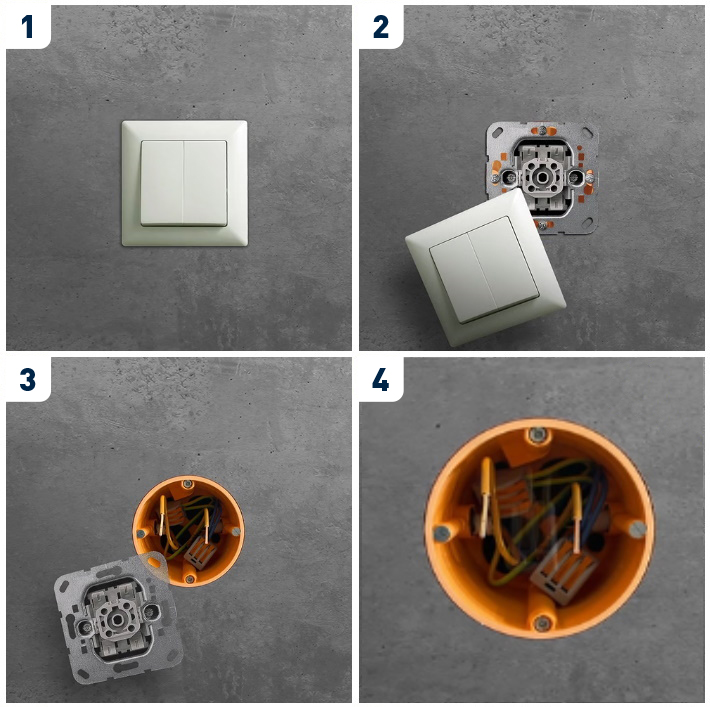
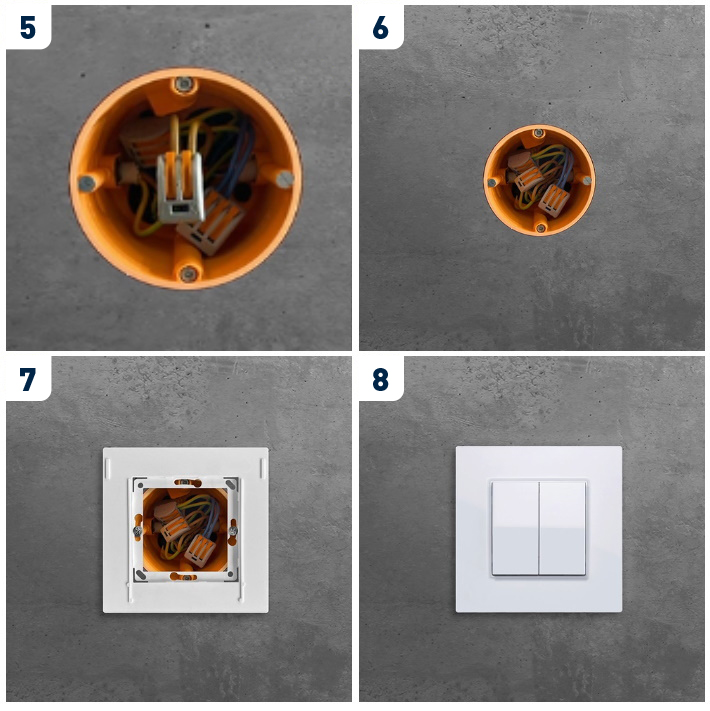
To replace an existing wired switch with a smart wireless switch, proceed as follows (requires electrician):
- To replace an existing wired switch, remove it completely. (Fig. 1-3)
- The cables are connected so that the lamp is permanently powered. (Fig. 4-6)
- The mounting frame is screwed onto the flush-mounted box. (Picture 7)
- The radio switch is snapped onto the mounting frame. (Fig. 8) - Done.
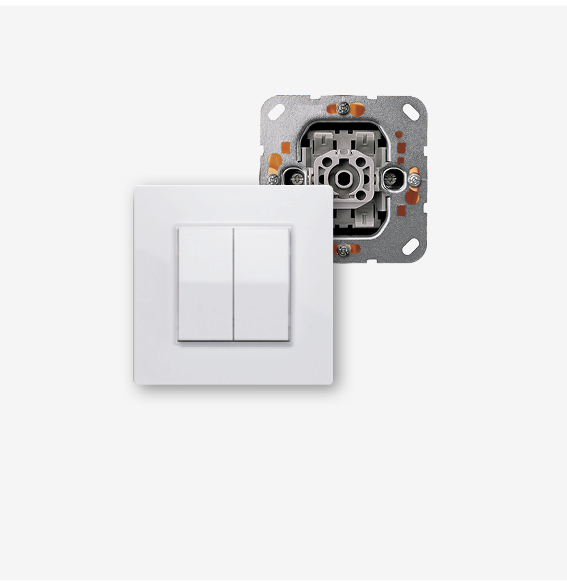
Friends of Hue light switch with mounting frame
Simply cover a wired switch
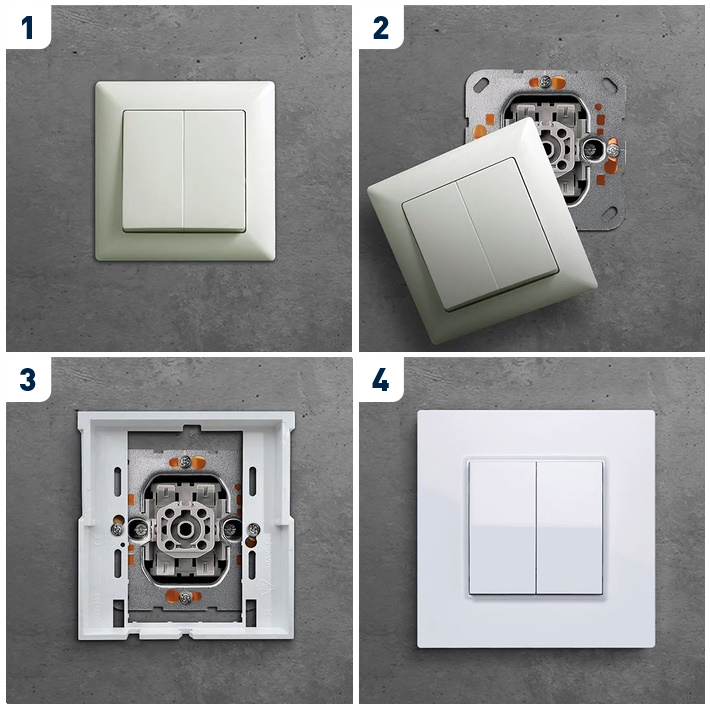
This Friends of Hue version is the right choice if you want to replace a wired switch - without the help of a professional. This simple over-mount installation is particularly interesting for tenants, as both the installation and later removal are easy to handle when moving out.
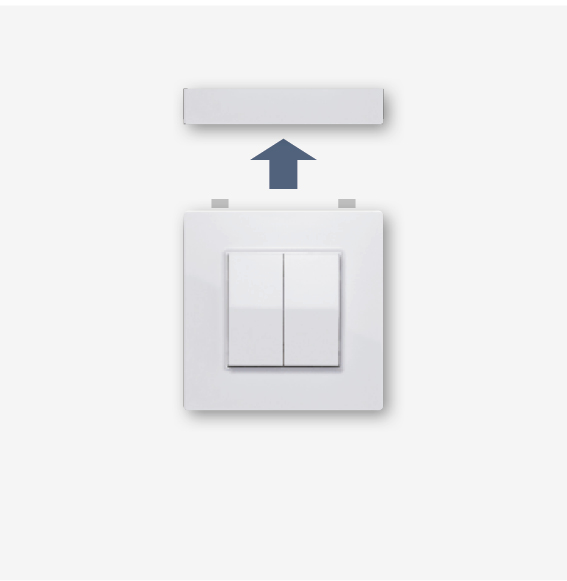
To install the light switch with surface-mounted frame, you only need to remove the frame and rockers of the existing push-button. The switch insert remains in the flush-mounted box, which is why you do not come into contact with the power cables at any time. Now place the cover frame of the radio switch where the previous switch was. Now make sure that the switch insert is set to "On" before you finally place the push-buttons on it.
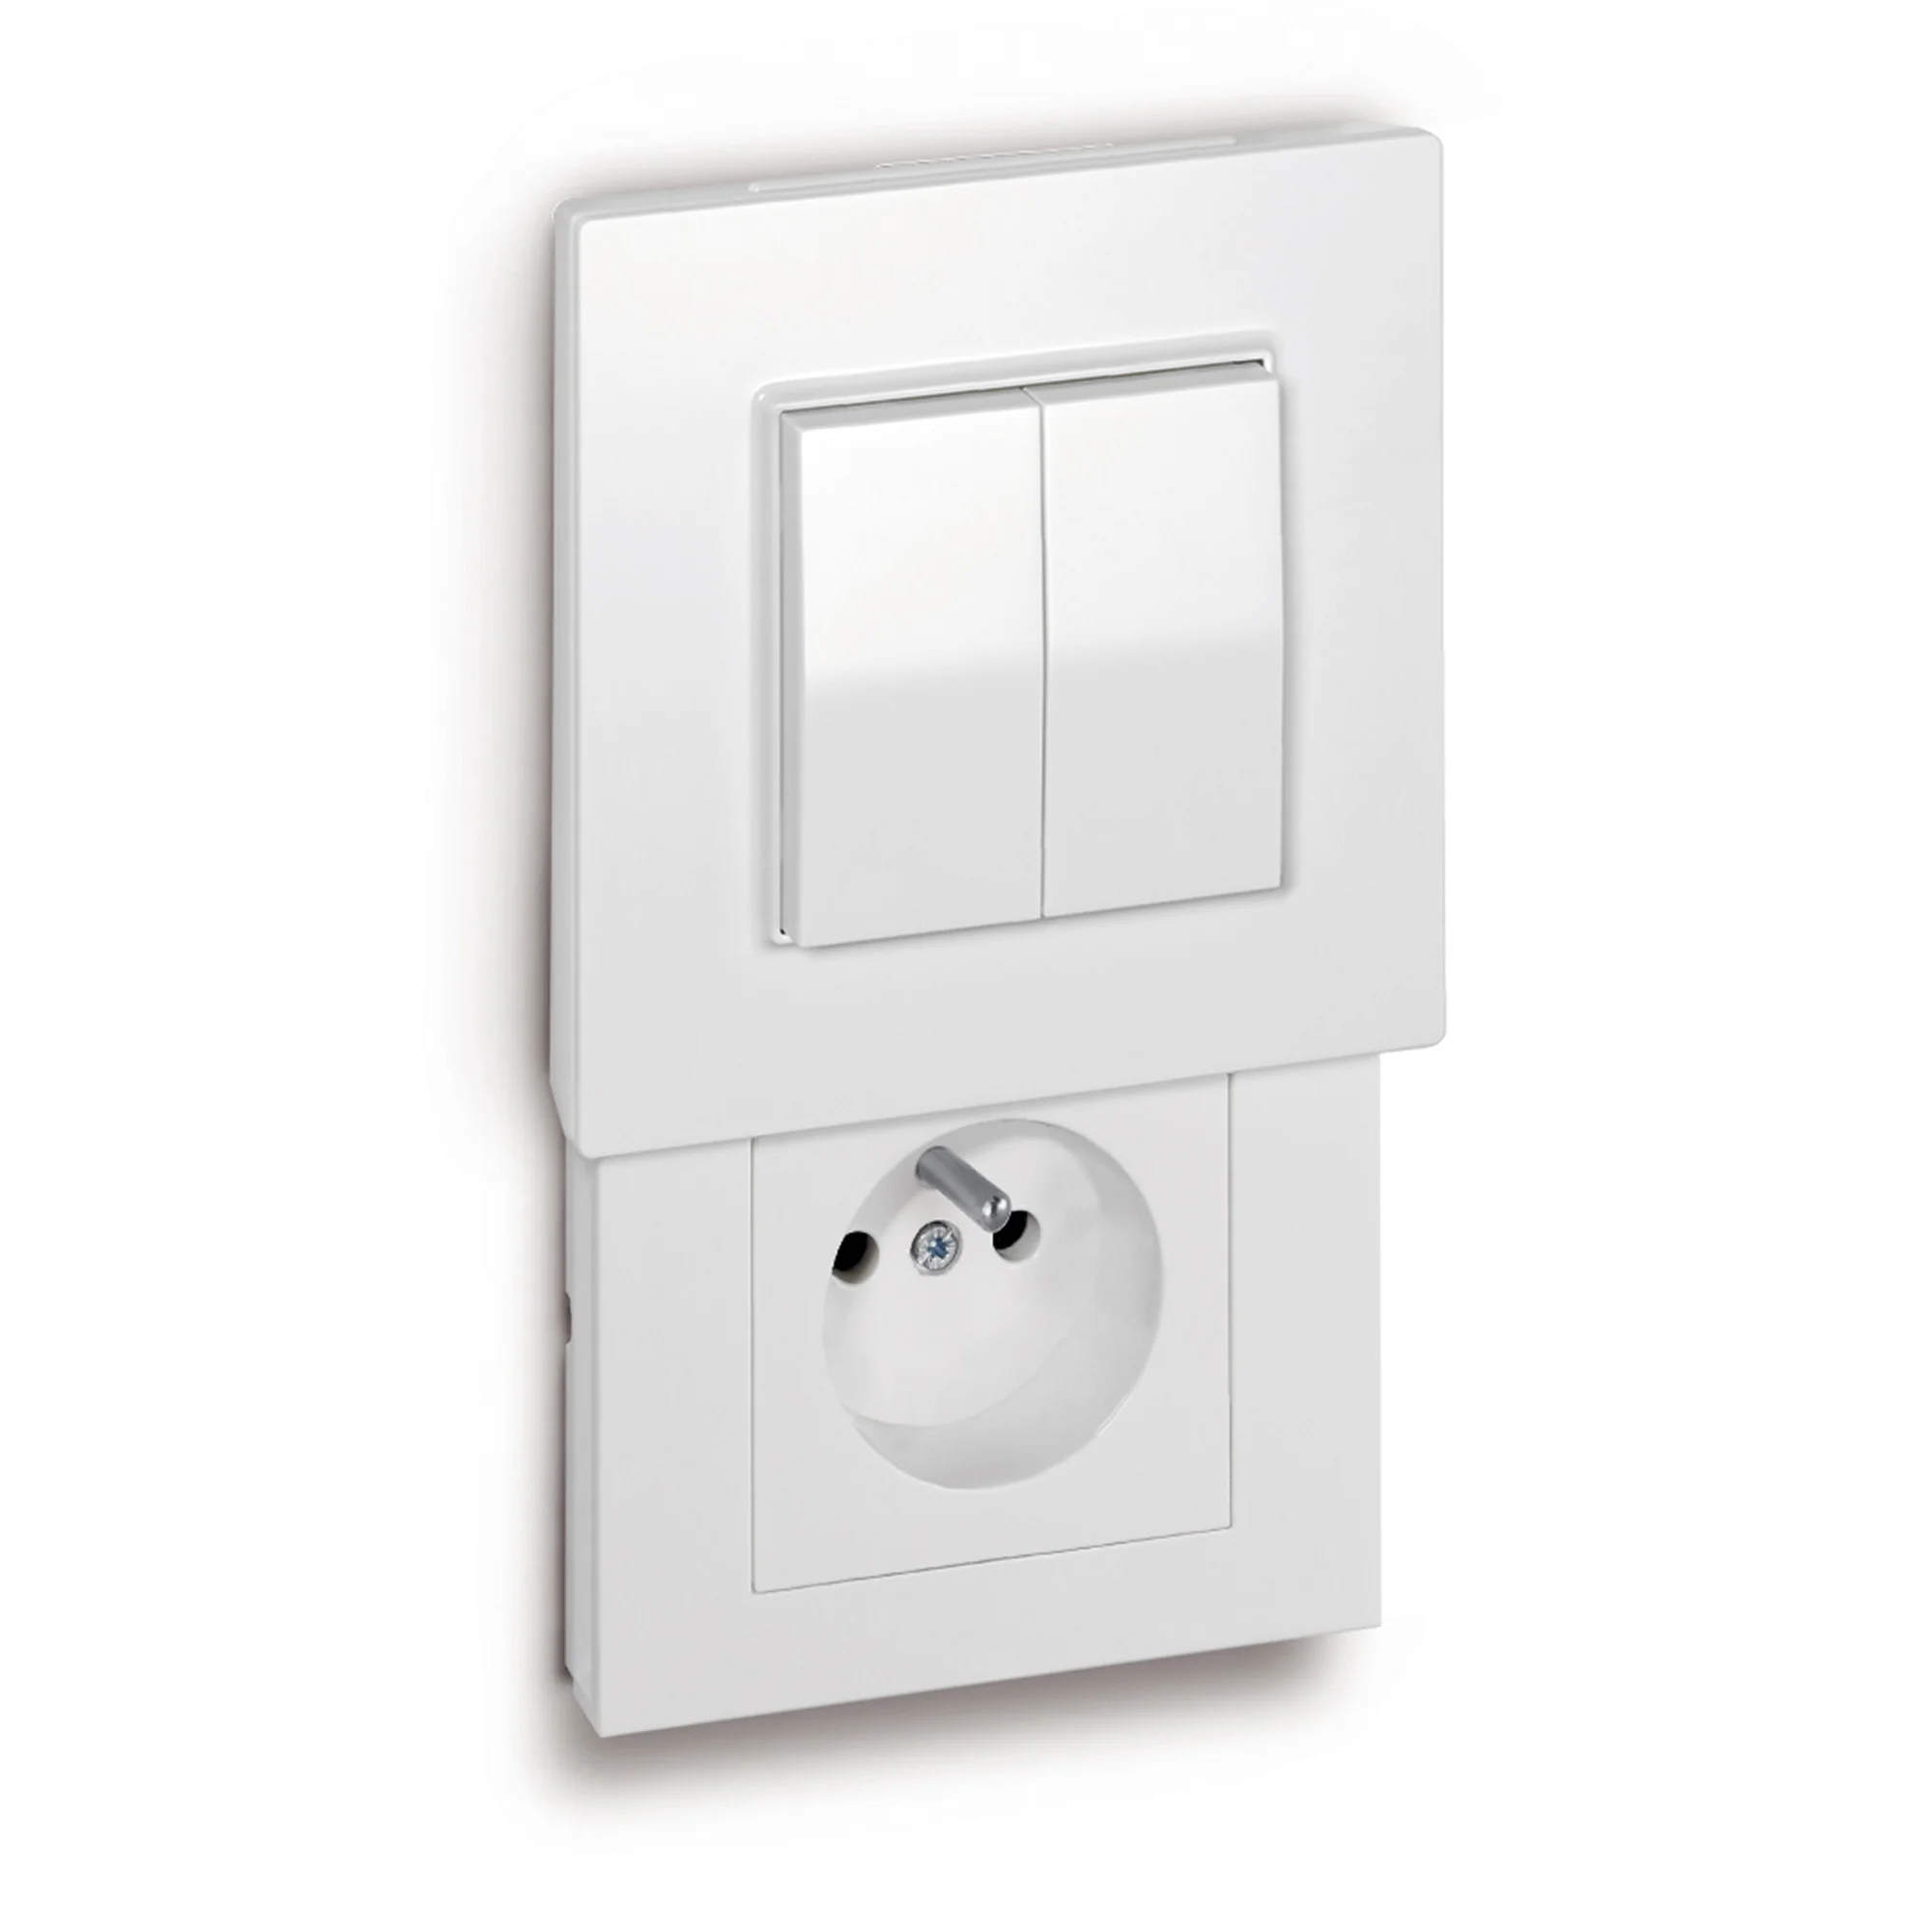
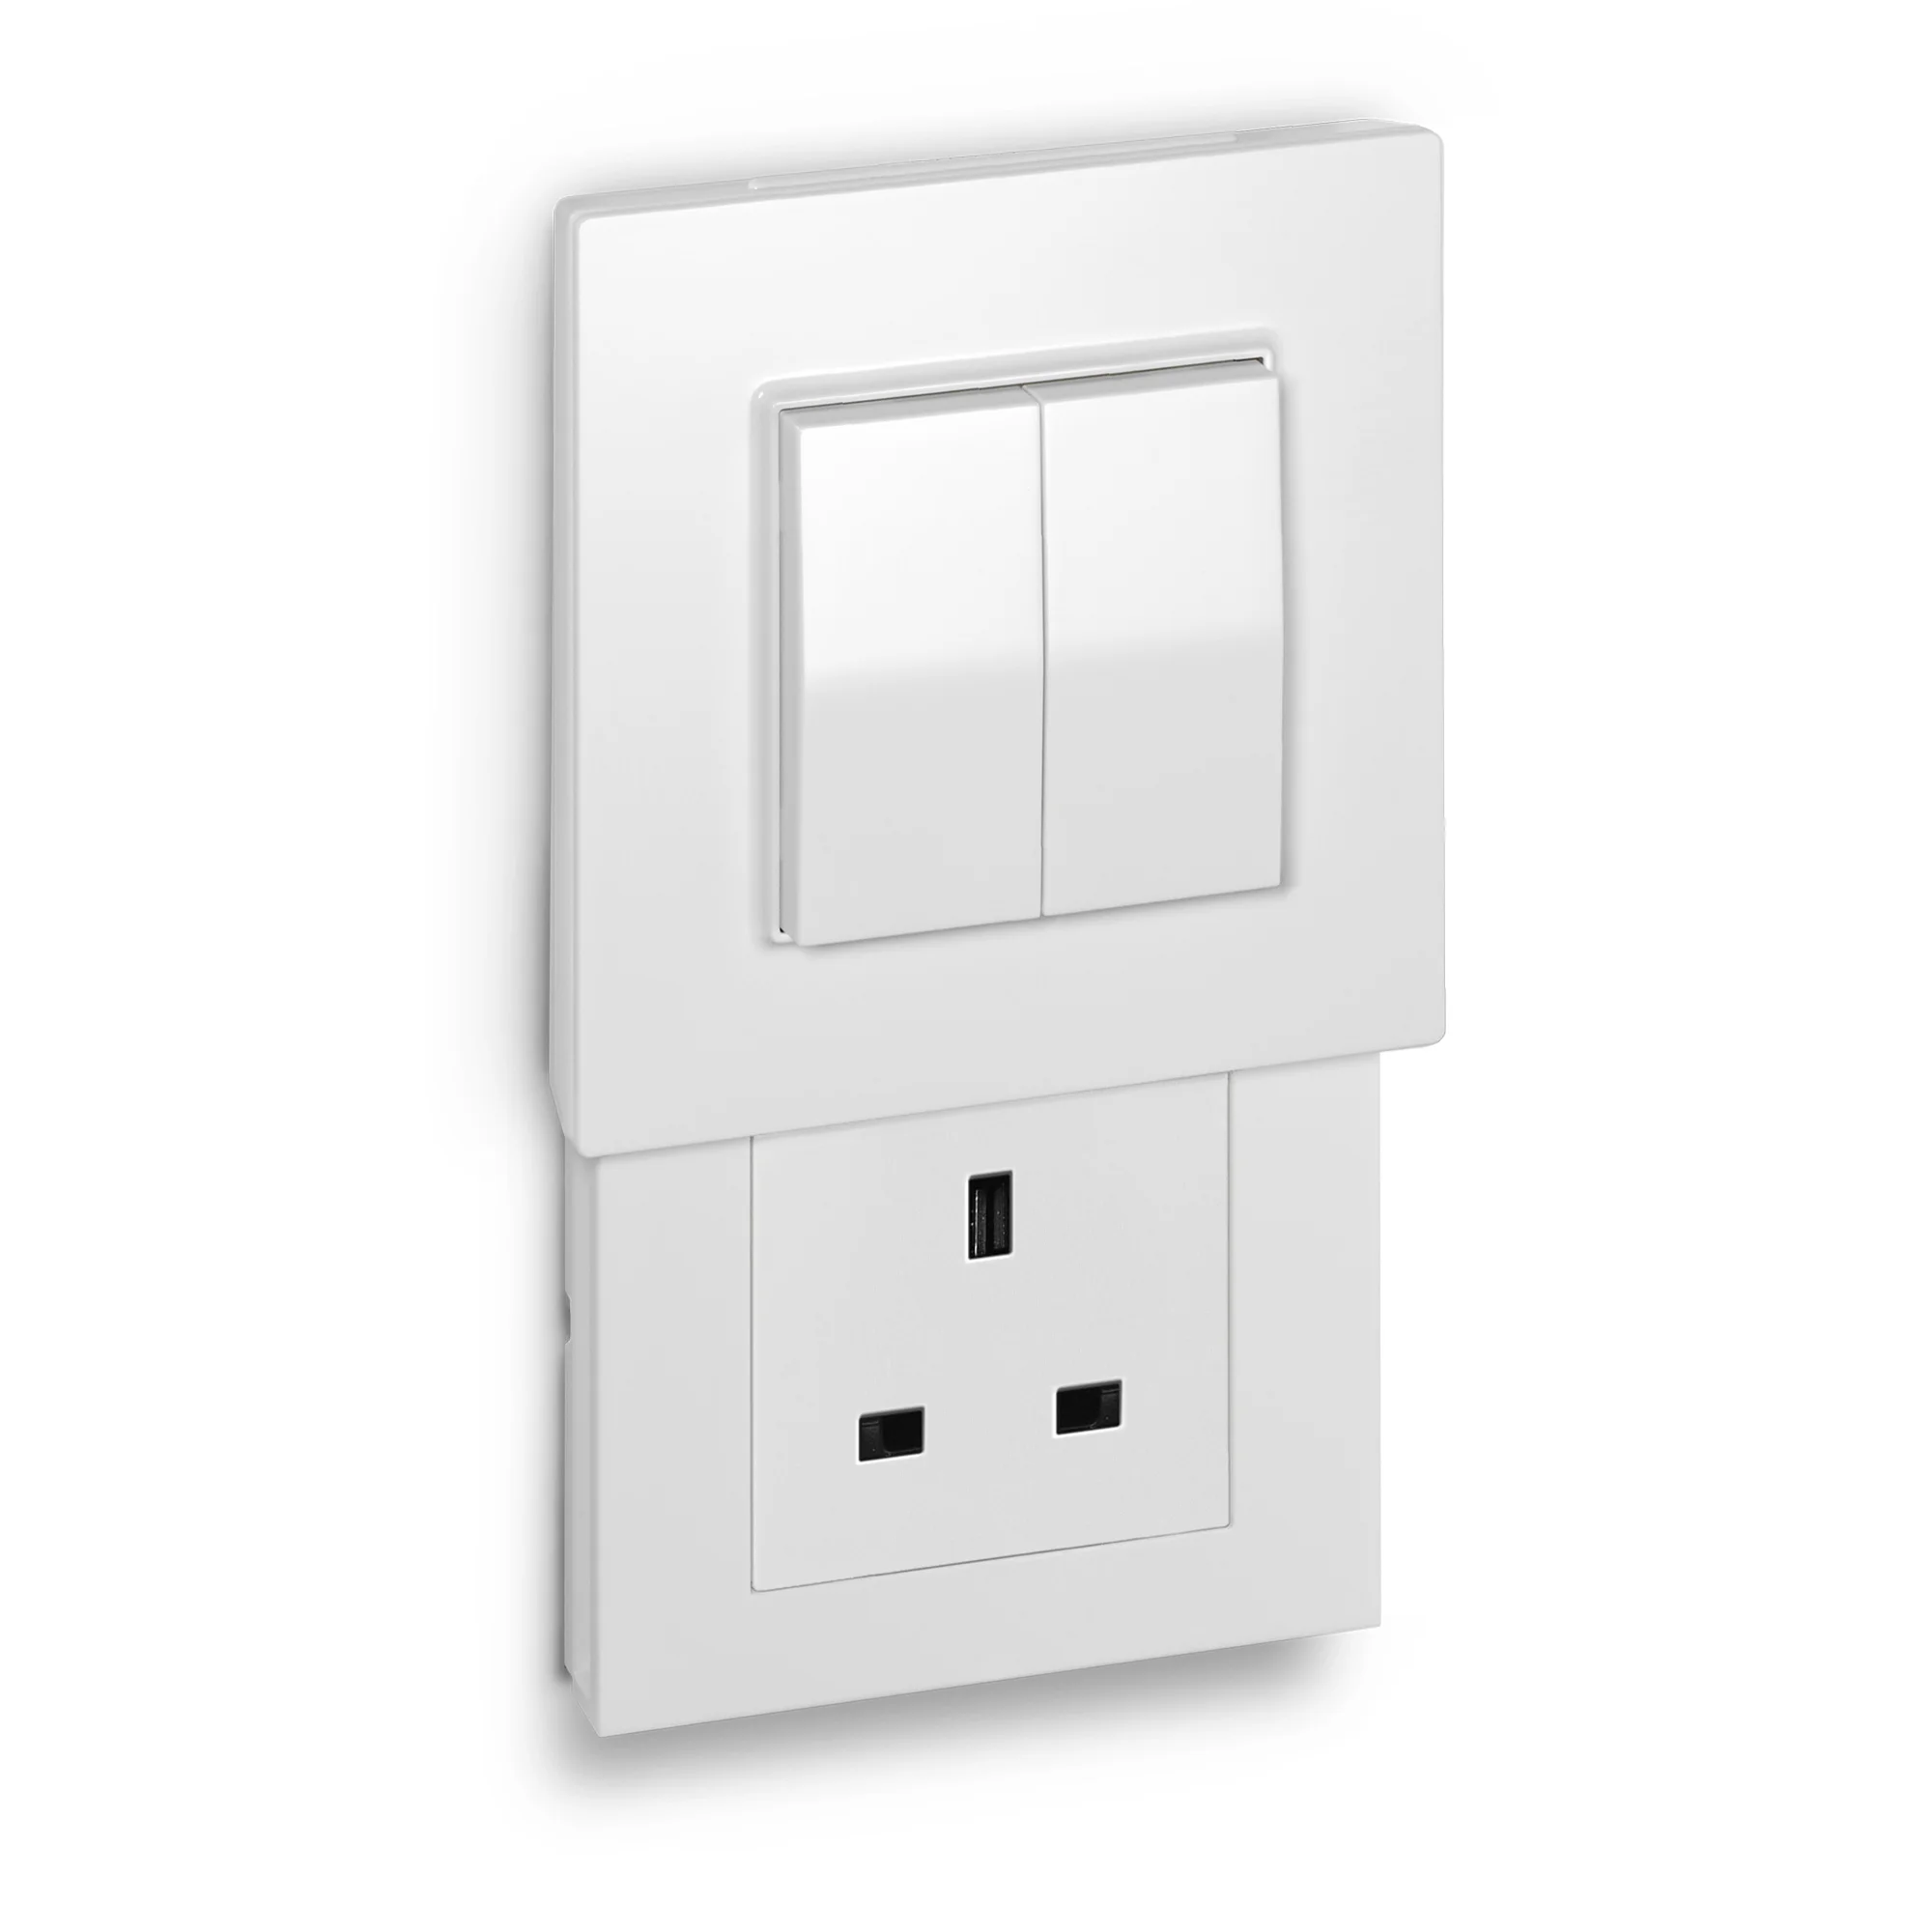
Friends of Hue movable switch with Hidden Socket
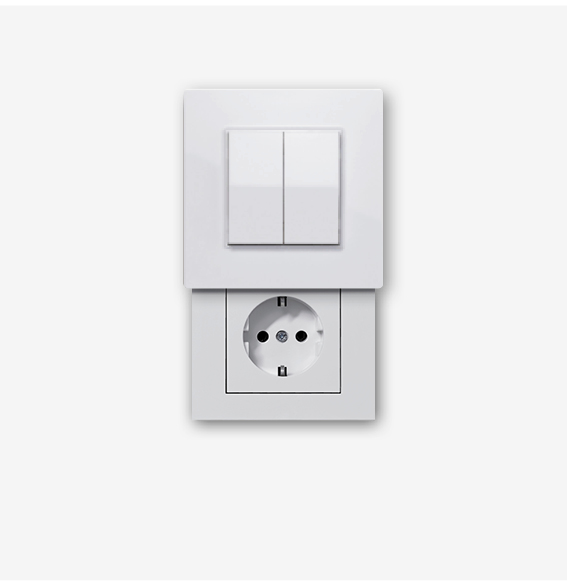
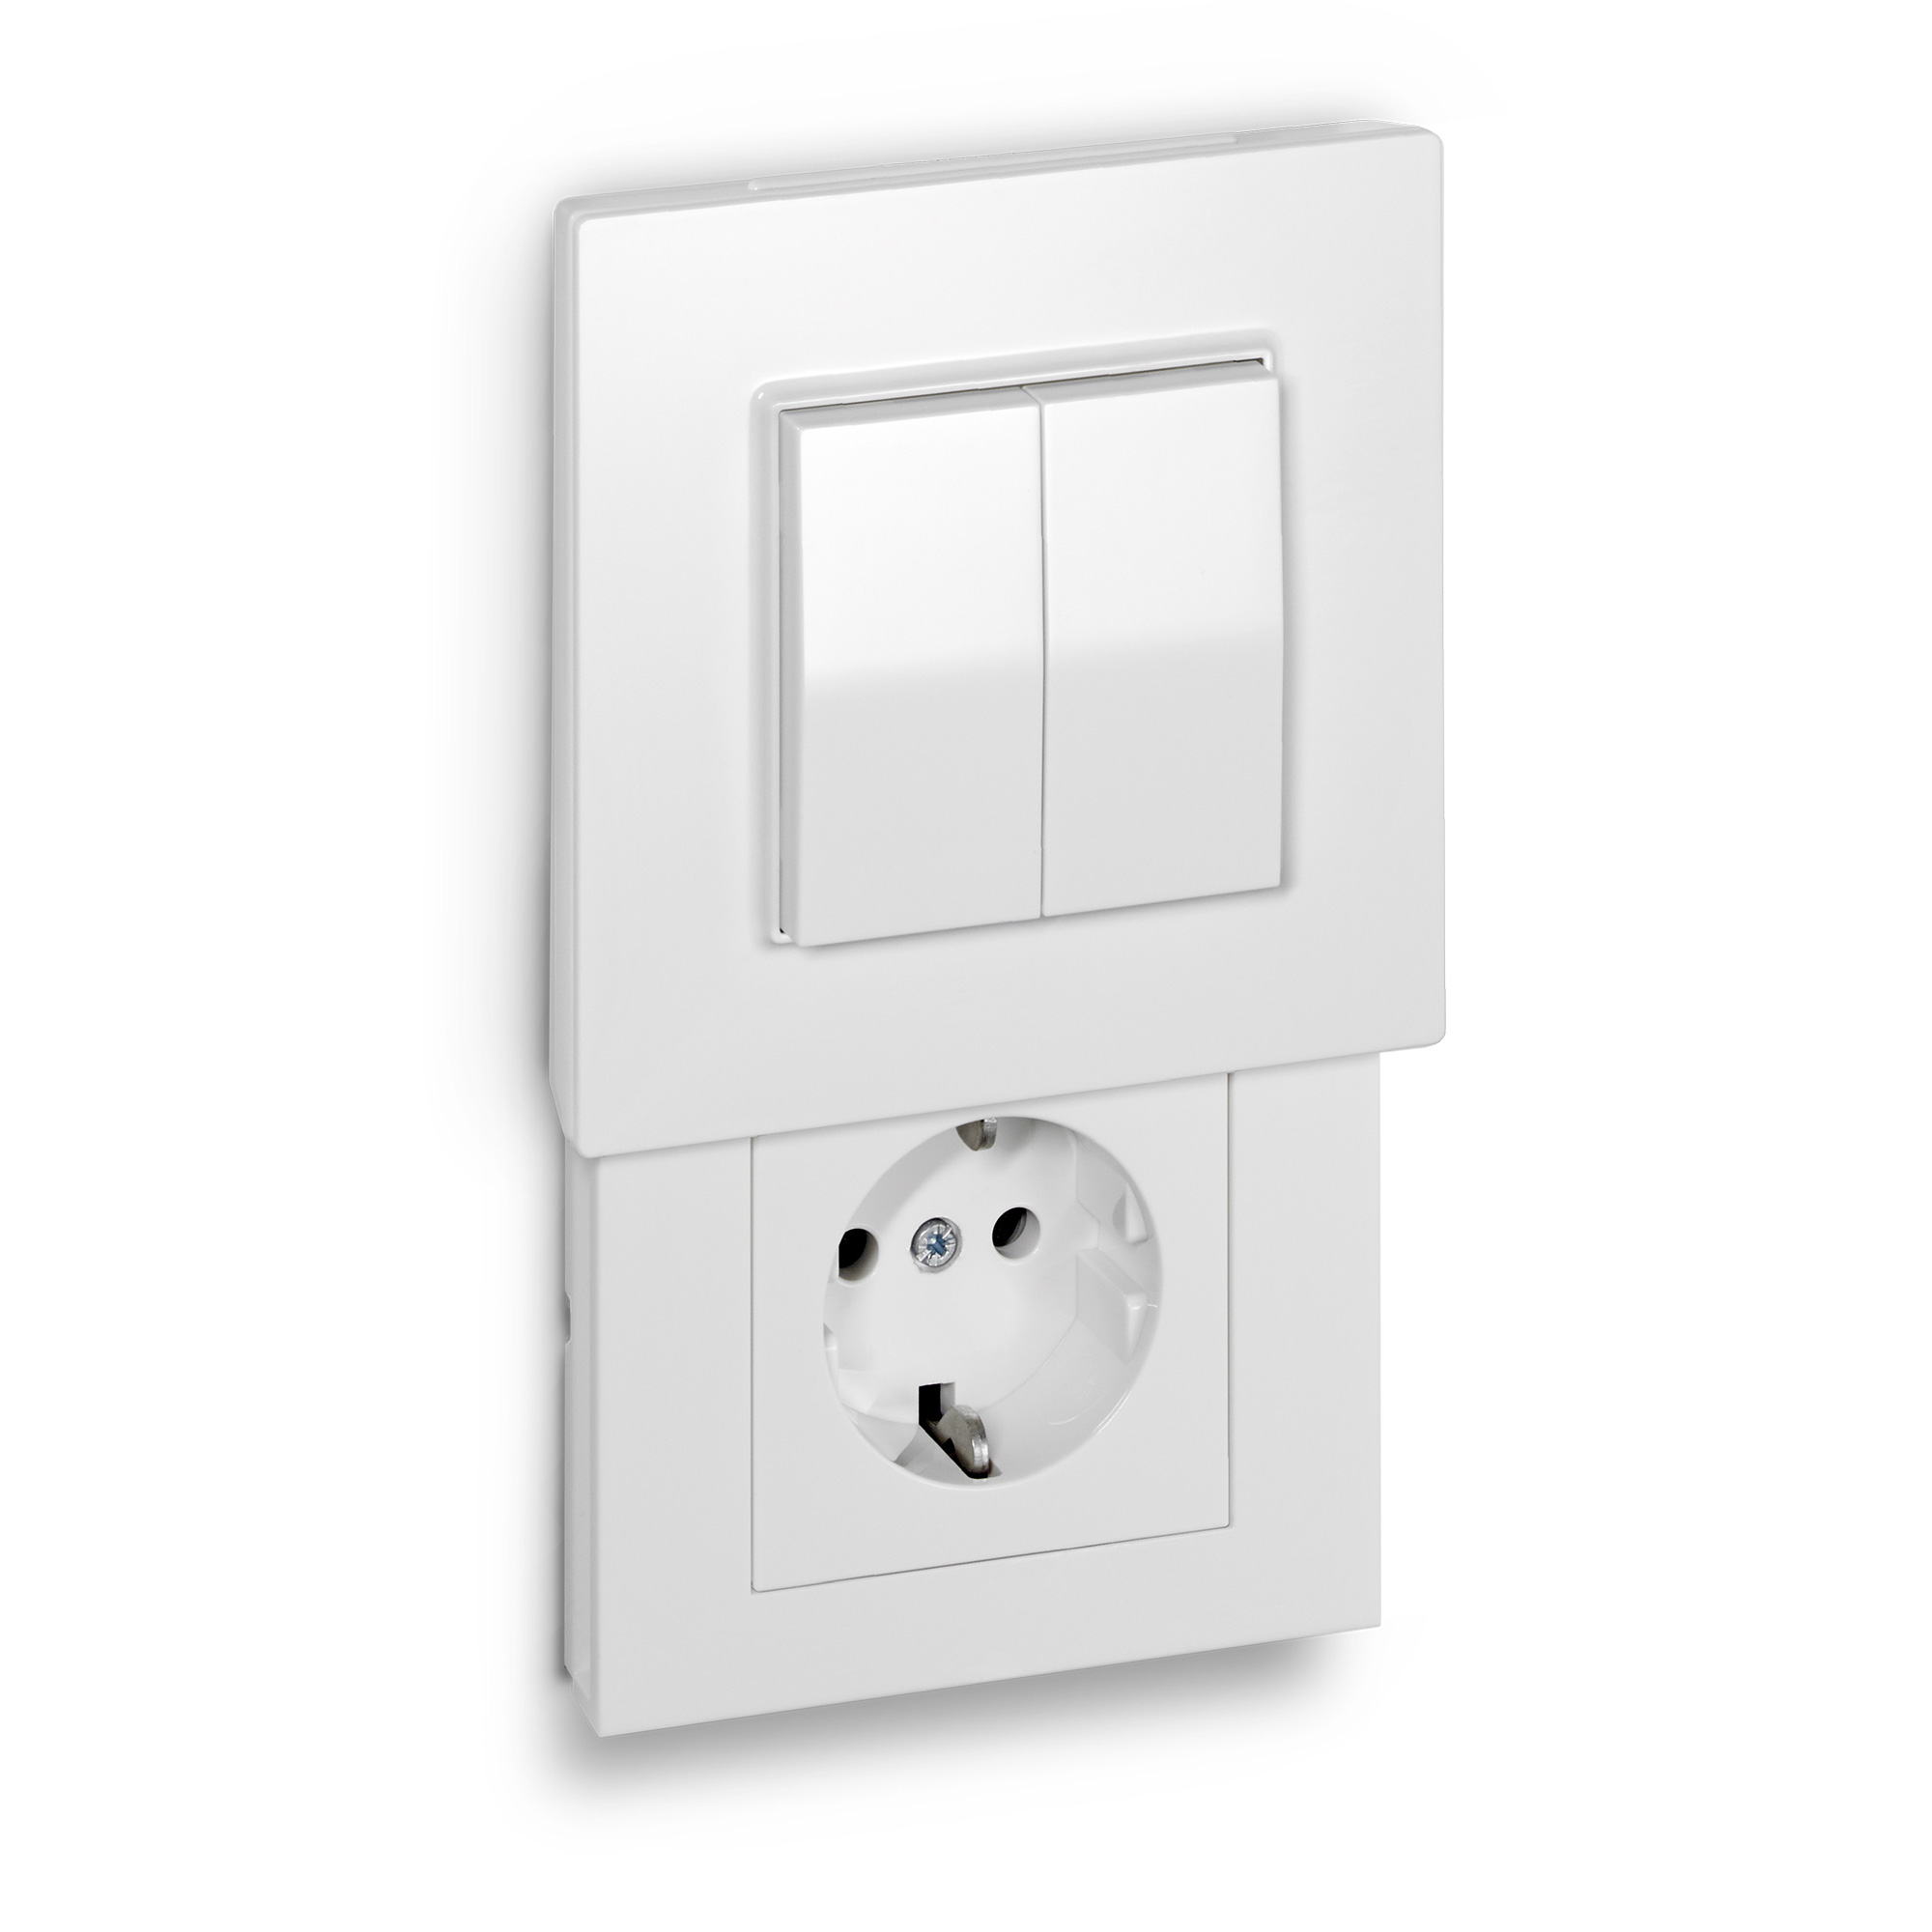
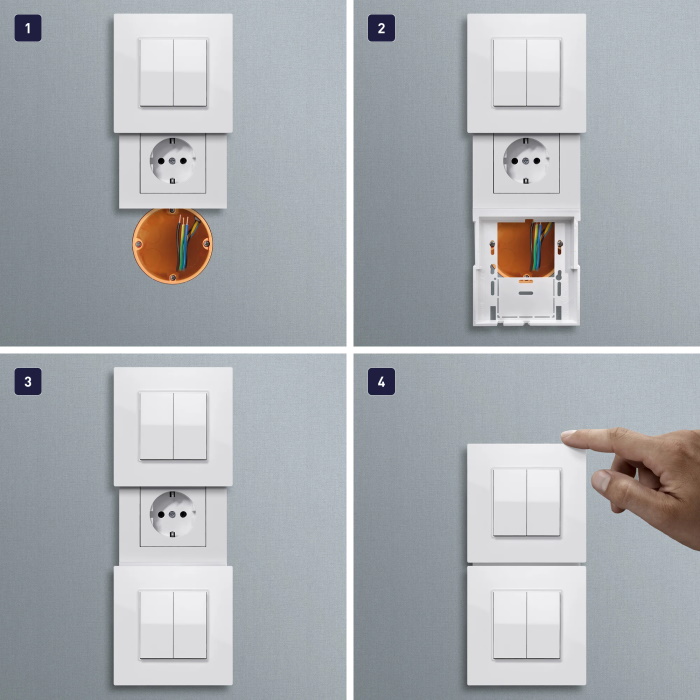
Beyond the wireless light switches, we offer our Hidden Socket | Versteckdose®. This is a combination of a Smart Home switch and a standard socket. The special thing about it is that you can make the socket disappear behind the switch at any time and only bring it out when you actually need it. All you need to do is press lightly on the switch and the mechanical opening support is triggered..
The advantage of this system is not only that you save space - the cables behind the original light switch also do not remain unused. In addition, you benefit from a comfortable operating height and do not have to bend down to insert a plug.
The switch-socket combination can be mounted exclusively by screw mounting on a flush-mounted box. The cables of the previous light switch are used for the socket insert. In this case, we recommend hiring a specialist for the installation.
Features of the Friends of Hue switches
With our officially certified Friends of Hue switches you can easily expand your existing Philips Hue lighting system. This way, you can control lamps and lights in your entire living environment as you wish - conveniently via app or directly via the wireless switch. Individual configuration options and the connection of up to 25 switches with the Hue Bridge allow you to create a smart home experience tailored to your needs.
The best features of the Friends of Hue switches:
- Configuration via the Philips Hue app
- Wireless use without batteries
- Dim, change light colours or light temperature
- Operate several luminaires as a group
- Ecological and convenient
Our Hidden Socket | Versteckdose® also offers you the combination of a smart light switch and a concealable socket. The latter is also available for retrofitting to replace an existing wired switch.
What functions do the switches for Philips Hue have?
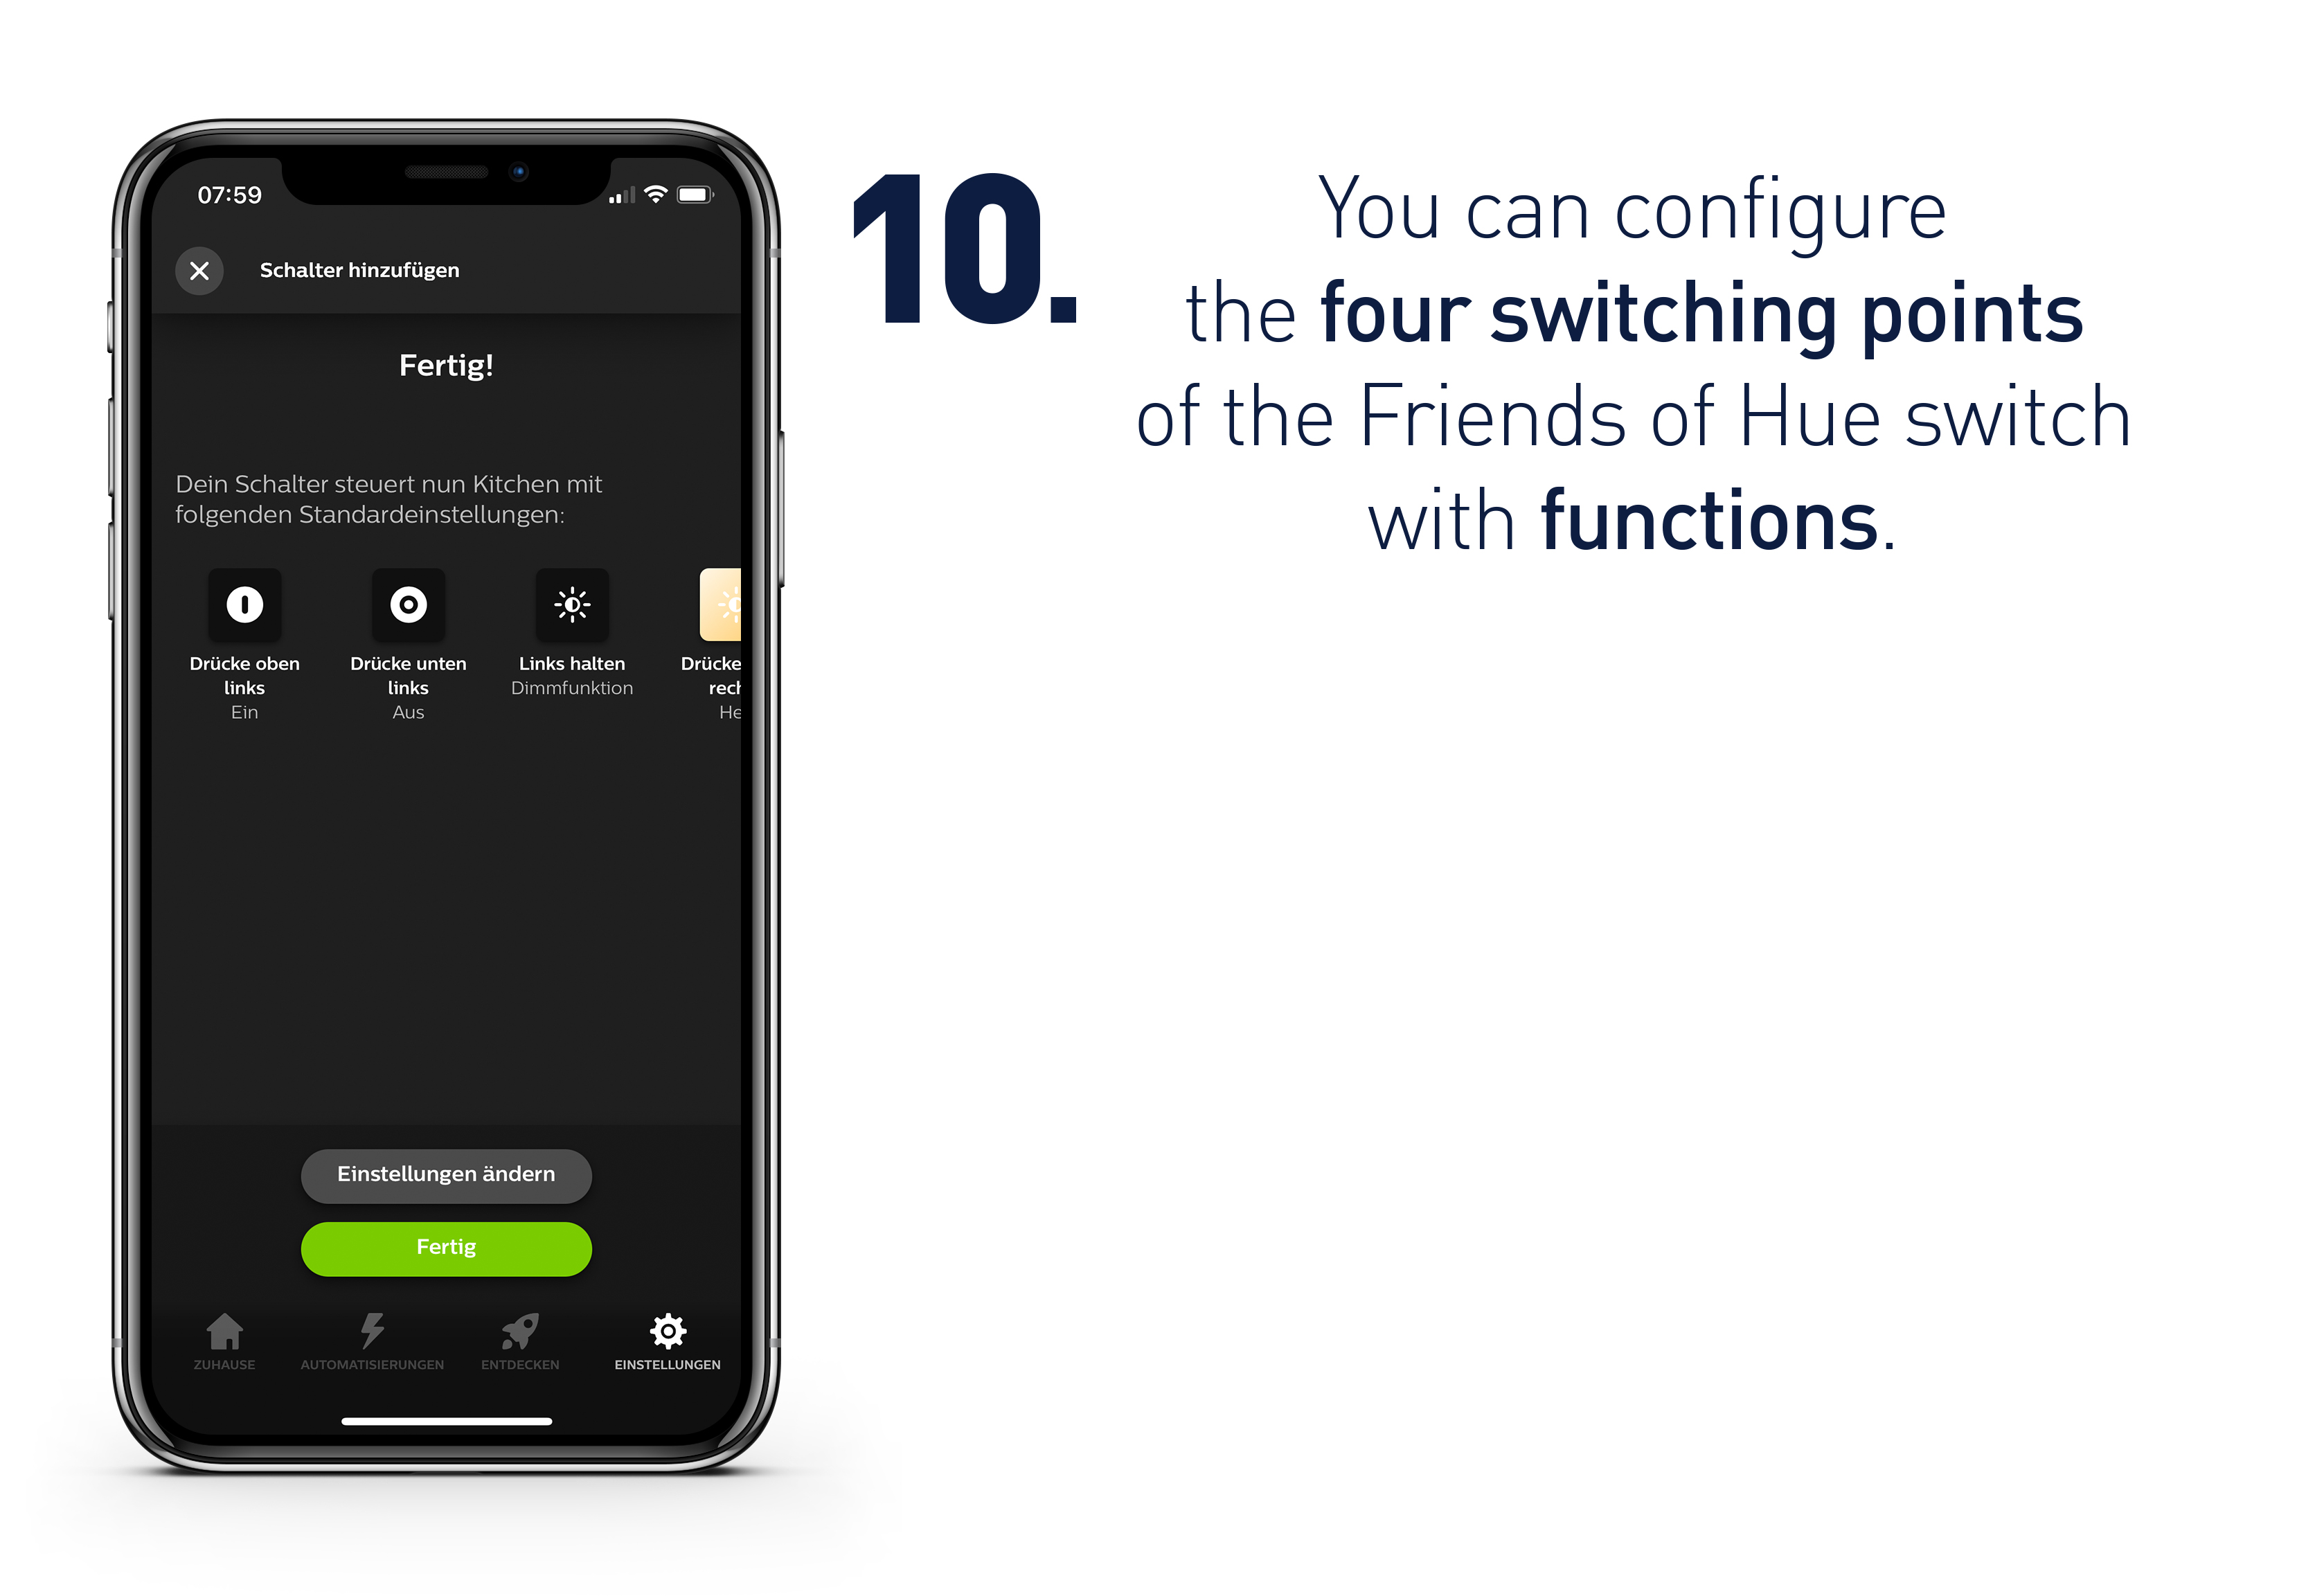
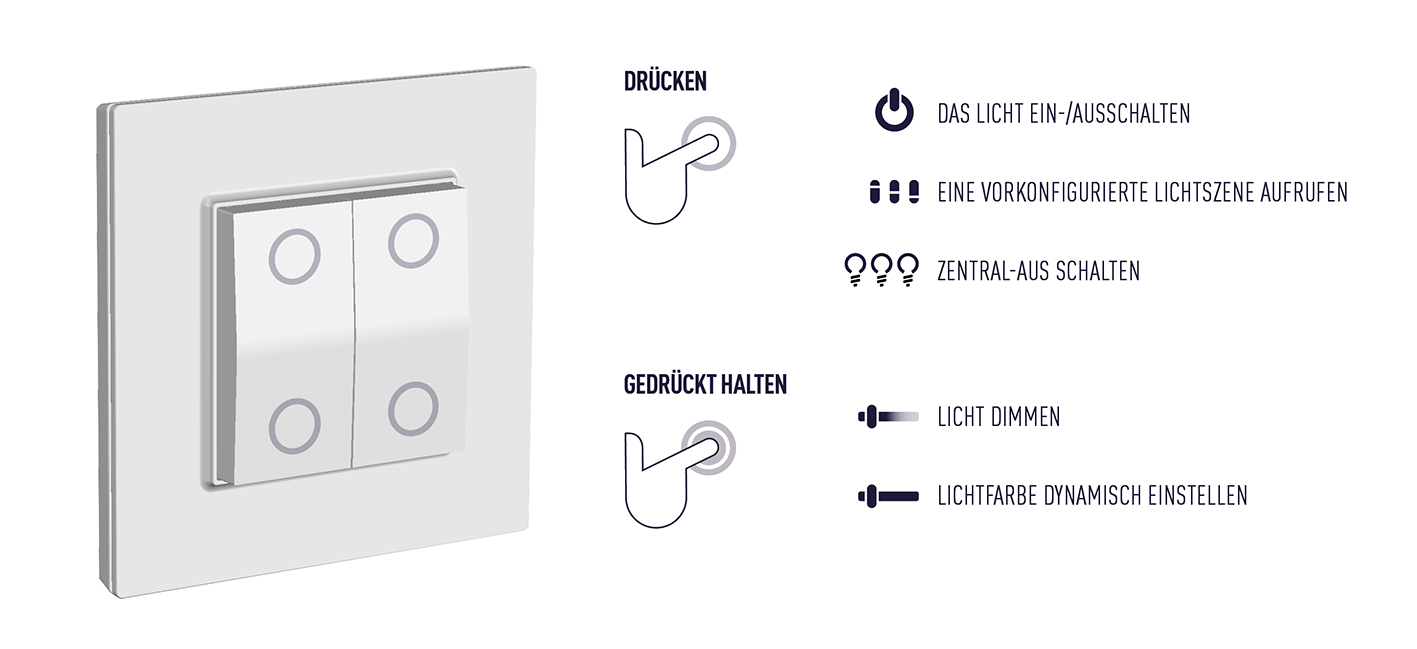
All wireless switches on this page are specifically designed for Philips Hue and are fully compatible. To configure and connect them according to your wishes, you need the official Philips Hue app. With this, you can individually assign functions to the four switching points of the buttons.
For example, you can use the left side of the wireless switch to control the light in the living room, and the right side to control the light in the kitchen. Or you can assign the four settings in a room with differently configured light scenes. Each function of the four switching points of the radio switch can also be operated in parallel on a smartphone via WiFi.
Determine the type of lighting, dim the light, change the colour, vary between cold and warm white or use the light scenes and dynamic light sequences already stored.
With the Hue Bridge, you can connect up to 25 switches and a total of 50 wireless components (including luminaires, lamps or actuators) and coordinate them with each other.
In short: The light switches in combination with your Smart Home system from Philips enable you to control your lighting in an uncomplicated and individual way.
Energy harvesting: Our battery-free technology makes the difference!
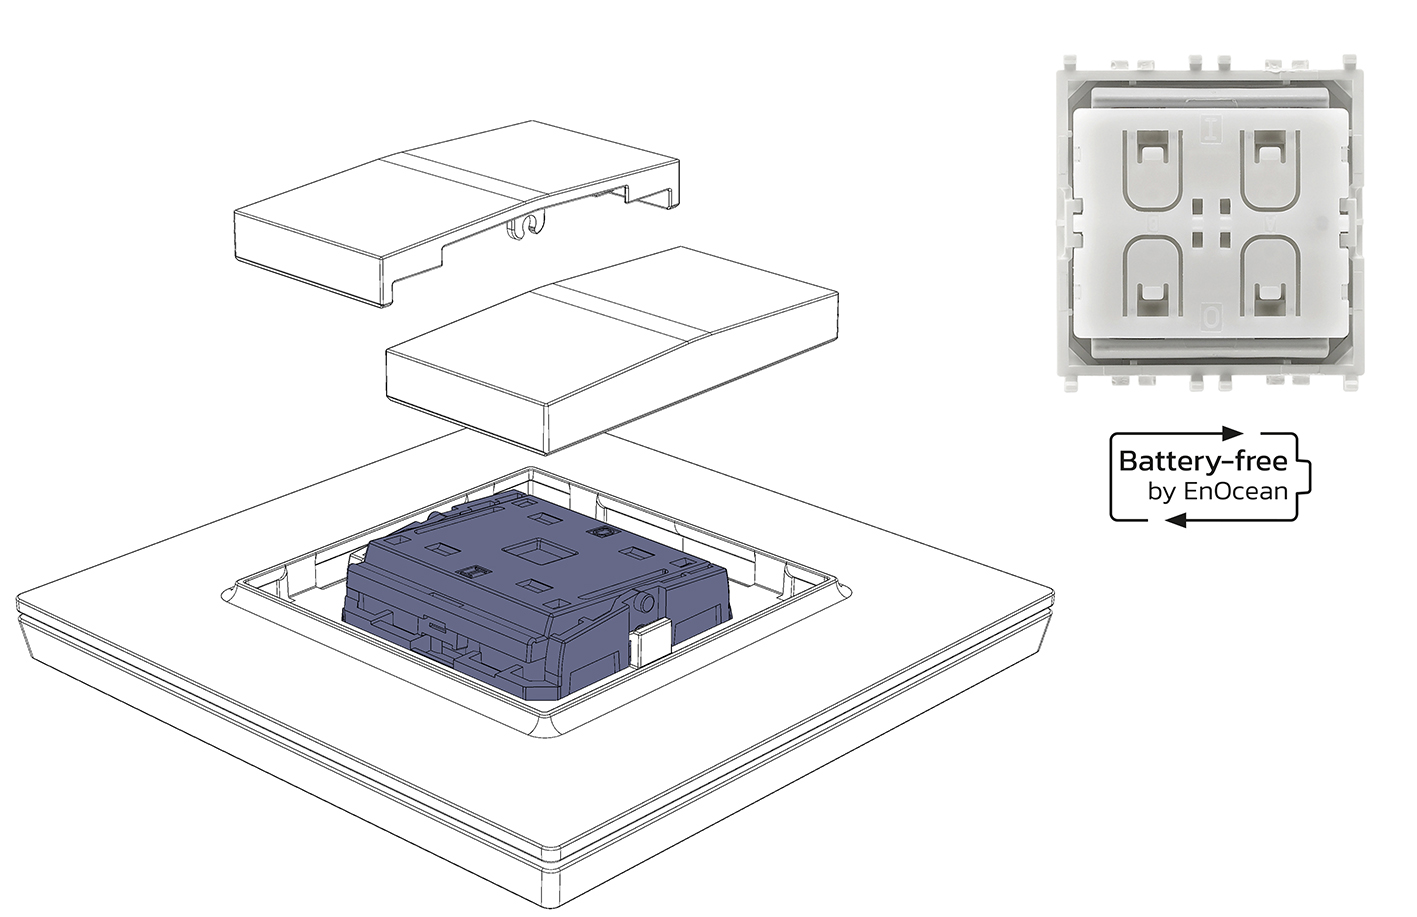
Replacing batteries is completely unnecessary with our wireless switches. This is made possible by the built-in EnOcean switching unit. The necessary energy is generated simply by pressing the buttons.
This energy harvesting technology obtains the required energy from the push of a button. In this way, our Friends of Hue wireless switches are completely independent of cables or batteries. With the switches, you have access to a sustainable and cost-saving solution in the long term.
In addition, this type of energy generation allows us to offer you the light switches with different mounting options.
In 10 steps to your own desired switch configuration
You can configure the switches for Philips Hue easily and in just a few steps. To integrate them into your existing system, you need the official Hue app. This will guide you through the setup of your new smart home switch in ten simple steps:
10 steps Procedure:
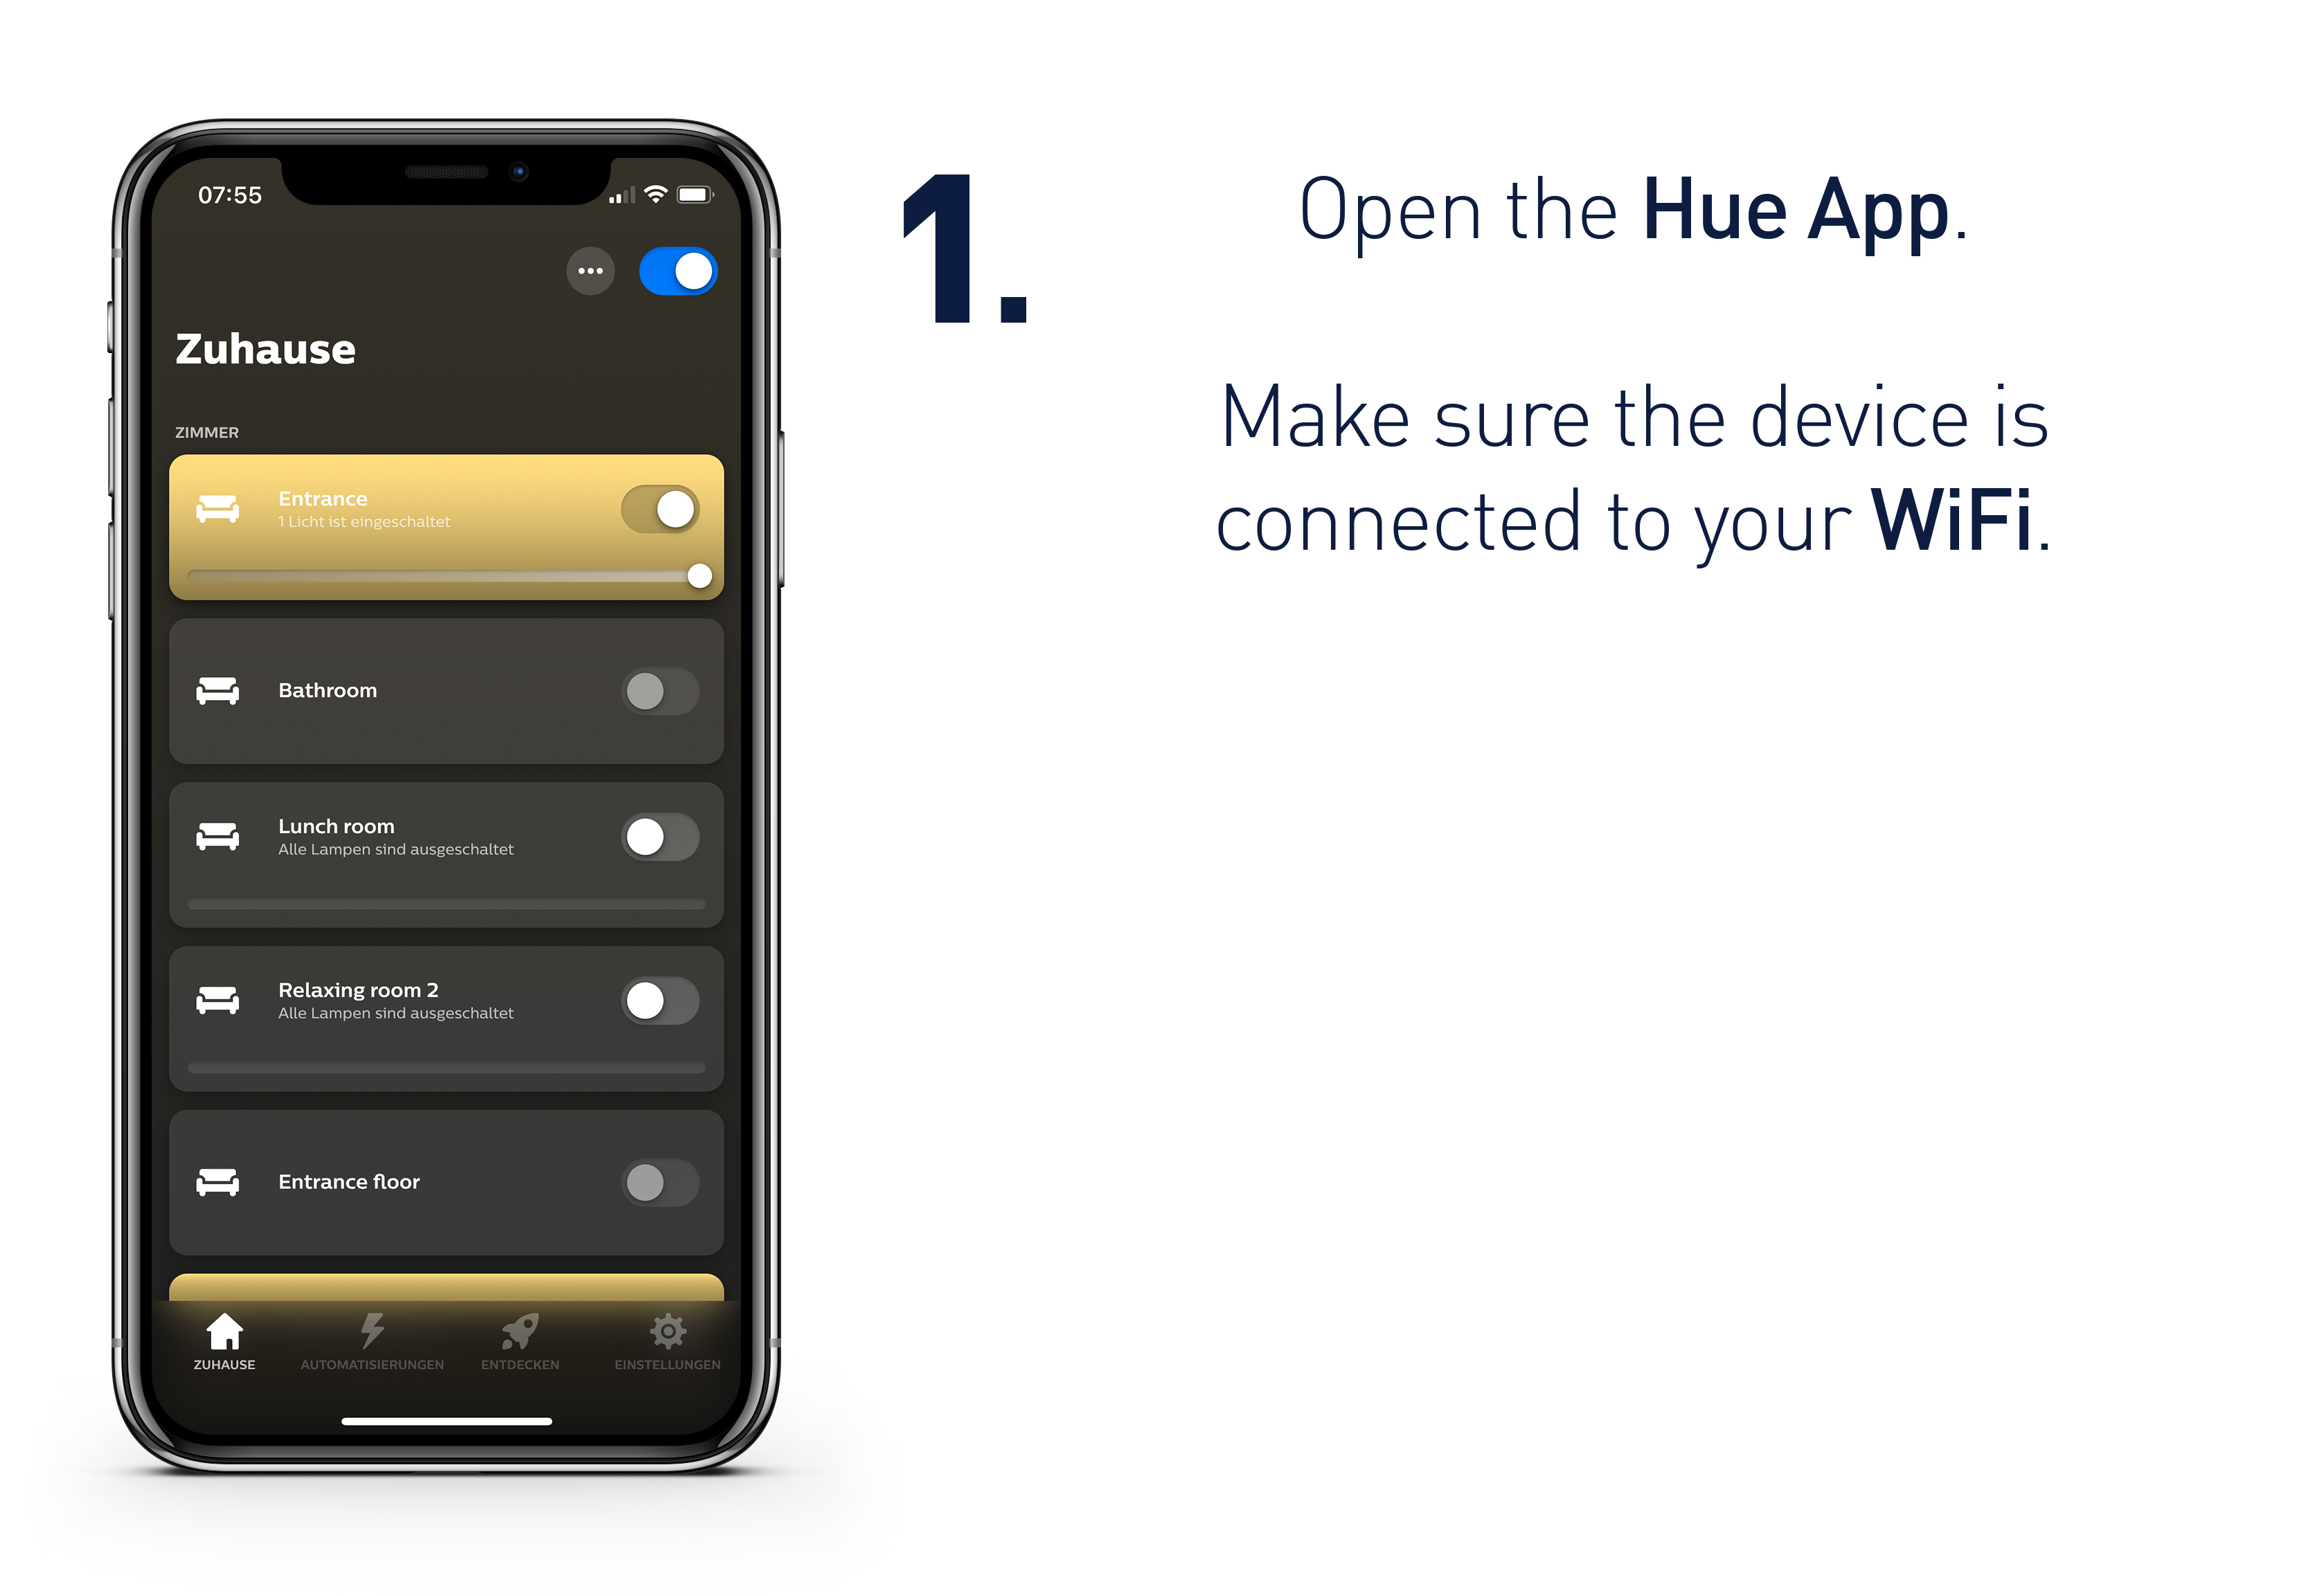
- Open the app: Make sure the device is connected to the WiFi.
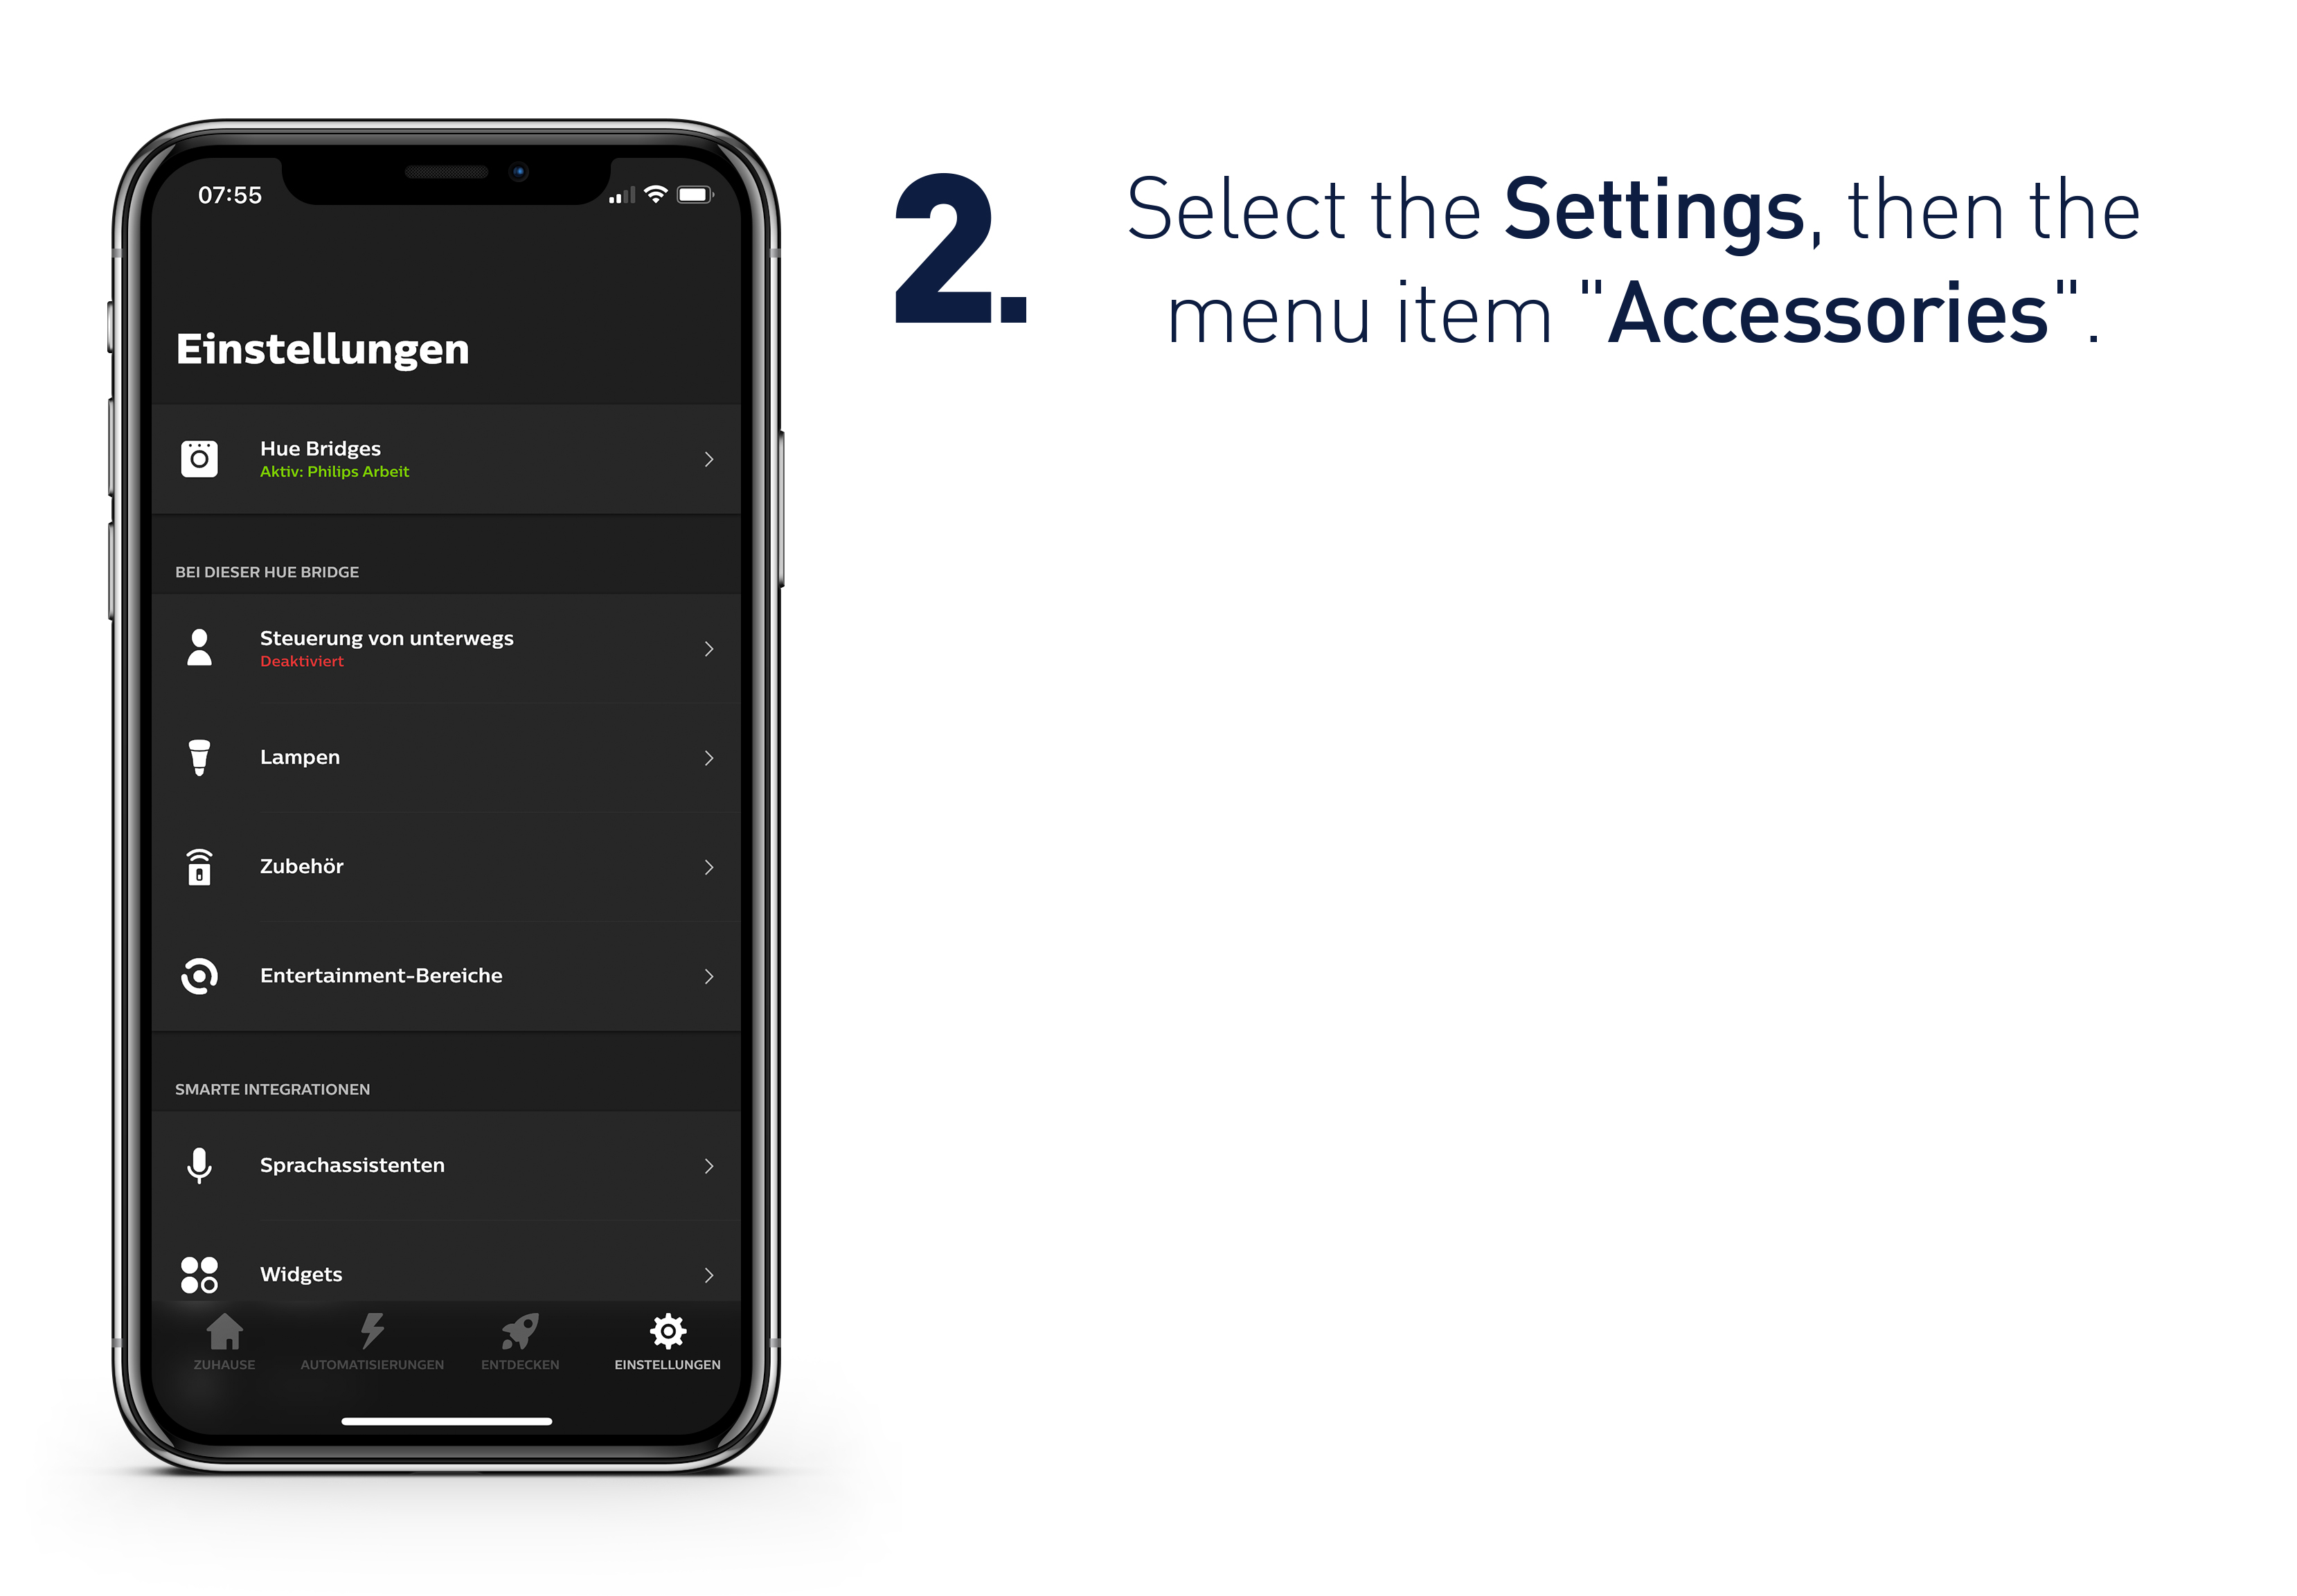
- Select the settings, then the menu item "Accessories".
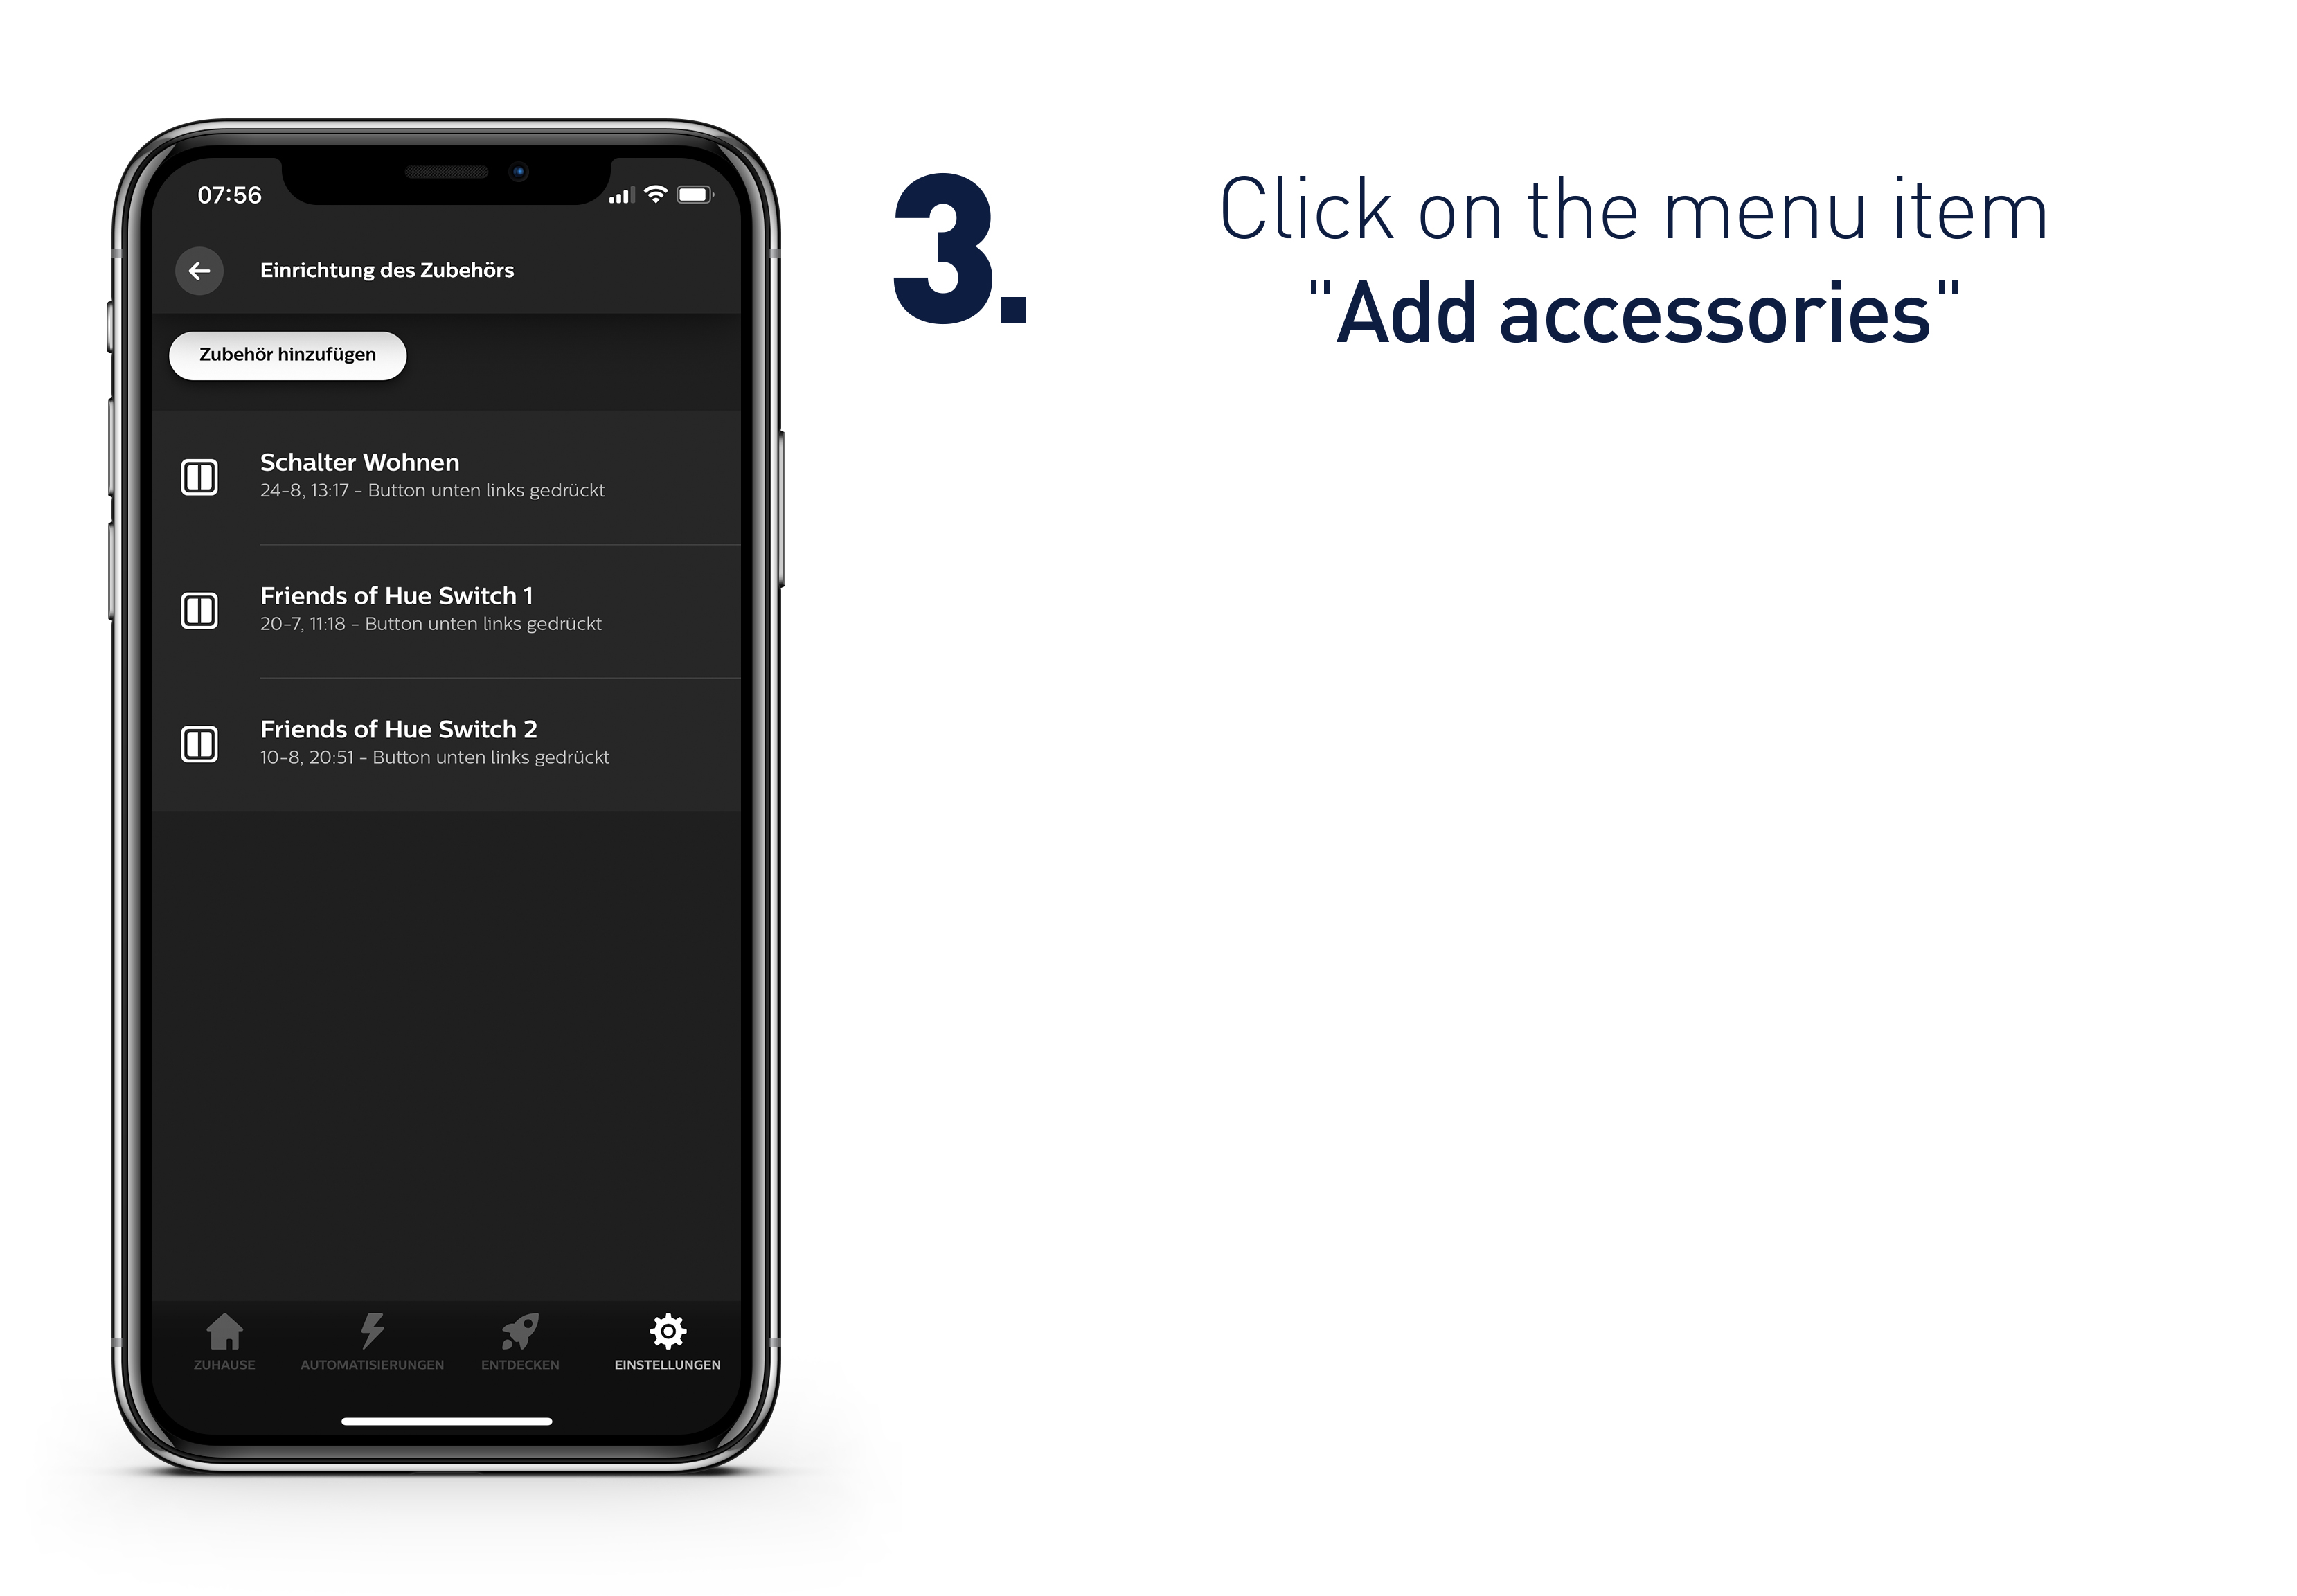
- Click on the menu item "Add accessories".
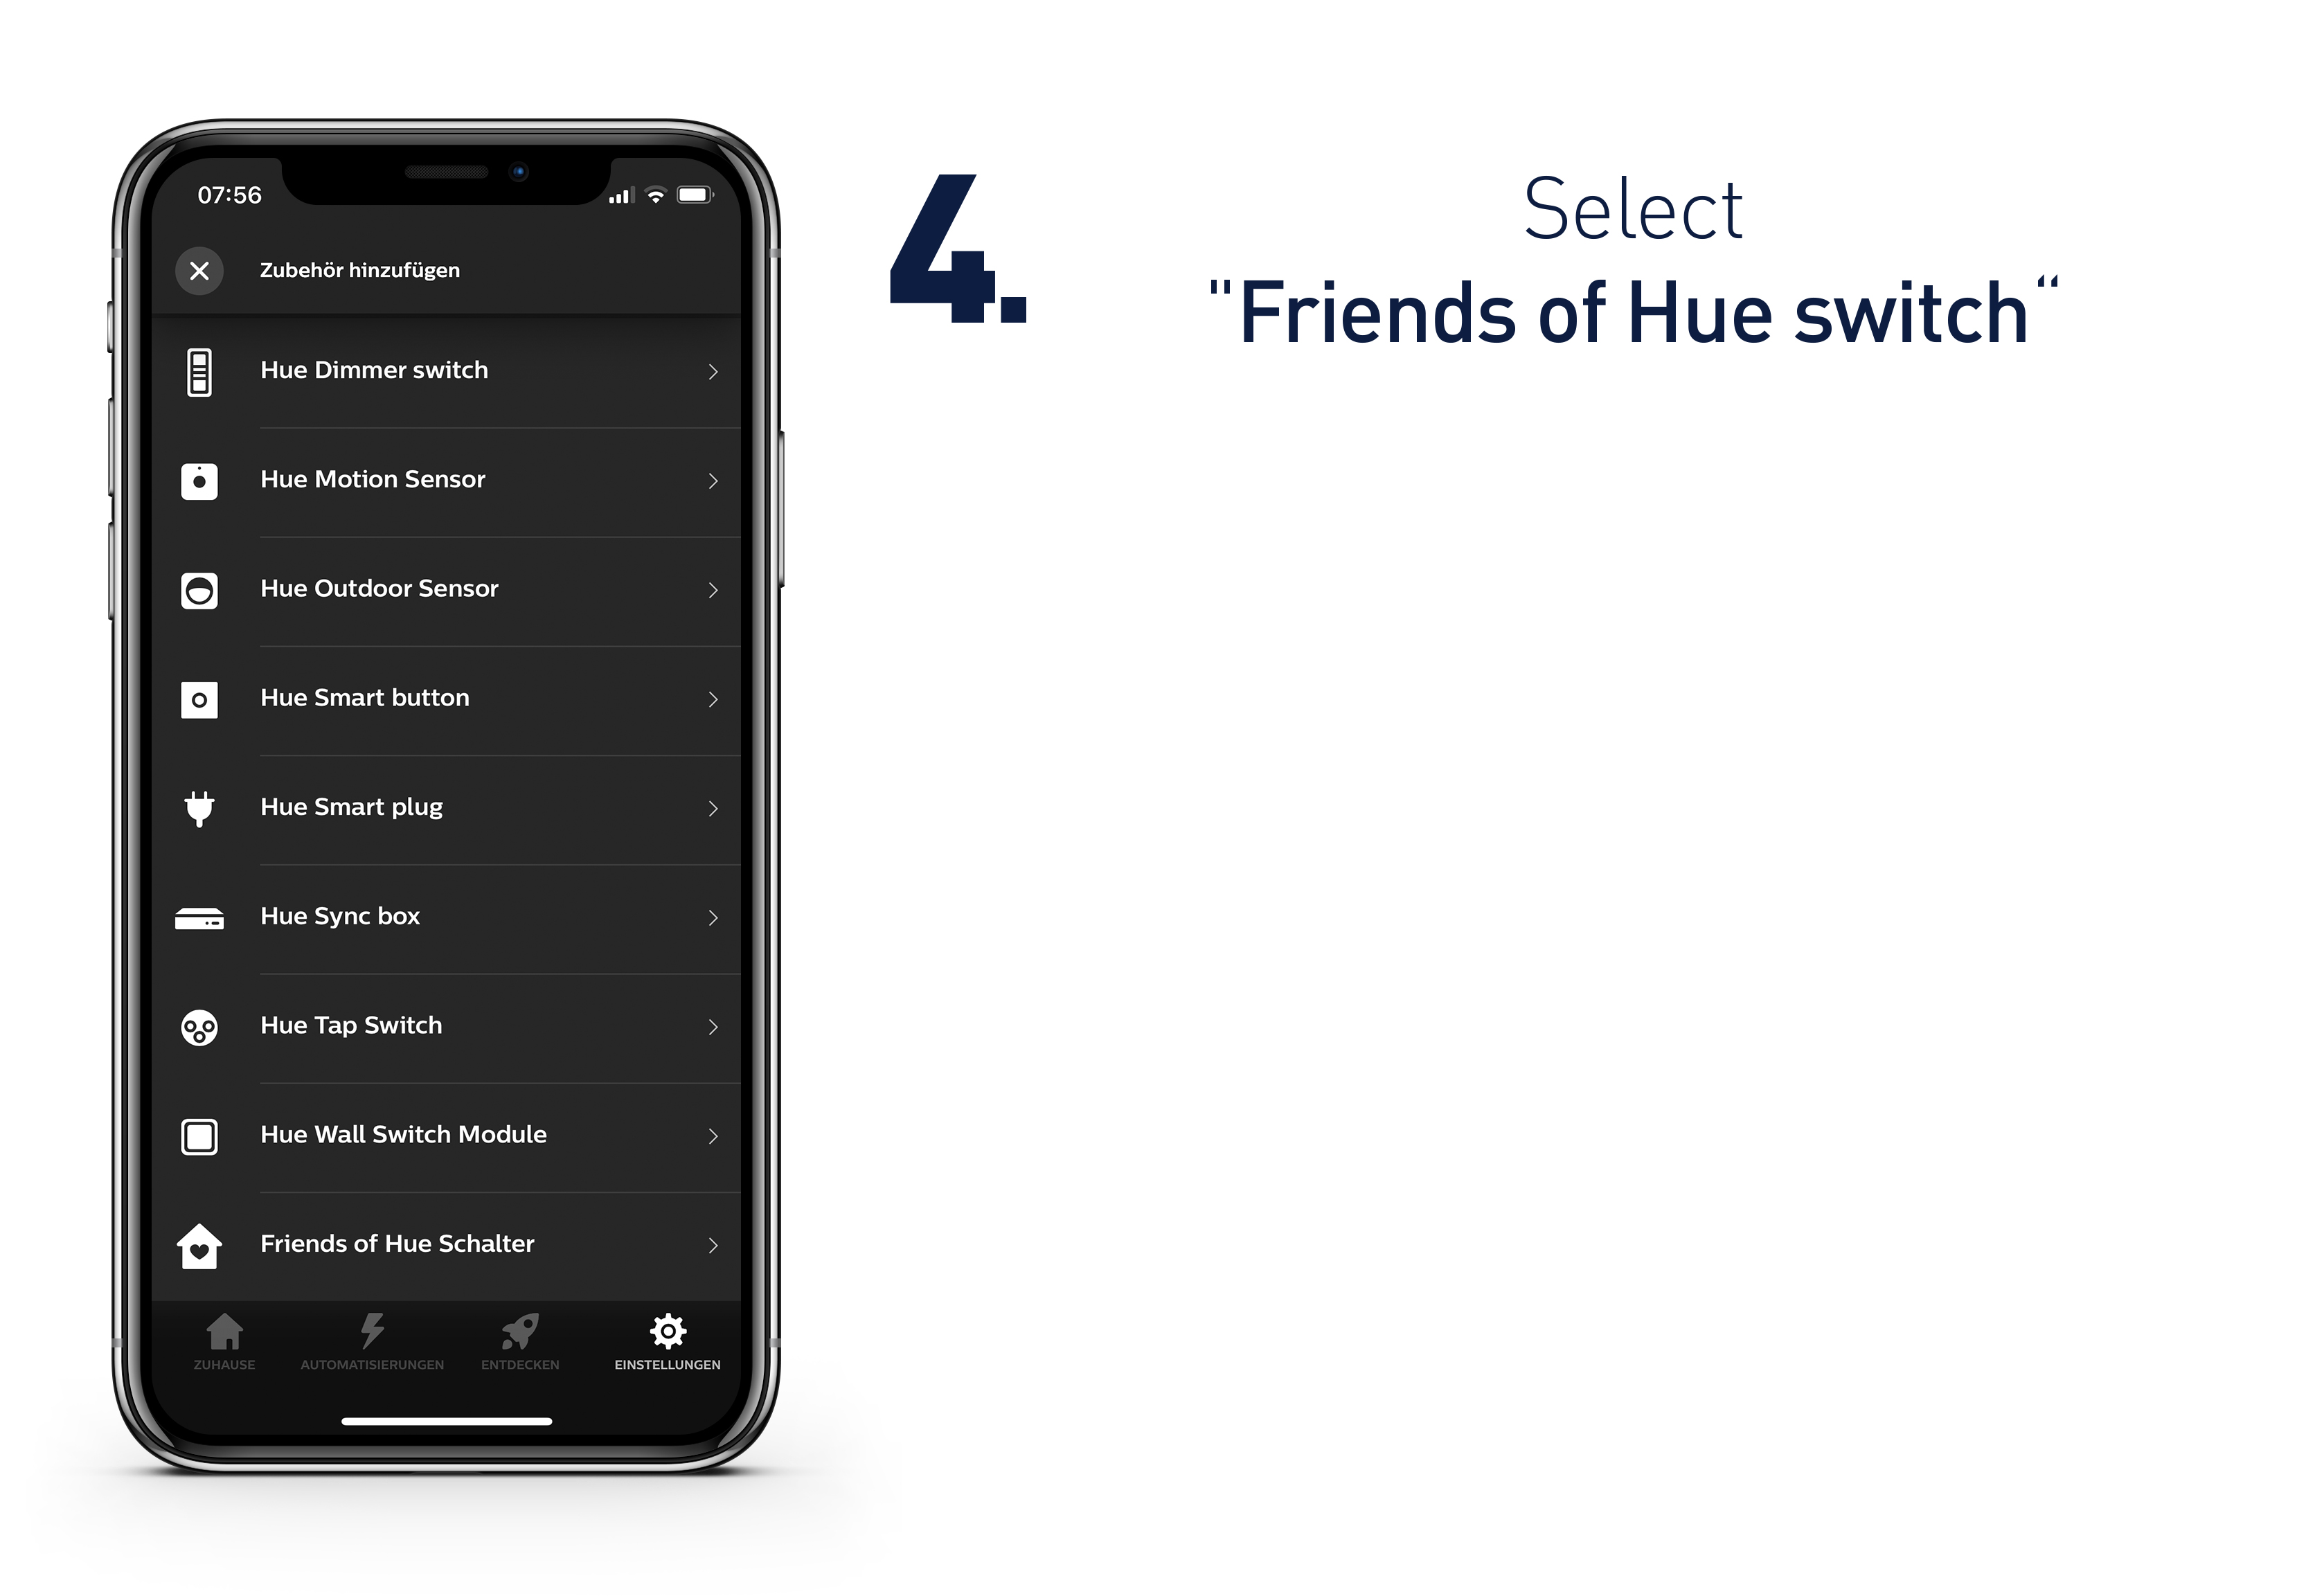
- Select "Friends of Hue switch"
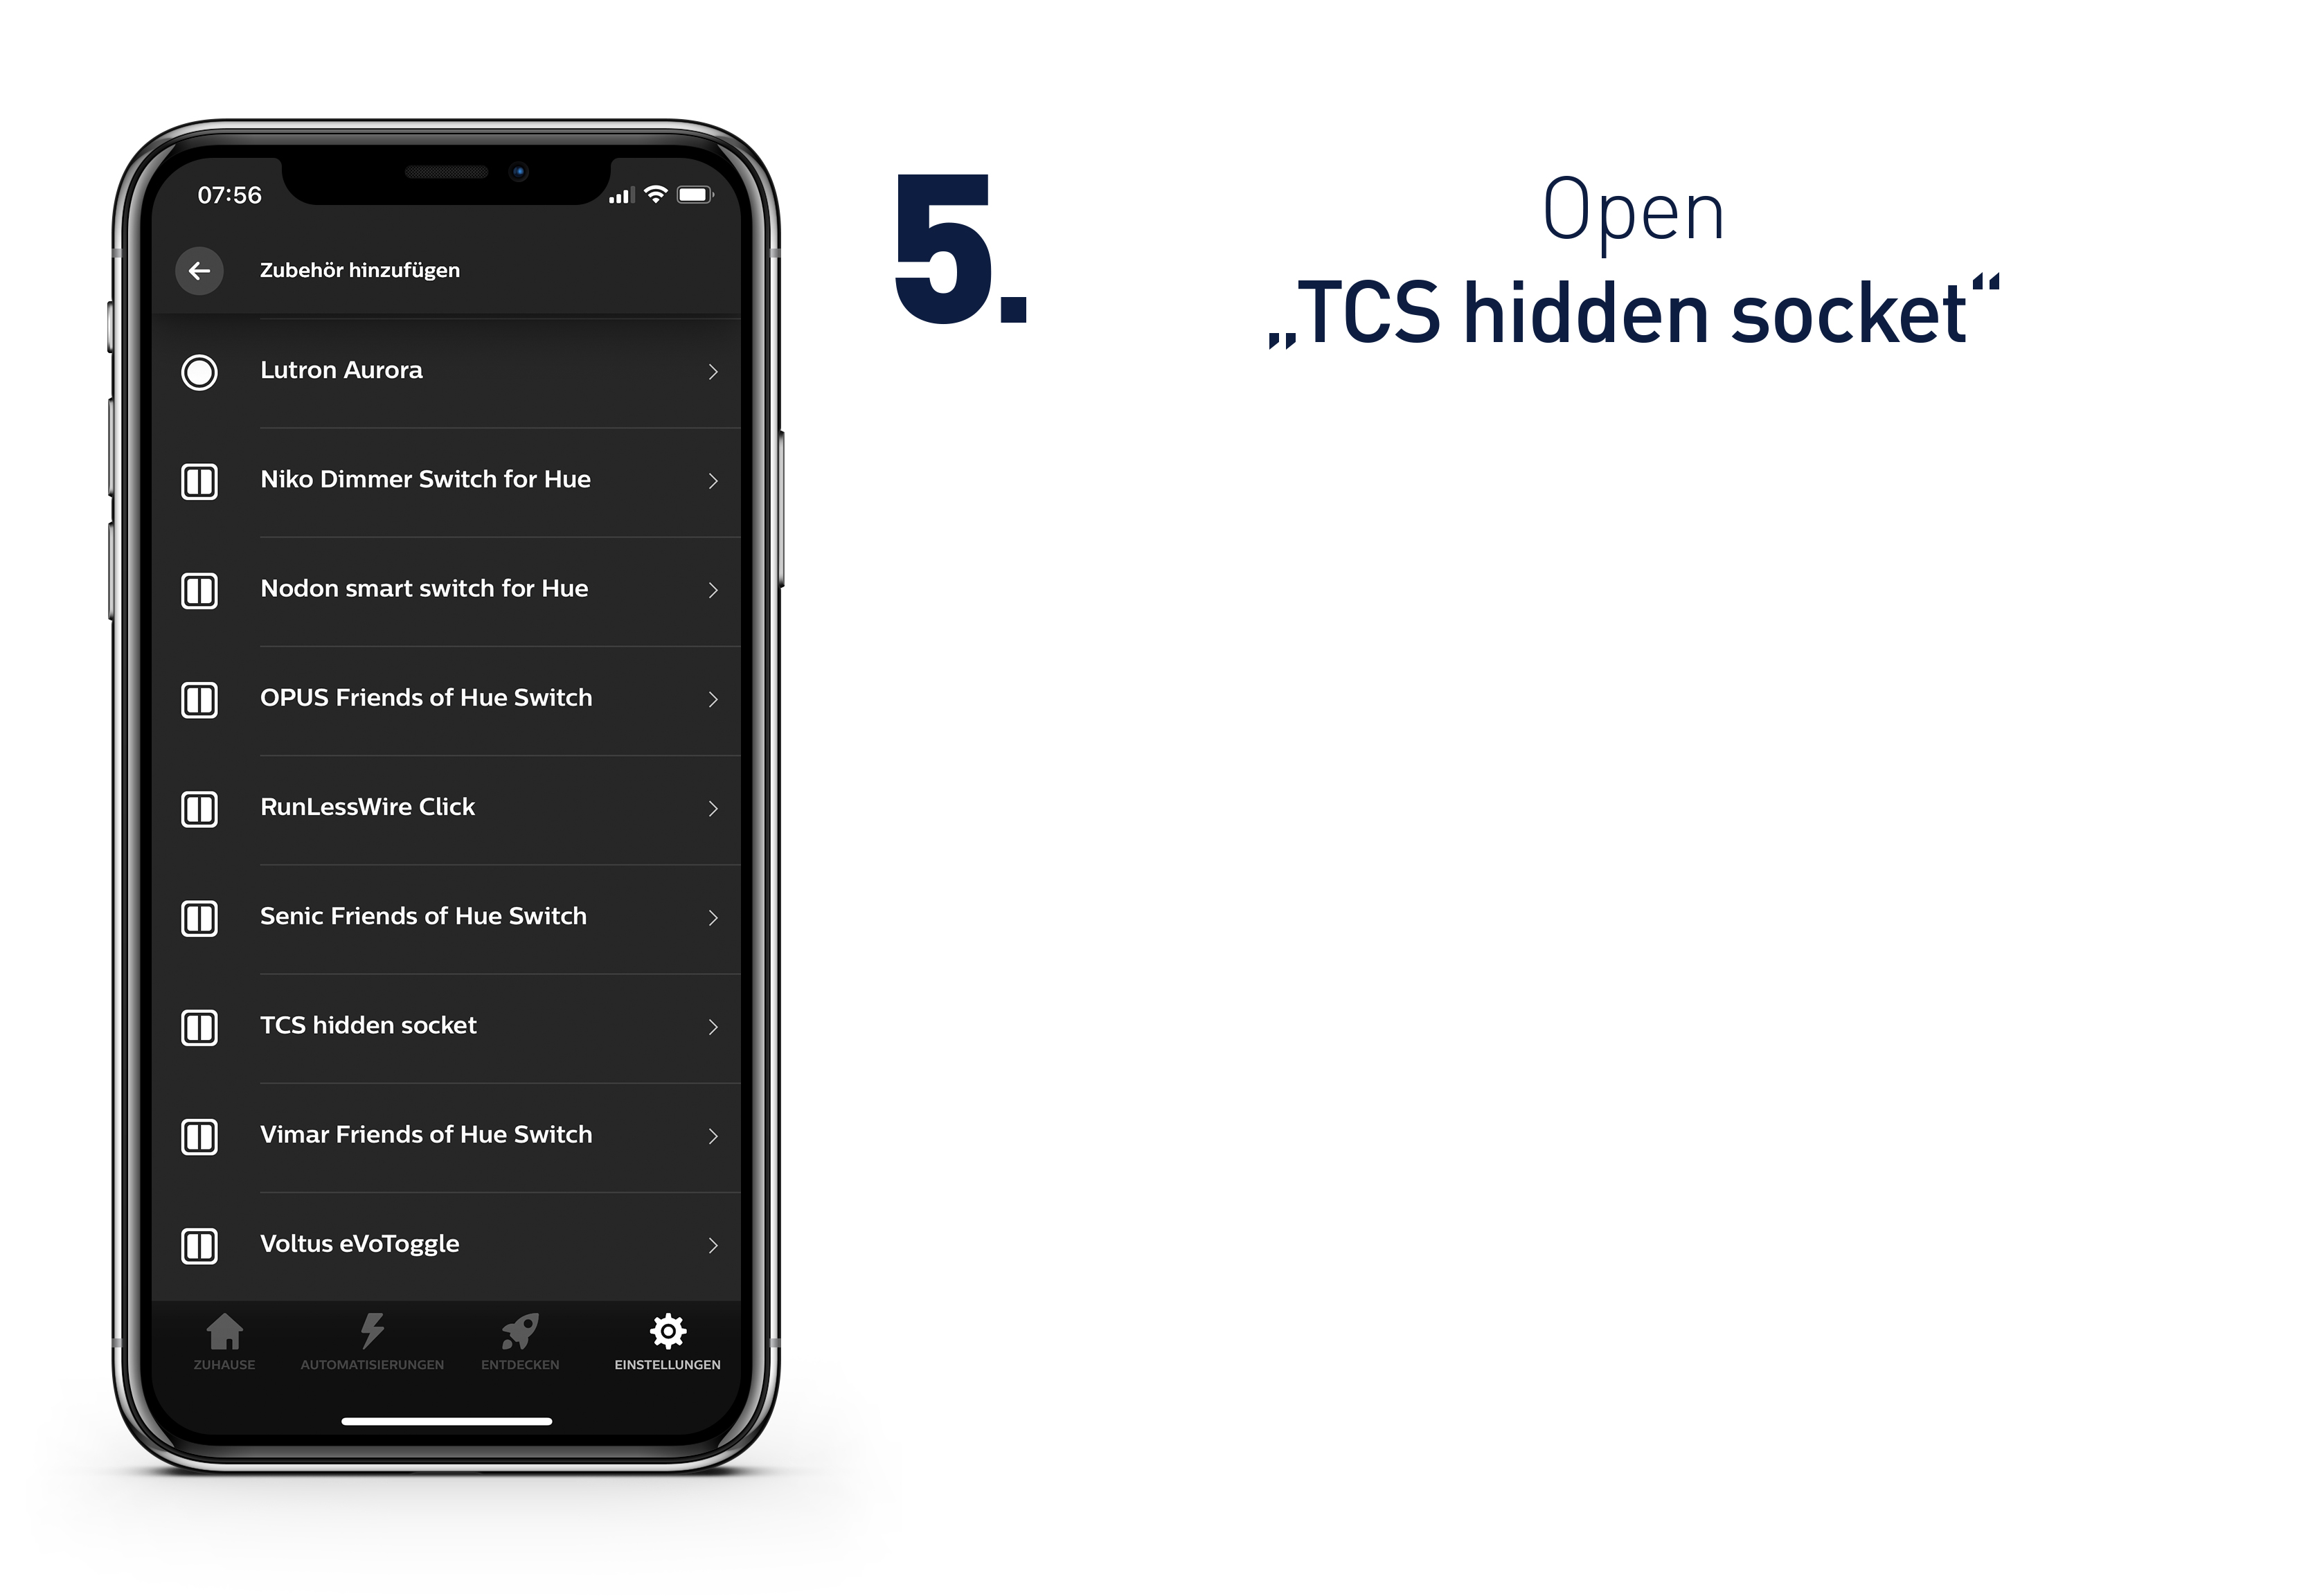
- Open "TCS hidden socket"
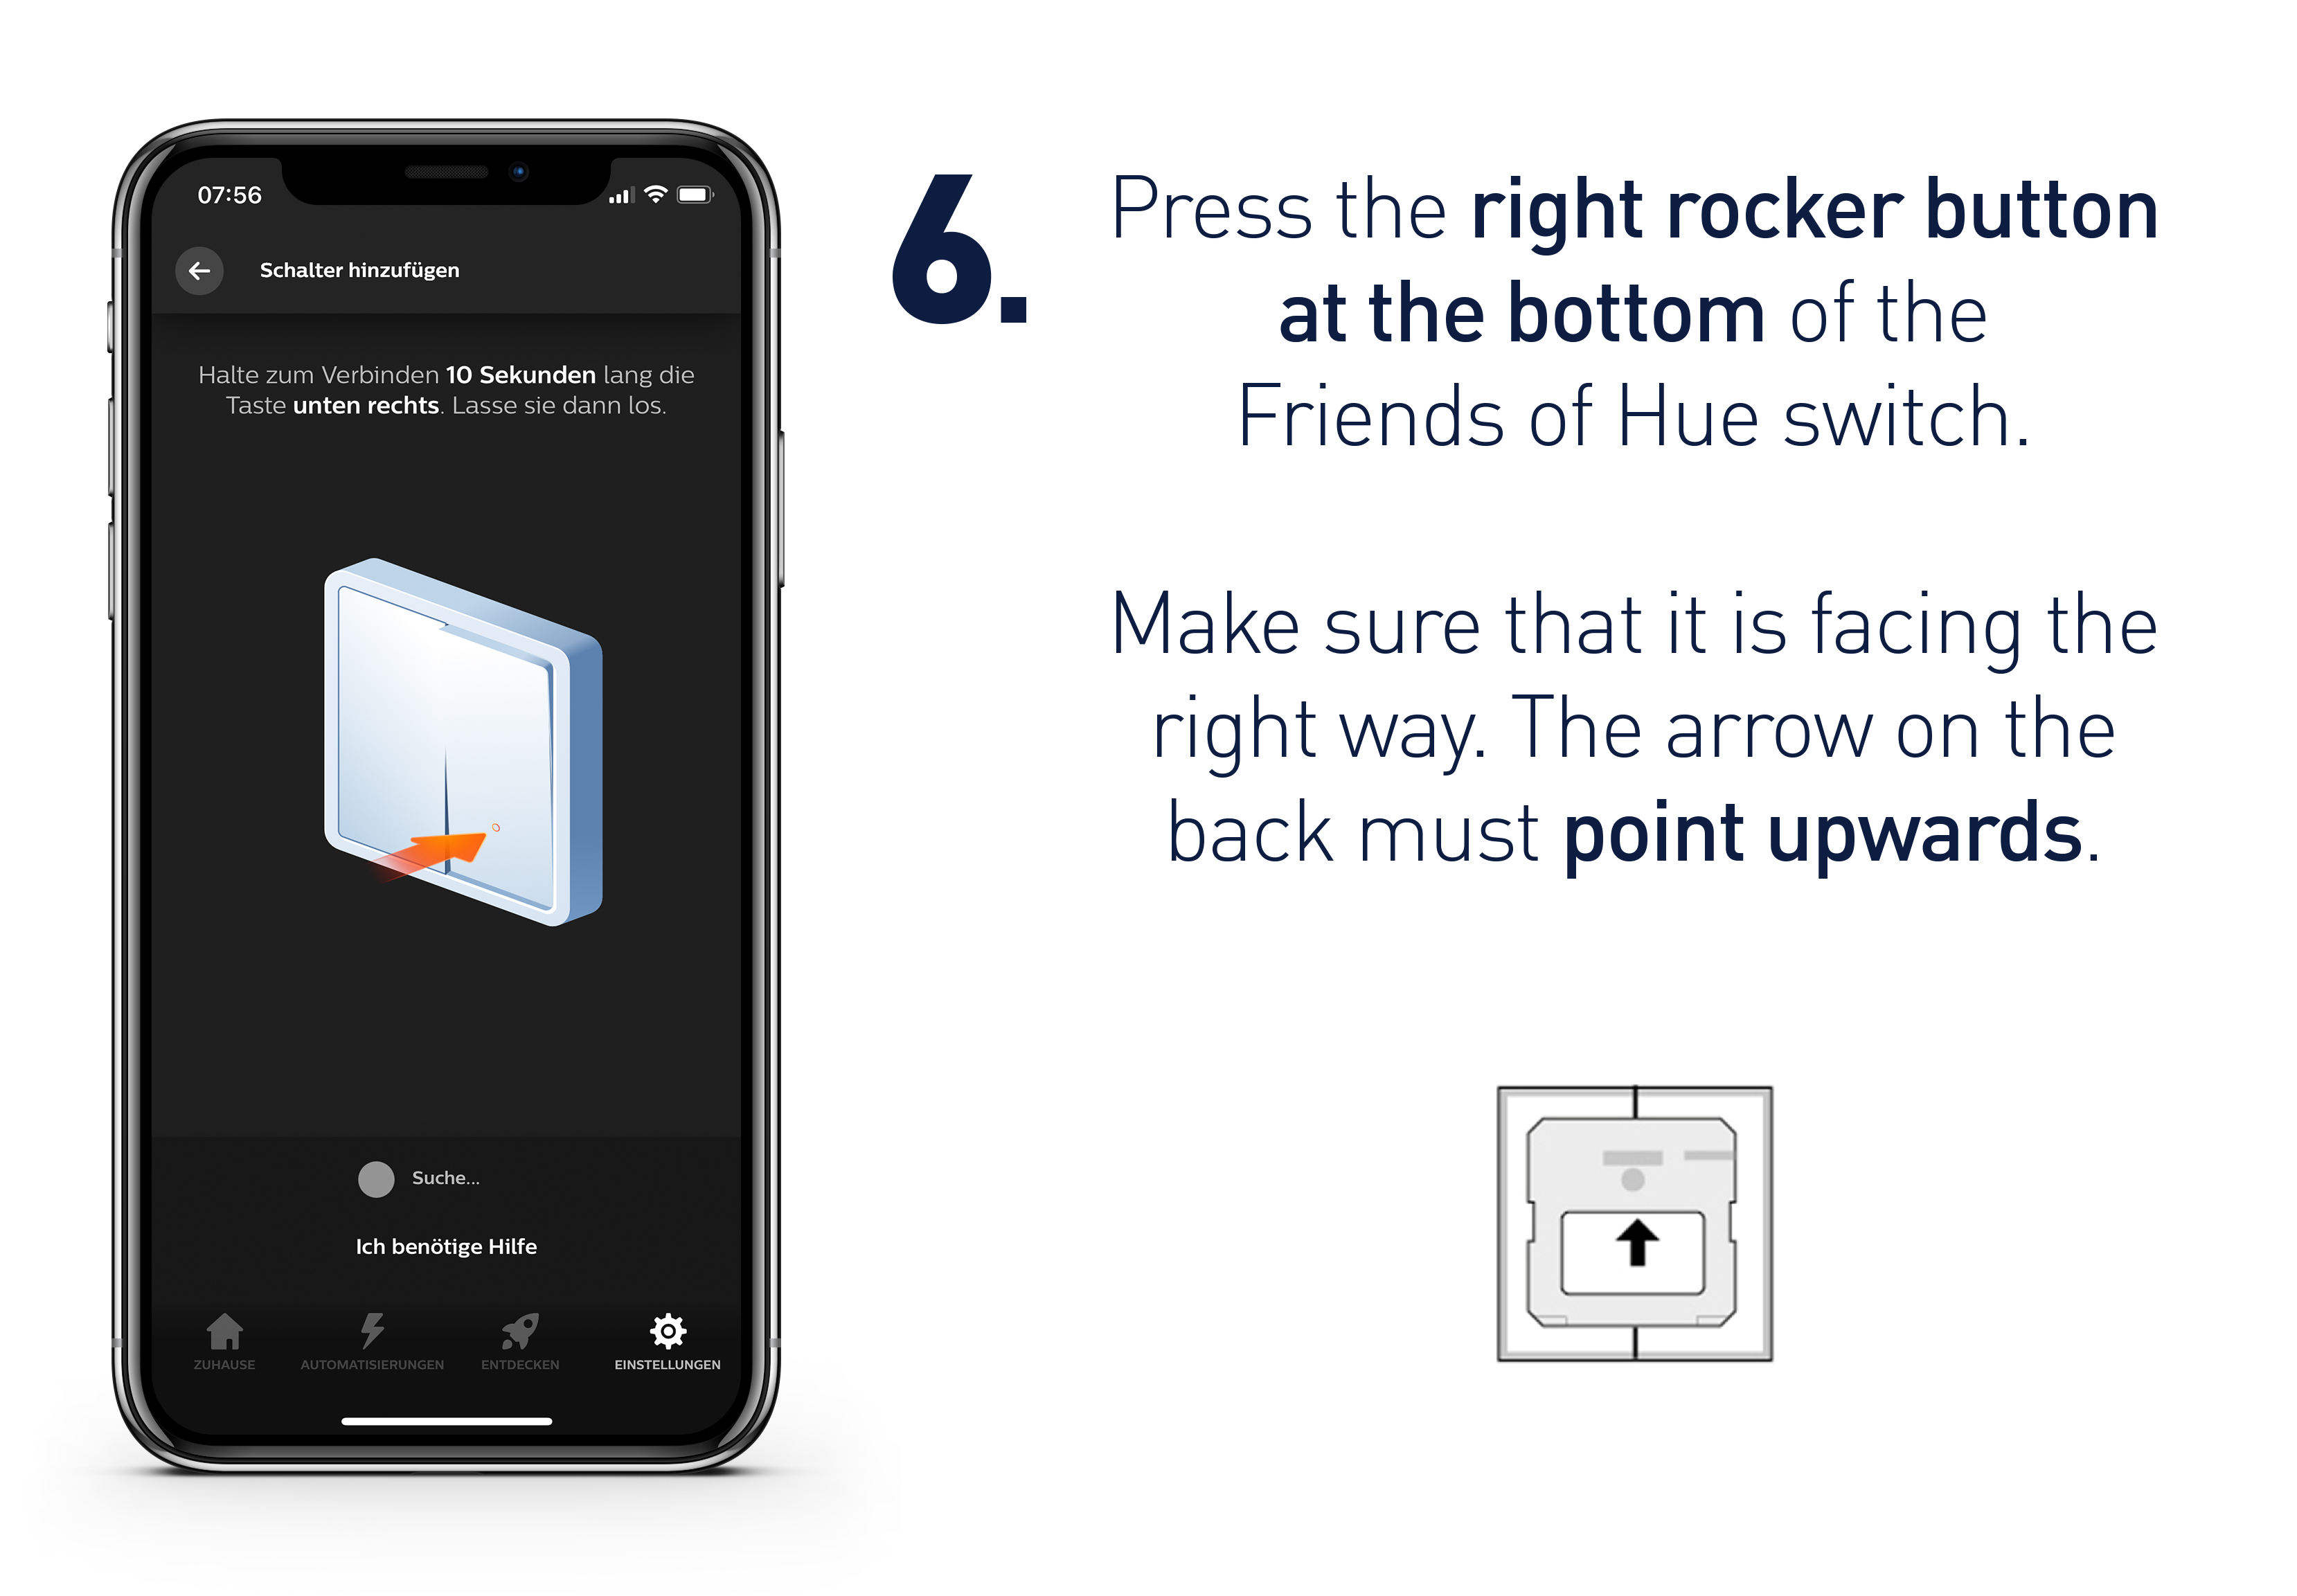
- Press the right rocker button at the bottom of the Friends od Hue switch. Make sure that it is facing the right way. The arrow on the back must point upwards.
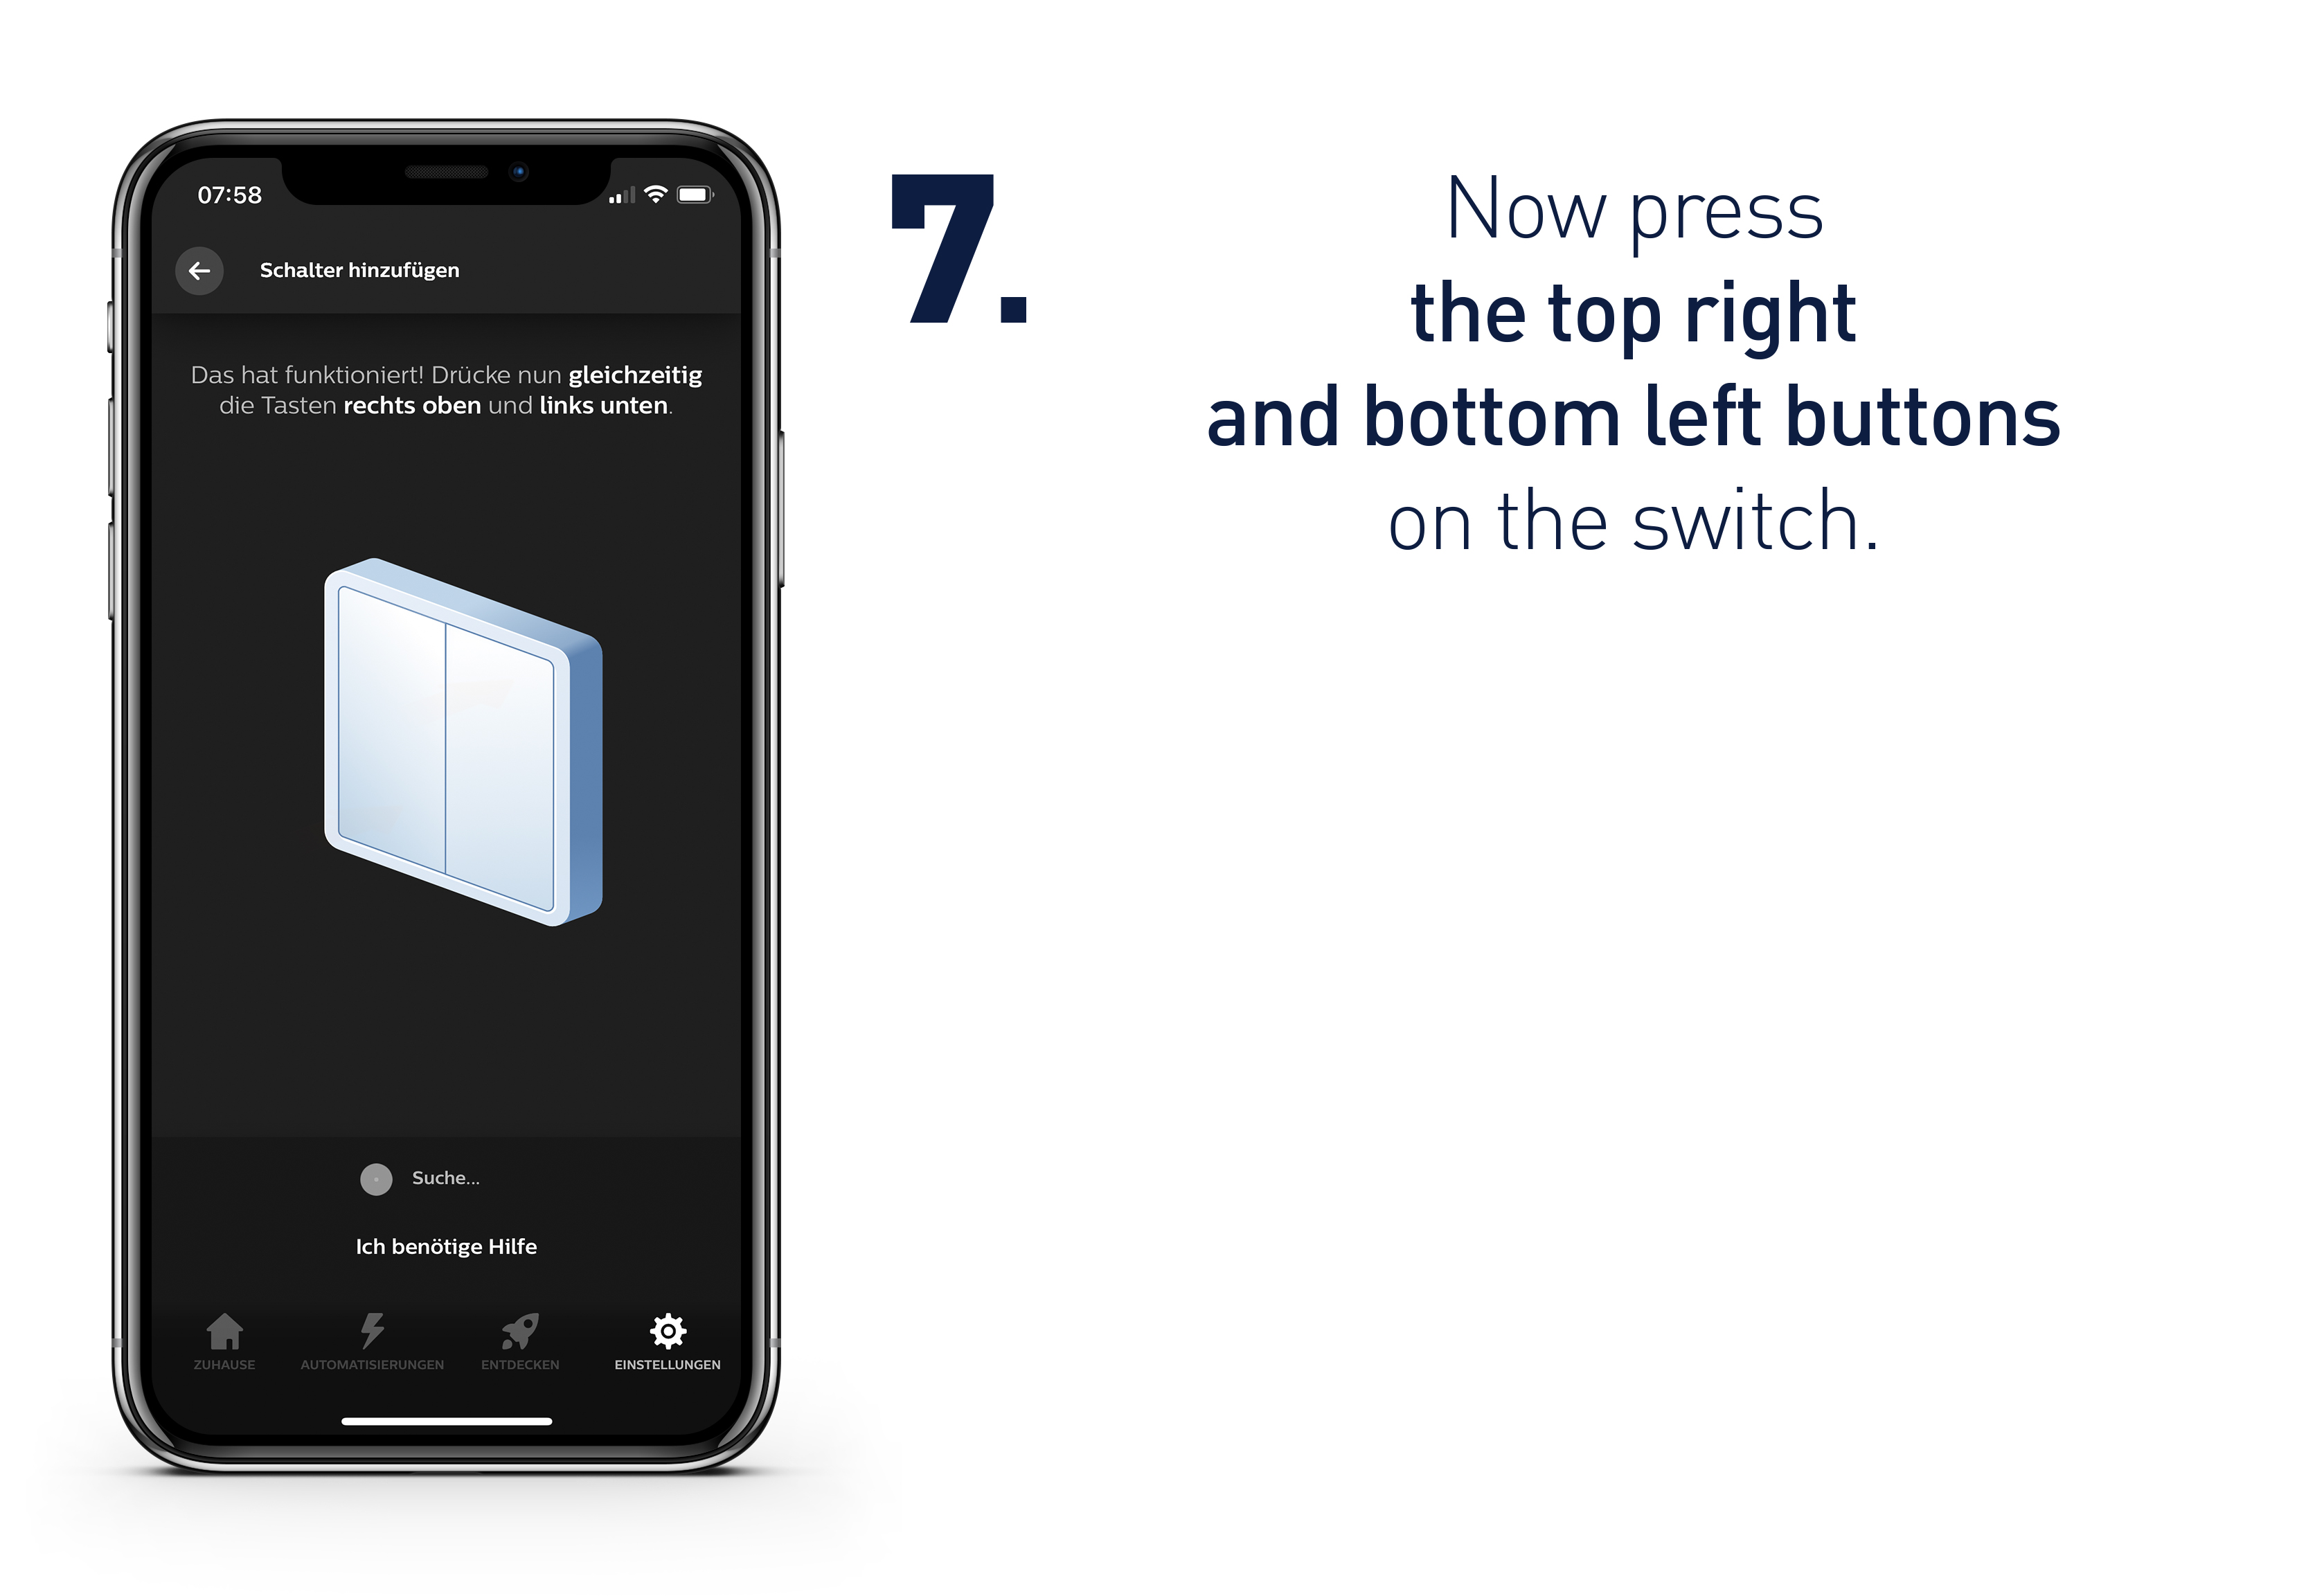
- Now press the top right and bottom left buttons on the switch.
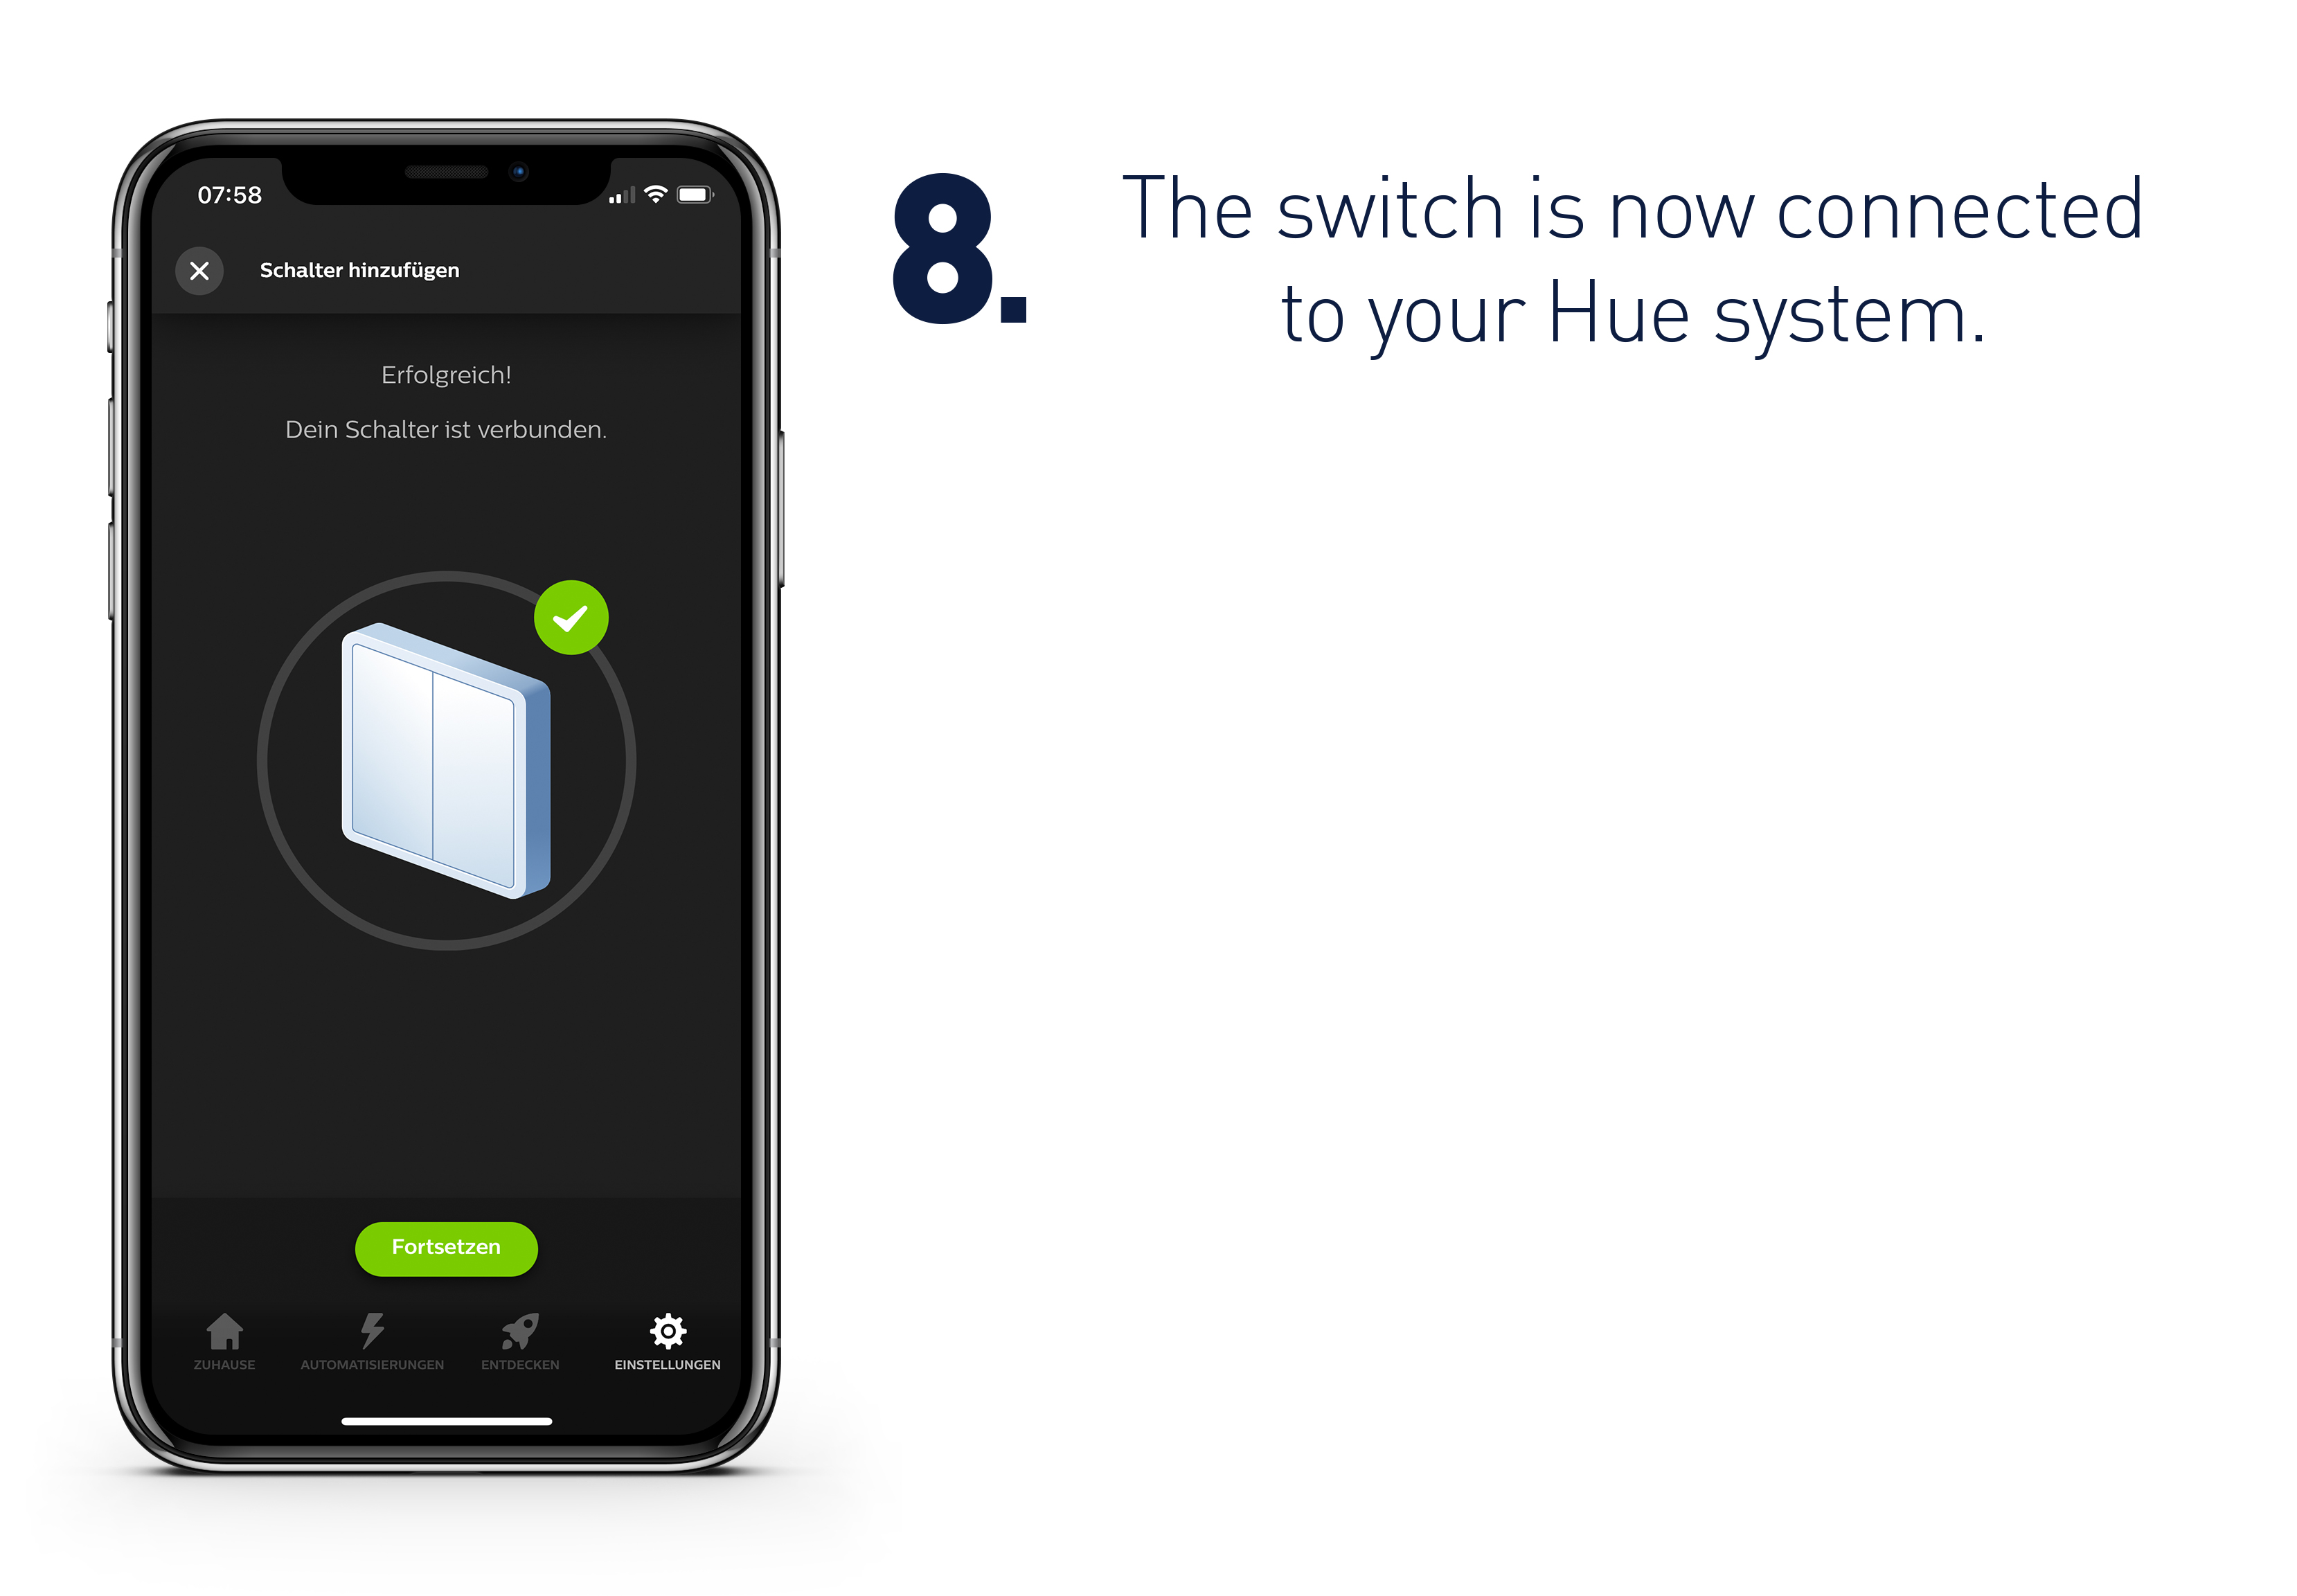
- The switch is now connected to your Hue system.
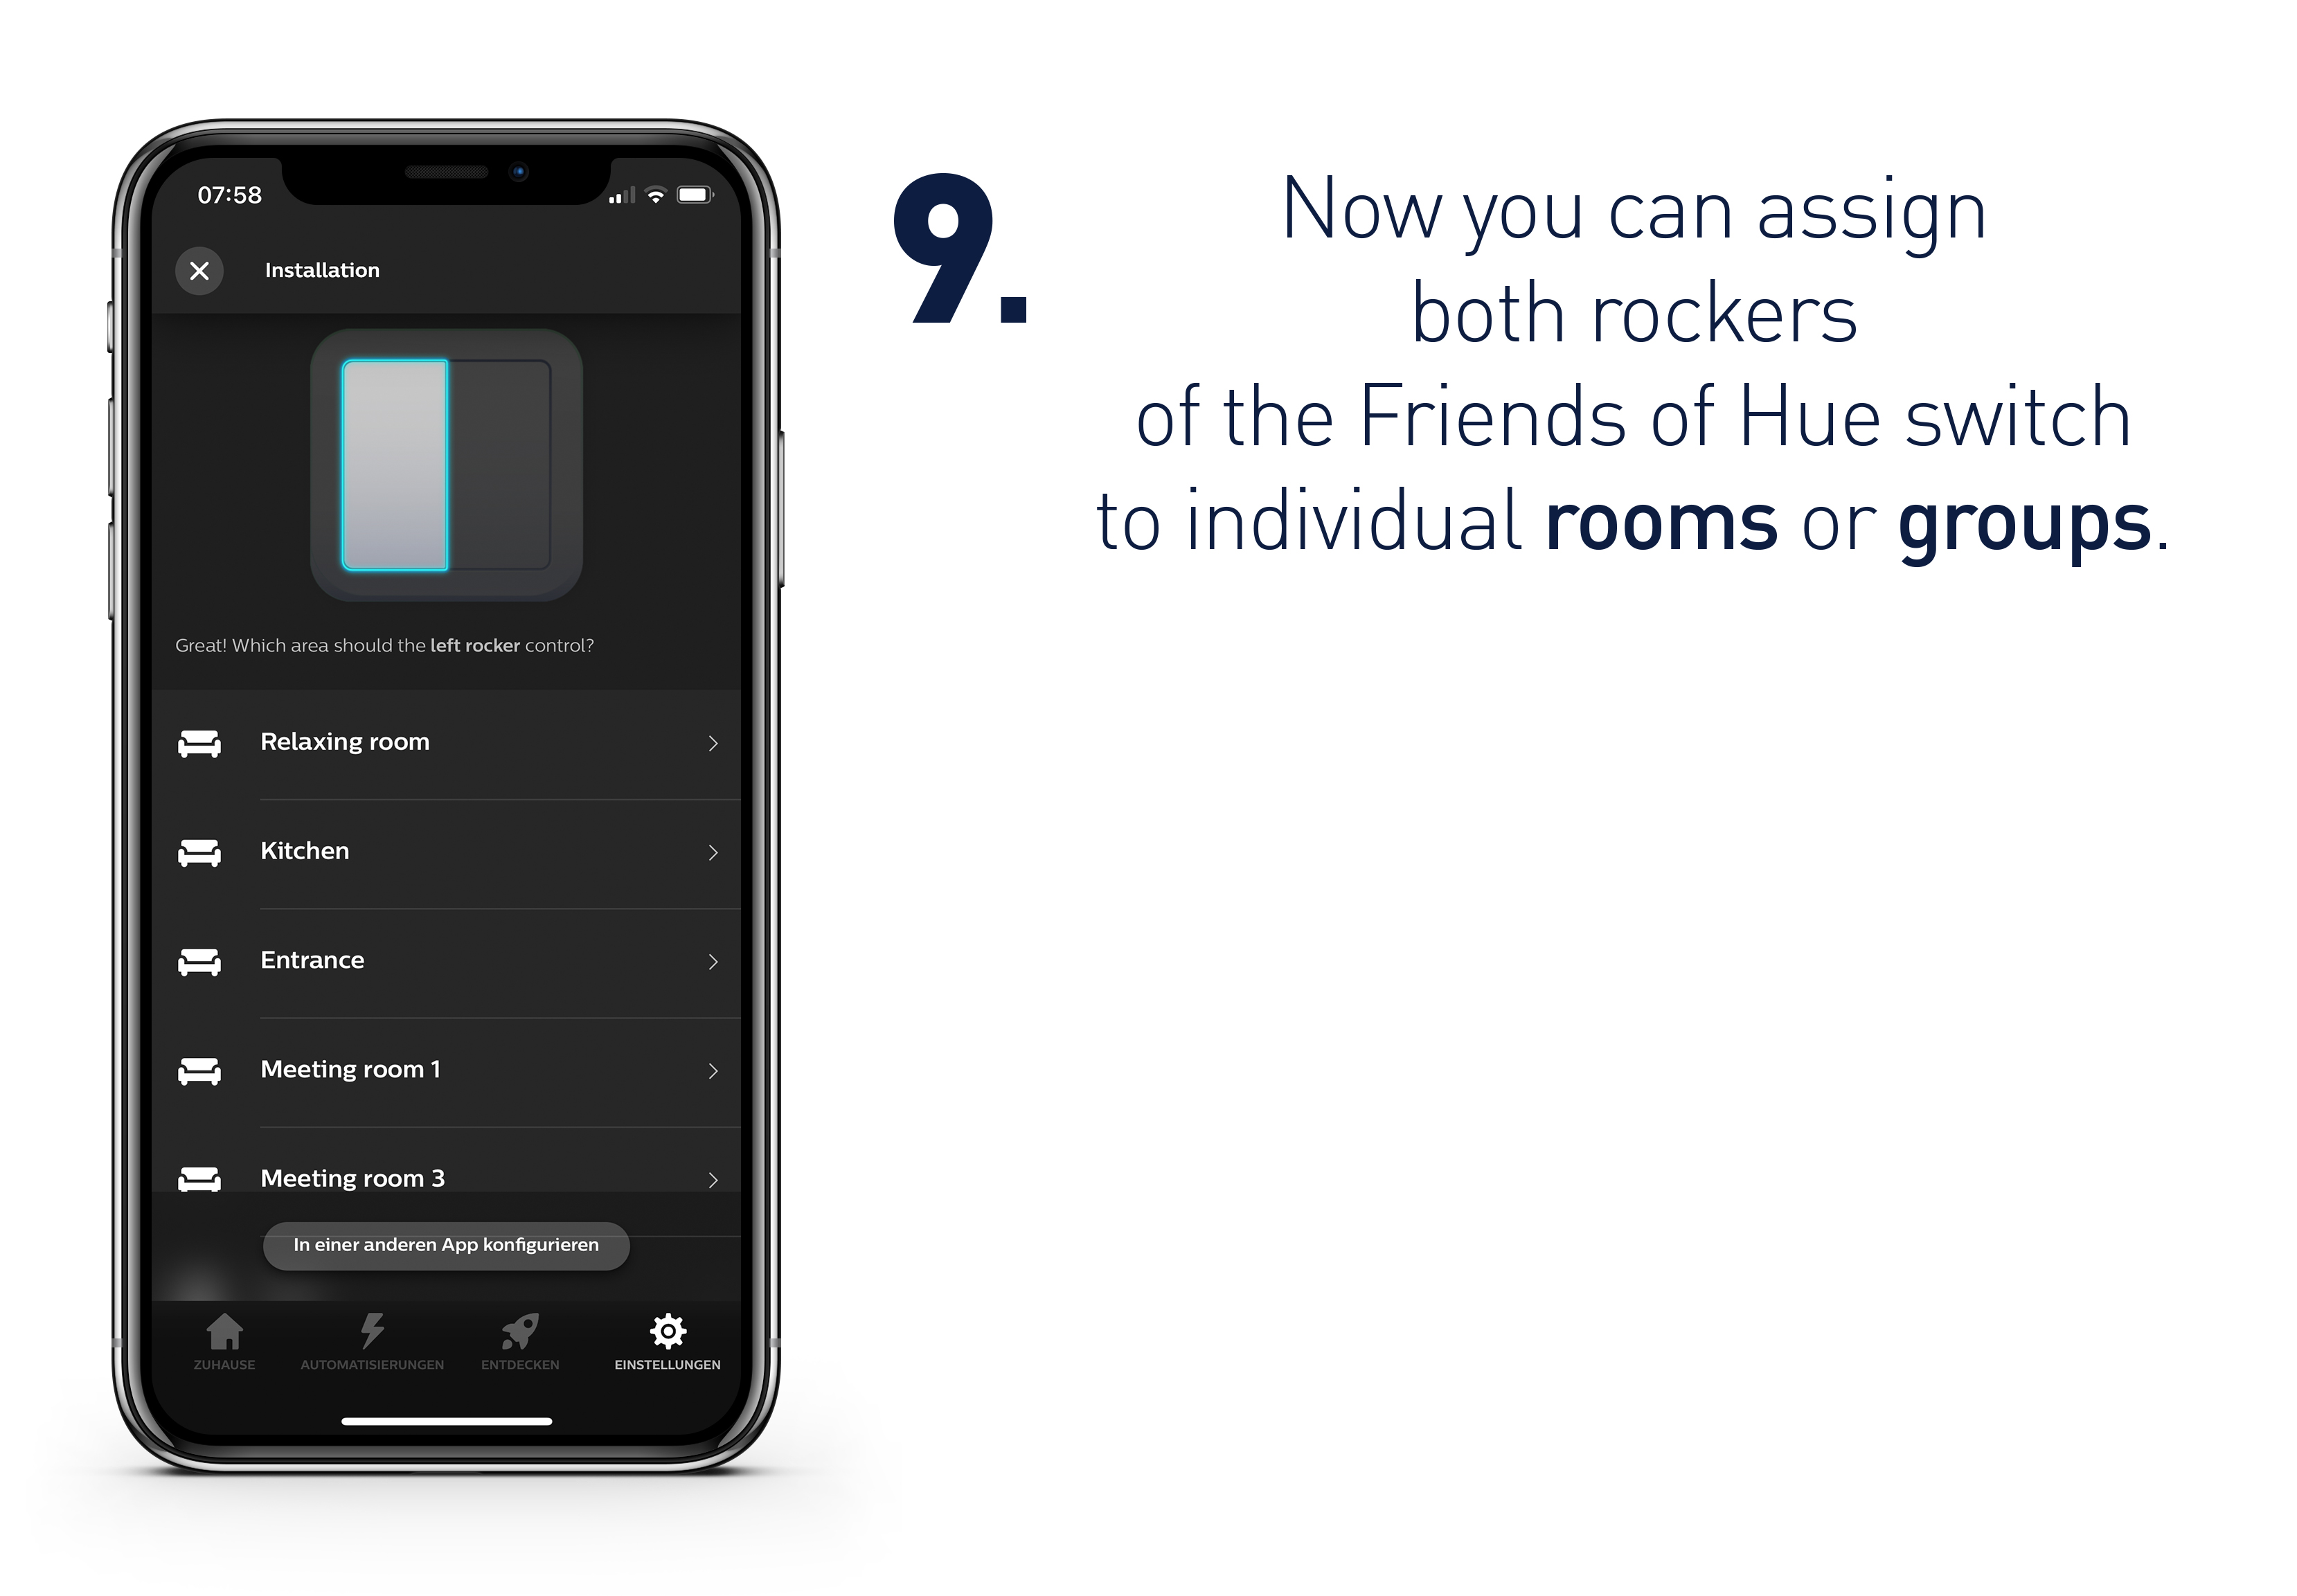
- Now you can assign both rockers of the Friends of Hue switch to individual rooms or groups.
- You can configure the four switching points of the Friends of Hue switch with functions.
